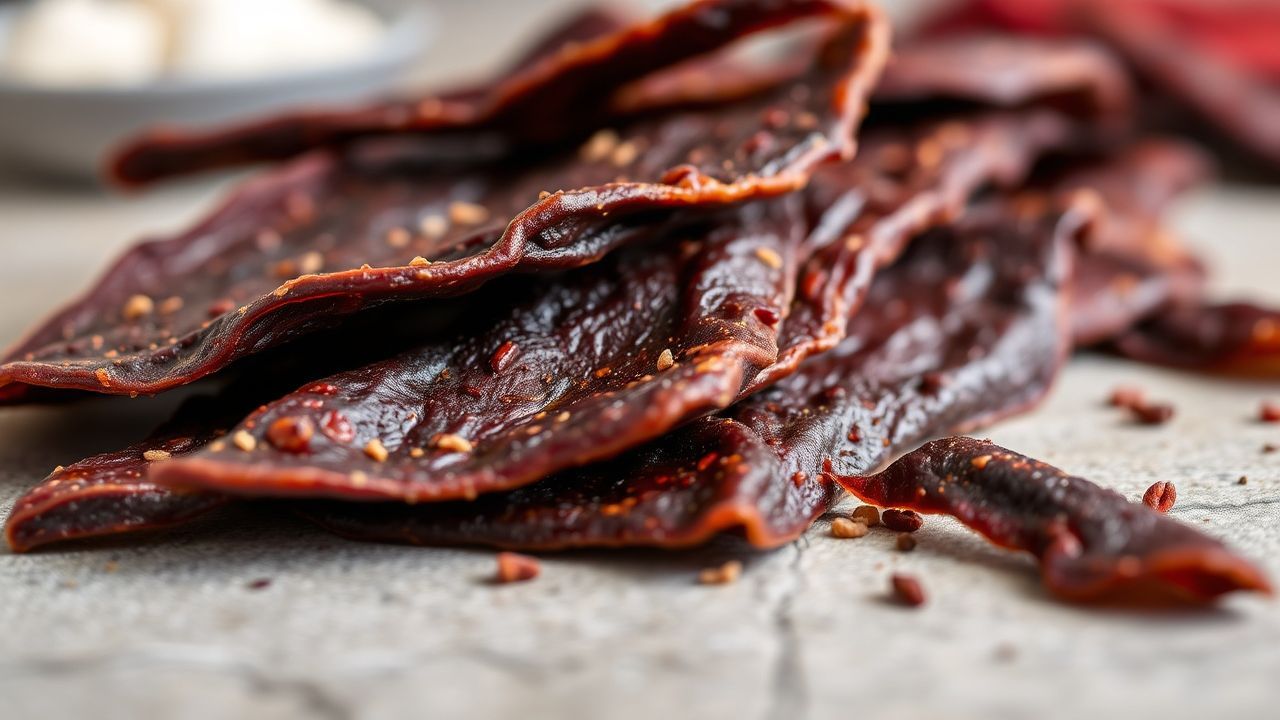

DIY Jerky lets you control flavor, sodium, and shelf life while delivering a concentrated protein snack. This guide gives clear, expert-tested steps for meat selection, marinade balance, drying technique, and safe storage so you get consistent results every batch.
- DIY Jerky: Prep and Cook Time
- DIY Jerky: Yield
- DIY Jerky: Difficulty Level
- DIY Jerky: Ingredients
- DIY Jerky: Instructions
- DIY Jerky: Drying methods and safety notes
- DIY Jerky: Tips for Success
- DIY Jerky: Food Safety and Storage
- DIY Jerky: Serving Suggestions
- DIY Jerky: Nutrition Snapshot
- DIY Jerky: Variations and Alternatives
- DIY Jerky: Q&A
- DIY Jerky: Future Practice and Tracking
- FAQ
- Lean meat and uniform slices speed drying and reduce spoilage.
- 12–24 hour marinades add deep flavor without over-salting.
- Use a thermometer to validate heat treatment and safety.
- Vacuum sealing or refrigeration extends freshness for weeks or months.
DIY Jerky: Prep and Cook Time
Plan active work in short blocks: 15–30 minutes for trimming and slicing, then 12–24 hours for marinating. Drying time varies from 4 to 8 hours depending on slice thickness and the drying method you choose.
Dehydrators give the most consistent airflow and temperature control. Read about the basics of food preservation for context on why even drying and low moisture reduce microbial risk.
DIY Jerky: Yield
Expect roughly 60–70% weight loss when you dry lean beef to jerky, so start with about 2–3 pounds raw to yield 8–12 ounces finished per pound. Yield varies with trimming, slice thickness, and marinade absorption.
When planning for trips or gifts, round up—moisture loss and trimming choices change the final amount. Track your raw-to-finished numbers for repeatable results.
DIY Jerky: Difficulty Level
The technique sits at an intermediate skill level. It requires precise trimming, uniform slicing, consistent marinating, and patient drying to reach the right texture.
Tools are simple: a sharp knife, calibrated thermometer, cutting board, and a dehydrator or low-heat oven. A slicer helps but is optional for small batches.
DIY Jerky: Ingredients
Start with a lean, tight-grain muscle—top round, eye of round, or flank—for predictable drying and texture. Trim all visible fat because fat reduces shelf life and can go rancid.
Balance a salt-forward base with sweet or acidic notes and aromatics. Keep salt and sugar within reasonable limits for food safety and personal dietary goals.
- 2 lb lean beef (top round, eye of round, or flank), trimmed and thinly sliced against the grain.
- 1/2 cup low-sodium soy
- 1/4 cup Worcestershire
- 2 tbsp brown sugar
- 1 tbsp smoked paprika
- 1 tsp garlic powder
- 1 tsp onion powder
- 1 tsp black pepper
- 1/2 tsp red pepper flakes (optional)
- 1 tbsp liquid smoke (optional)
- 1 tsp kosher salt
DIY Jerky: Instructions
Keep workflow linear: trim, chill, slice, marinate, drain, dry, cool, and store. Clean surfaces and utensils between stages to avoid cross-contamination.
Use a running checklist and a calibrated thermometer for critical checks. Consistency beats experimentation during the basic learning curve.
- Trim and chill: Remove visible fat and chill meat 30–45 minutes to firm it for thin slicing. Fat causes rancidity and uneven drying.
- Slice: Cut strips about 1/8–1/4 inch thick. Slice against the grain for tender bites or with the grain for chewier jerky.
- Make marinade: Whisk liquid and dry ingredients until sugar dissolves. Taste a small cooked scrap to adjust balance before marinating the full batch.
- Marinate: Combine meat and marinade in the refrigerator for 12–24 hours. Turn occasionally for even penetration.
- Drain and blot: Remove strips and pat dry with paper towels to remove surface moisture that slows dehydration.
- Arrange: Lay strips single-file on dehydrator trays or wire racks above a sheet pan in the oven. Keep space between pieces for airflow.
- Dry: Dehydrator: 4–8 hours. Oven: lowest stable setting, often around 160°F, for 4–6 hours. Flip once for even results.
- Check doneness: Jerky should bend and crack but not snap. If the center is soft, dry in 30–60 minute steps until uniform.
- Cool and store: Cool fully to room temperature before sealing. Refrigerate or vacuum-seal for longer storage.
Temperature and verification
If you want added safety, heat meat to an internal 160°F before or during drying to reduce pathogens. Use a probe thermometer and test the thickest pieces.
Validate your thermometer against boiling water or an ice bath periodically so readings remain accurate. Reliable readings prevent undercooking or over-drying.
[PARAMETERS FOR REFERENCE: Follow USDA guidelines where applicable and consult temperature charts in trusted preservation references such as dehydration (food processing).]
DIY Jerky: Drying methods and safety notes
Dehydrators provide controlled airflow and steadier temperatures, which minimizes uneven pockets of moisture. Ovens work but require monitoring and occasional venting for airflow control.
Drying removes moisture to inhibit microbial growth, which pairs conceptually with traditional preservation techniques covered under jerky history. Combine low moisture with refrigeration or vacuum sealing for longer life.
DIY Jerky: Tips for Success
Cut selection matters: Choose lean, tight-grain muscles that dry evenly and resist spoilage. Eye of round, top round, and flank are reliable choices.
Uniformity counts: Use a guide or slicer for consistent thickness; irregular pieces create quality variance and safety risk. Record thickness and drying times to build repeatable results.
DIY Jerky: Food Safety and Storage
Trim fat because fat reduces shelf life and promotes rancidity. Keep marinating meat cold and use clean containers to reduce bacterial growth.
Store finished jerky in vacuum-sealed bags or airtight jars. Refrigeration keeps quality for weeks; freezing in vacuum bags keeps it for months.
Label packages with dates and rotate stock. Portion single-serve bags for trips to avoid repeated exposure to air and humidity.
DIY Jerky: Serving Suggestions
Serve long strips on a protein-forward board with sharp cheese and crisp fruit. Cut bite-sized pieces into trail mixes for a chew and umami boost.
Use jerky as a salad topper, pasta garnish, or crushed into grain bowls. Pair with acidic notes like pickles or citrus to balance richness.
For related recipe ideas and storage gear, see our internal resources on the dehydrator guide and charcuterie tips on CookHarvest.
DIY Jerky: Nutrition Snapshot
Typical beef jerky concentrates protein. A 1 oz (28 g) serving often provides around 12 g protein and roughly 70 calories, depending on sugar and fat content.
Adjust sodium and sugars for dietary needs and read labels when comparing to store-bought options. For macronutrient fundamentals, review protein (nutrient) basics.
| Nutrient | Per 1 oz Serving (28g) |
|---|---|
| Calories | 70 |
| Protein | 12g |
| Carbohydrates | 3g |
| Fat | 1.5g |
DIY Jerky: Variations and Alternatives
Explore teriyaki, chipotle-lime, maple-smoked, or herb blends for different profiles. Swap brown sugar for honey or maple to change caramel notes and texture slightly.
Plant-based jerky uses marinated tofu, tempeh, or thick mushrooms and follows the same dehydration logic. For a broader view of meat as an ingredient consult meat.
DIY Jerky: Q&A
Q1: Why make DIY Jerky instead of buying it?
Homemade jerky gives ingredient control: less sugar, no unwanted preservatives, and tailored sodium. You can also tune texture and dry time for your preferences.
Small batches let you experiment with spices and record results for repeatable success on future batches.
Q2: What meats work best for DIY Jerky?
Lean beef cuts like top round, eye of round, and flank dry predictably because they have low fat and firm grain. Poultry breast and game meats like venison work when handled carefully.
Trim excess fat to extend shelf life and reduce rancidity. The leaner the cut, the better the long-term storage performance.
Q3: How do I know when DIY Jerky is done?
Proper jerky bends and cracks without snapping. A thick piece should not feel soft or wet inside when split.
If interior moisture remains, dry longer in short increments until the texture is uniform across strips.
Q4: How should I store DIY Jerky?
Store cooled jerky in vacuum-sealed bags or airtight jars in a cool, dry place. Refrigeration prolongs freshness to weeks; freezing preserves quality for months.
Label packages with dates and rotate stock. Portion into single-serve bags for trips to reduce repeated exposure to air.
DIY Jerky: Future Practice and Tracking
Treat each batch as a controlled experiment: change one variable at a time and record results. Variables to test include slice thickness, marinade time, sugar level, and drying duration.
Create a simple log with thickness, time, temperature, and flavor notes. That habit produces predictable improvements faster than guessing.
FAQ
How long does homemade jerky last?
Stored airtight in the fridge, jerky typically lasts several weeks. Vacuum-sealed and frozen jerky keeps for months with minimal quality loss.
Can I safely dehydrate poultry for jerky?
Yes, but you must be more cautious with poultry because of bacterial risk. Heat pieces to 165–170°F before or during drying and verify internal temps with a calibrated thermometer.
Is it necessary to use liquid smoke?
Liquid smoke is optional. It adds a smoky aroma without a smoker, but you can omit it for a cleaner spice-forward profile.
What equipment makes the biggest difference?
A reliable dehydrator with an adjustable thermostat and even airflow is the fastest path to consistent results. A sharp knife and a good thermometer are also must-haves.
Where can I learn more about preservation science?
Check references on food preservation and dehydration for technical detail. Read about food preservation and dehydration (food processing) for scientific principles that apply to jerky making.
See also: DIY Jerky
Recommended Reading:
- Crafting Homemade Chicken Jerky: A Step-by-Step Guide
- Mushroom Magic: Crafting Delicious Vegan Jerky at Home
- Crafting Bresaola: The Art of Air-Dried Beef Mastery