
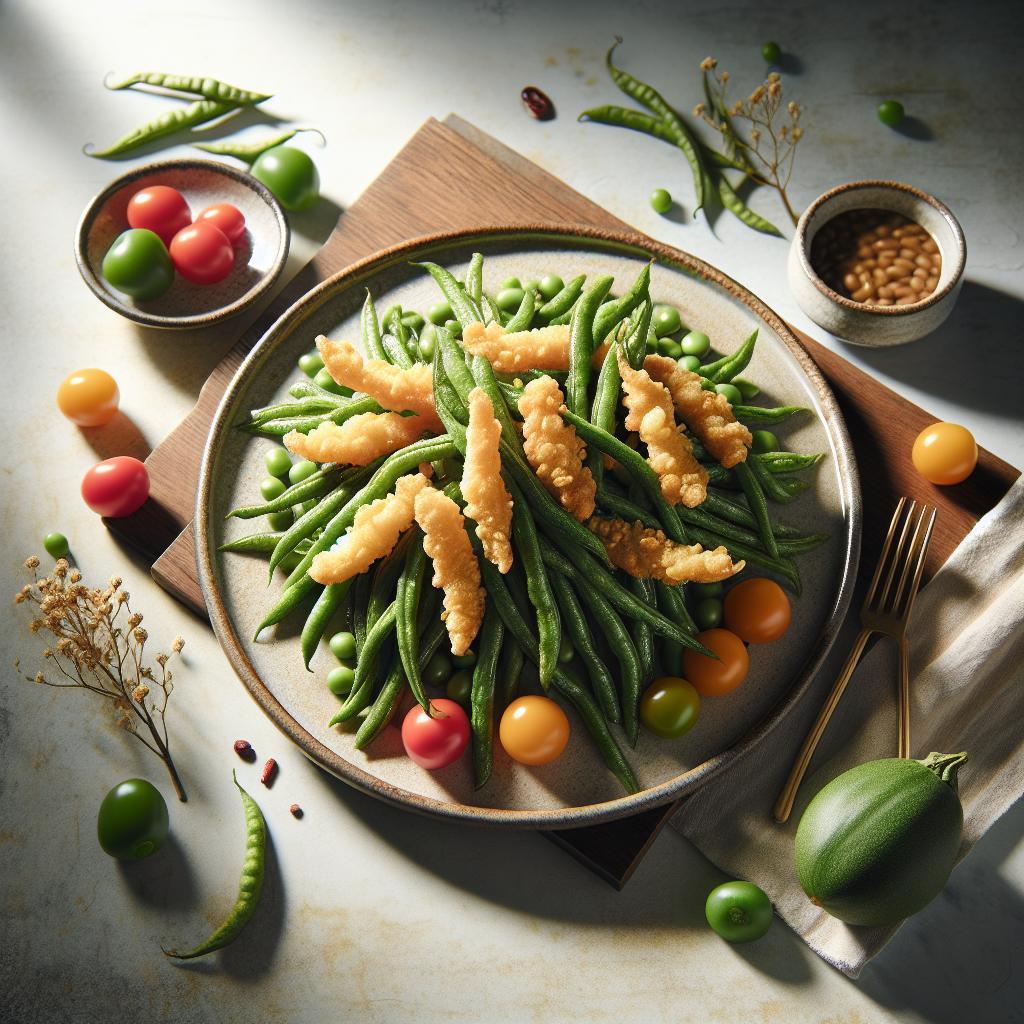
There is a simple pleasure in hearing fresh green beans hit hot oil and emerge with a golden, shattering crust. When you combine the snap of the vegetable with a well-calibrated batter or breadcrumb layer, the result becomes a repeatable, crowd-pleasing snack or appetizer.
- Quick crunch: Proper oil temperature locks moisture out and creates a crisp shell.
- Light batter: Cold liquid and measured aeration give a thin, airy crust.
- Finish smart: Rest on a wire rack and season hot for best texture and flavor.
Overview and key concepts
Fried green beans rely on three technical factors: bean selection, coating adhesion, and oil temperature control. Each affects texture, color, and oil uptake.
Understanding simple science—surface moisture, batter viscosity, and heat transfer—lets you repeat great results. For background on the vegetable itself, see green bean.
Prep and Cook Time
Preparation: 15 minutes. Trim, dry, and (optional) blanch the beans to even internal cook. Proper prep reduces steam under the coating and prevents sogginess.
Cooking: 10 minutes active fry time, depending on batch size and fryer efficiency. Resting between batches keeps oil temperature steady and avoids overloading the pan.
Yield and difficulty
Serves 4 as an appetizer or side. This recipe scales; increase oil and fry in controlled batches to maintain temperature. Use a heavy-bottomed pot or dedicated fryer for stable heat.
Difficulty: Easy to intermediate. Basic frying skills suffice, but mastering oil temperature, batter thickness, and dredge technique elevates the final result.
Ingredients
Use fresh, slender green beans. Stout or woody beans will resist tenderization and will not deliver the ideal inside-to-outside contrast when fried. Trim and dry thoroughly before battering.
Essential components include all-purpose flour (or_substitutes), aeration agent, seasonings, a cold liquid for batter, and an outer dry layer like panko for extra crunch. See panko for why its structure yields superior crunch.
- 500 g fresh green beans, trimmed and dried
- 1 cup all-purpose flour, sifted (or 1:1 rice flour for gluten-free)
- 1 teaspoon baking powder (for lightness)
- 1 teaspoon smoked paprika, 1/2 tsp garlic powder, 1/2 tsp salt
- 1/4 teaspoon black pepper, freshly ground
- 1 cup cold sparkling water or very cold beer (for batter aeration)
- 1 cup panko breadcrumbs or crushed crackers
- Vegetable or canola oil for frying (high smoke point)
Instructions
1) Prepare the beans: Trim ends, remove blemishes, and pat completely dry. If you choose to blanch, plunge beans into boiling water for 30–45 seconds, then shock in ice water; this sets color and slightly shortens fry time.
2) Make the batter: Whisk flour, baking powder, and seasonings. Add cold sparkling water gradually until the mixture reaches a loose, ribboning consistency slightly thicker than heavy cream. Cold liquid reduces gluten development and improves crispness.
3) Coat sequence: Work one bean at a time. First dip into batter, letting excess drip, then roll in panko. Use light pressure to avoid compressing the crumbs. A single-layer crumb gives better fracturing and less oil absorption than a dense coating.
4) Heat and frying: Use a deep, heavy pot and heat oil to 350–375°F (175–190°C). Maintain that range; too low, and the coating soaks oil, too high and the exterior burns before the center cooks. For a concise primer on fried cooking behavior, refer to deep frying.
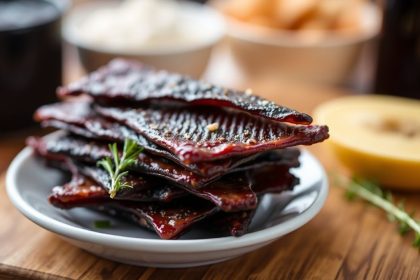
5) Frying technique: Fry in small batches to avoid temperature drop. Fry 2–3 minutes per batch until golden. Remove with a spider or slotted spoon and drain on a wire rack—not paper towels—to preserve airflow and crispness.
6) Finish: Season immediately with flaky salt and a light herb garnish. Serve hot; reheating in an oven or air fryer restores crispness much better than a microwave.
Heat control and equipment
Use a digital thermometer and monitor oil temp between batches. A stable 350–375°F range gives a robust crust and safe internal doneness. Avoid overfilling the pot to reduce boil-over risk.
A 3–4 quart heavy-bottomed pot works for home cooks; consider a basket fryer for larger yields. A wire cooling rack over a sheet pan collects oil without trapping steam beneath the beans.
Tips for Success: Perfecting Your Crispy Delight
Bean selection matters. Choose medium, relatively straight pods: they crisp evenly and fit well in most fryers. Thicker pods need longer fry time and risk a mismatch between crust color and internal tenderness.
Batter coldness increases snap. Keep batter chilled until use; refrigerate for 10–15 minutes if needed. Cold batter creates better microstructure as it hits hot oil, producing an aerated, brittle shell.
Breading choices and variation
Panko delivers an open, jagged crumb that fractures cleanly on the bite. For a lighter finish, try a tempura-style batter; for more body, mix fine breadcrumbs with grated hard cheese for extra flavor and crunch.
For gluten-free, use rice flour or a chickpea-flour batter. For vegan adaptations, ensure no dairy in crumbs and select plant-based liquids like carbonated water or non-dairy beer.
Control oil uptake by keeping fry time short and temperature stable. If the batter turns dark quickly, lower the temp; if the coating is pale and oily, raise the temp slightly or shorten the fry time.
Serving Suggestions and Complementary Dips
Pair fried green beans with bright, acidic dips to cut richness. Try a lemon-garlic yogurt dip, a sriracha-mayo for spice, or a honey-mustard for sweet-tang balance. Each contrast elevates the perceived crispness and flavor complexity.
Garnish with fresh herbs, a light zest of lemon, or toasted sesame seeds. Presentation on a wire rack over a wooden board highlights the crisp texture and keeps the beans from sitting in oil.
Pairing and menu roles
Serve these as a shareable appetizer, a vegetable-forward side, or a bar snack. They complement fried proteins and grilled mains, and they sit well alongside cold salads to provide a hot-cold contrast.
For ideas on complementary fried vegetables and how to use an air fryer for reheating, see the internal resources: Crispy Zucchini Fries and Air Fryer Reheating Guide.
Nutritional snapshot and swaps
A typical serving runs around 180–220 kcal depending on batter thickness and oil absorption. Using lighter batters and an air-fryer finish reduces calories and oil content while retaining crunch.
For lower-fat versions, use a tempura-style batter and shallow-fry then finish under a high-heat broiler to crisp. Alternatively, fully air-frying yields a different but still enjoyable texture for health-conscious diners.
FAQ
How do I keep the beans crisp after frying?
Drain on a wire rack and season while hot; the airflow prevents trapped steam and sogginess. If you must hold them, keep in a single layer on a warm rack in a low oven (200°F/95°C) for short holding periods.
Can I use a different coating than panko?
Yes. Tempura batter yields a very light, delicate shell; seasoned flour or fine breadcrumbs give a denser crust. Match the coating to your target texture and flavor profile.
Is blanching necessary?
Blanching is optional but useful for thick beans or when you want a bright green interior with reduced fry time. Quick blanch and ice shock maintain color and create a consistent bite.
How do I reheat without losing crunch?
Reheat in an oven at 375°F (190°C) for 6–8 minutes or in an air fryer for a few minutes. Avoid microwaves; they cause steam and immediate sogginess.
What oils are best for frying?
Choose oils with high smoke points like refined peanut, canola, or sunflower oil to maintain a consistent frying temperature and neutral flavor. Change oil when it darkens or develops off-odors to preserve flavor quality.
With focused preparation, predictable batter behavior, and strict heat control, fried green beans become a reliable, craveable plate. Practice small batches, tune seasoning, and you will reproducibly hit that golden, snapping result that defines a great fried vegetable snack.

See also: Fried Beans


