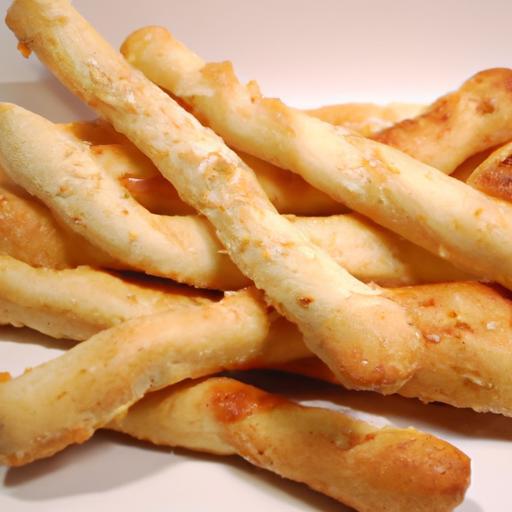
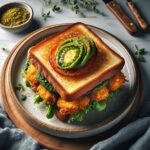
There’s something undeniably magical about the perfect breadstick-a golden, toasty exterior that crackles with every bite, giving way to a soft, pillowy center that melts effortlessly on the tongue. Whether paired with a hearty marinara, a savory cheese dip, or simply enjoyed on their own, breadsticks have long held a beloved spot at the table. But why settle for store-bought or frozen when you can master the art of homemade breadsticks that marry crunch and softness in every twist and turn? In this ultimate recipe, we’ll guide you through crafting breadsticks that boast an irresistible crust and a tender heart, turning your kitchen into a haven of warm, freshly baked goodness. Get ready to elevate snack time, family dinners, and gatherings with a batch of breadsticks that are truly a cut above the rest.
Crunchy & Soft: The Ultimate Homemade Breadsticks Recipe begins with an understanding that the perfect breadstick is a delightful dance of textures-an irresistible crispy exterior guarding a tender, fluffy interior. Achieving this balance requires thoughtful ingredient choices and precise techniques that transform humble dough into a golden, crunchy masterpiece. Whether you’re impressing guests or elevating a family meal, mastering this recipe will become your go-to for crave-worthy breadsticks that pair beautifully with any dish.
Prep and Cook Time
Preparation: 20 minutes
Rising: 1 hour 15 minutes
Baking: 15 minutes
Total Time: 1 hour 50 minutes
Yield
Makes 20 perfectly textured breadsticks, serving 4 to 6 people
Difficulty Level
Medium – approachable for confident beginners and intermediate bakers
Ingredients
- 2 ¼ teaspoons active dry yeast (1 packet)
- 1 ½ cups warm water (110°F/43°C)
- 3 ½ cups all-purpose flour, sifted for airy dough
- 1 cup bread flour for extra chew and structure
- 2 tablespoons granulated sugar to feed the yeast and add subtle sweetness
- 1 tablespoon fine sea salt
- 3 tablespoons extra virgin olive oil, plus more for brushing
- 1 teaspoon garlic powder (optional, for flavor boost)
- Coarse sea salt for sprinkling
- Fresh rosemary or dried Italian herbs (optional garnish)
Instructions
- Activate the Yeast: In a large mixing bowl, whisk the warm water with the sugar and sprinkle the active dry yeast over the surface. Allow to bloom for 5-10 minutes until foamy, signaling active yeast.
- Combine Flours and Salt: In another bowl, mix the sifted all-purpose flour, bread flour, and sea salt. Gradually add this to the yeast mixture, stirring gently to form a shaggy dough.
- Knead to Perfection: Turn dough onto a floured surface and knead for 8-10 minutes until smooth and elastic. The blend of flours ensures the ideal texture-bread flour for crunch and all-purpose for softness.
- First Rise: Lightly oil a clean bowl with olive oil, place the dough inside, cover with a damp cloth, and let rise in a warm place for about 1 hour or until doubled in size.
- Shape Breadsticks: Gently deflate the dough and divide into 20 equal portions. Roll each piece into thin sticks about 6 inches long, maintaining an even thickness to guarantee uniform baking.
- Second Rest: Arrange the breadsticks on a parchment-lined baking tray, leaving space between each. Lightly brush with olive oil and sprinkle with garlic powder and coarse sea salt. Cover loosely and allow to rest for 15 minutes for a puffier interior.
- Bake to Golden Crunch: Preheat the oven to 400°F (200°C). Bake the breadsticks for 12-15 minutes until lightly golden and crunchy on the outside; watch closely to prevent over-browning.
- Final Touch: Brush warm breadsticks with a little extra olive oil and garnish with fresh rosemary or Italian herbs for an aromatic finish.
Tips for Success
- Flour Blend Insight: Using a mix of all-purpose and bread flour strikes the perfect balance – bread flour lends crispy crusts while all-purpose keeps the crumb soft.
- Water Temperature: Keep it between 105°F and 115°F to activate yeast without killing it.
- Even Thickness: Rolling each breadstick evenly ensures consistent texture and prevents soggy spots.
- Make Ahead: Shape breadsticks and freeze them on a baking sheet. Once frozen, transfer to a resealable bag; bake directly from frozen, adding 3-4 minutes to baking time.
- Flavor Twists: Experiment with parmesan sprinkle or chili flakes for different flavor profiles.
Serving Suggestions
Serve these homemade breadsticks warm alongside hearty soups, fresh salads, or as a companion to dipping sauces like creamy pesto, marinara, or garlic-infused olive oil. For a visually appealing presentation, place them upright in a rustic basket lined with a linen cloth, adorned with sprigs of fresh herbs or a small bowl of sea salt for dipping. They also pair stunningly with a charcuterie board, adding both crunch and comfort to your gathering.

Nutritional Information
| Per Breadstick | Calories | Protein | Carbs | Fat |
|---|---|---|---|---|
| 1 Breadstick (~30g) | 90 kcal | 3 g | 15 g | 2 g |
For a deeper dive into the science behind perfect bread baking, visit the King Arthur Baking Bread Science Guide. Also, explore our detailed Fluffy Soft Artisan Breads recipe for more expert tips on texture mastery.
Q&A
Q&A: Crunchy & Soft – The Ultimate Homemade Breadsticks Recipe
Q1: What makes these breadsticks both crunchy and soft at the same time?
A1: The secret lies in the baking technique and dough composition. A high-gluten flour ensures a tender inside, while a quick, high-heat bake crisps up the outside crust. Brushing the dough with olive oil before baking locks in moisture, giving you that perfect contrast of textures-crunchy on the outside, soft and pillowy on the inside.
Q2: Can I customize the flavor of the breadsticks?
A2: Absolutely! The dough acts like a blank canvas. Mix in herbs like rosemary, garlic powder, or Parmesan cheese right into the dough for a savory twist. Alternatively, sprinkle sea salt or everything bagel seasoning on top before baking to create layers of flavor.
Q3: How long do these breadsticks keep fresh?
A3: Freshly baked breadsticks are best enjoyed within 24 hours for optimal texture and flavor. However, if you want to store them, keep them in an airtight container at room temperature for up to 3 days. To refresh the crunchiness, pop them in a warm oven for a few minutes before serving.
Q4: Is this recipe beginner-friendly?
A4: Definitely! This recipe uses basic ingredients and simple steps that don’t require advanced baking skills. It’s perfect for first-timers wanting to impress family or friends with homemade goodies without the fuss.
Q5: What dipping sauces pair well with these breadsticks?
A5: The possibilities are endless-from classic marinara and garlic butter to creamy ranch or tangy pesto. The mild yet flavorful breadsticks create a tasty vehicle for your favorite dips, making every bite a delightful experience.
Q6: Can I make these breadsticks gluten-free?
A6: You can! Swap the all-purpose flour for a trusted gluten-free blend designed for baking. Just note that gluten-free doughs can behave differently, so you might need to adjust hydration levels and baking time. Adding xanthan gum helps mimic that chewy texture you expect.
Q7: How do I prevent the breadsticks from becoming too dry?
A7: The key is not to overbake. Keep a close eye during the last few minutes in the oven and remove once they’re golden brown and just crisp on the exterior. Brushing them with olive oil immediately after baking also seals in moisture for a luscious bite.
Q8: Any tips for shaping the breadsticks beautifully?
A8: Use even pressure when rolling out the dough into ropes, and try to keep them uniform in size to bake evenly. For a fun twist, braid two or three thin ropes together or twist each stick gently before baking for a rustic, artisanal look.
Enjoy crafting these irresistible breadsticks that bring the best of both worlds-crunchy edge meets soft heart-in every bite!
Final Thoughts
As the warm aroma of freshly baked breadsticks fills your kitchen, you realize that mastering the perfect balance of crunchy and soft is no longer just a dream-it’s a delicious reality. With this ultimate homemade breadsticks recipe in your culinary arsenal, you can transform simple ingredients into irresistible snacks that satisfy every craving. Whether enjoyed as a cozy side, dipped in your favorite sauce, or savored on their own, these breadsticks promise a symphony of textures that dance on your palate. So roll up your sleeves, bake with love, and share the joy of truly exceptional breadsticks-because the best bites are always homemade.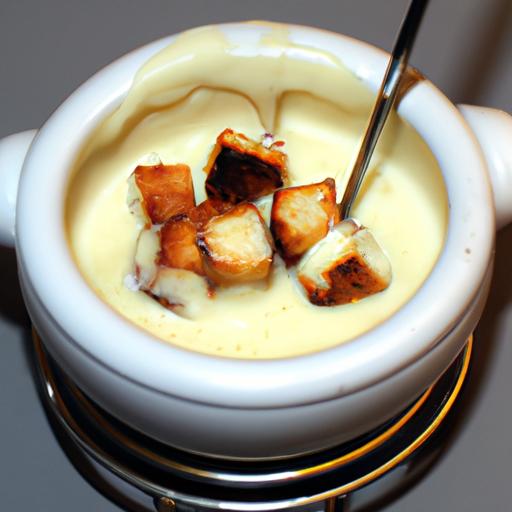

