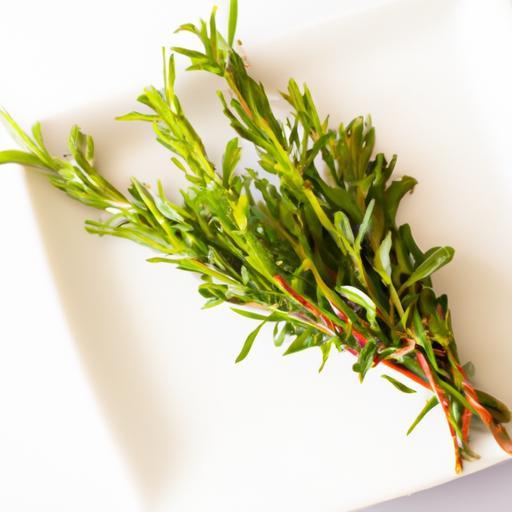
There’s a special kind of satisfaction in harvesting fresh herbs from your garden, envisioning the aromatic wonders that will soon enhance your meals, teas, and remedies. But then-weeks pass, and those vibrant little leaves? Still stubbornly damp, limp, and far from the fragrant, crisp bundles you dreamed of. Why is the drying process dragging on like a slow-moving season, and what can you do to speed things up without sacrificing quality? Welcome to the curious conundrum of herb drying delays. In this article, we’ll uncover the sneaky reasons why your herbs take forever to dry and share practical, easy-to-implement fixes that will have you preserving that garden goodness faster than you ever thought possible.
Understanding the Science and Solutions Behind Herb Drying Delays
Why Your Herbs Are Taking Forever to Dry can be frustrating-but unlocking the science behind this process transforms it into a gratifying craft. Drying herbs properly preserves their vibrant flavors and aromas, essential for elevating your culinary creations. Let’s dive into the common environmental factors that slow down herb drying, explore innovative techniques to speed it up, and discover how the right tools and spaces make all the difference.
Prep and Cook Time
- Preparation: 5 minutes
- Drying Time: 7-14 days (varies by method and conditions)
Yield
- Approximately ¼ cup dried herbs from 1 cup fresh herbs
Difficulty Level
- Easy to Medium
Ingredients
- 1 cup fresh herbs (e.g., basil, thyme, rosemary), rinsed and patted dry
- Optional: cotton string or paper bags for bundling
Instructions
- Assess Environmental Conditions. Ideal drying requires warm, dry air with good ventilation and low humidity. Herbal drying delays often occur in damp or poorly ventilated areas, so select a spot accordingly.
- Prepare Herbs. Trim the herbs, removing any damaged leaves. Gently wash and thoroughly pat them dry-excess moisture prolongs drying times.
- Bundle the Herbs. Tie small, loose bundles with cotton string to allow airflow between stems. Avoid thick bunches that trap moisture.
- Choose Your Drying Spot. Hang bundles upside down in an airy, dark room-ideal temperatures range between 70°F and 90°F. Avoid direct sunlight, which can fade flavors and colors.
- Innovative Drying Techniques to Speed Up the Process. Consider using a food dehydrator set to a low temperature (95°F-115°F) for faster results while preserving quality. Alternatively, lay herbs flat on a mesh screen in front of a gentle fan to enhance air circulation.
- Monitor and Test. Check herbs daily. Dried herbs are crisp and crumble easily. If any signs of mold appear, discard affected parts immediately.
Chef’s Notes
- Humidity is Key: High humidity zones slow drying drastically. Use a dehumidifier or move herbs to a less humid room to prevent delays.
- Use Paper Bags: Wrapping herbs in paper bags with tiny holes helps trap natural oils while allowing moisture to escape, accelerating drying.
- Oven-Dry Method: In a hurry? Set your oven to its lowest setting (~170°F), place herbs on a baking sheet, and dry for 20-30 minutes, flipping halfway. Keep a close watch to prevent burning.
- Storage Tips: Store dried herbs in airtight containers away from heat and light to keep their flavor vibrant.
Serving Suggestions
Once dried, use your herbs to season roasted vegetables, simmer into delicate soups, or sprinkle over fresh salads. Crush dried herbs gently to release their aromas just before cooking. Garnish dishes with whole dried sprigs for rustic elegance and visual appeal.
| Nutritional Info (per 1 tbsp dried herbs) |
Calories | Protein | Carbs | Fat |
|---|---|---|---|---|
| Thyme | 3 | 0.1 g | 0.7 g | 0.1 g |
| Basil | 2 | 0.2 g | 0.3 g | 0.1 g |
| Rosemary | 6 | 0.1 g | 1.2 g | 0.1 g |

For additional tips on herb preservation techniques and creative seasoning ideas, check out our Herb Preservation 101 guide. For detailed scientific insights on drying and storage, visit USDA’s Agricultural Research Service.
Q&A
Q&A: Why Your Herbs Are Taking Forever to Dry (And How to Fix It)
Q1: Why do my herbs seem to never finish drying?
A1: If your herbs are dragging out their drying time like a slow soap opera, chances are they’re trapped in a moisture maze. Humidity, dense foliage, or improper air circulation can trap water inside, making the drying process linger. Think of it as trying to dry a sponge in a damp basement-frustrating and slow!
Q2: Could the way I harvest my herbs affect drying time?
A2: Absolutely! Harvesting herbs too late in the day or when they’re wet from dew or rain means you’re starting with extra moisture, turning drying into a marathon. Aim to pick herbs in the morning after the dew has evaporated but before the sun gets scorching.
Q3: How does the environment impact the drying speed?
A3: Environment is the unsung villain in your drying saga. High humidity? Slow drying. Poor airflow? Slow drying. Low temperatures? Yep, slow drying again. Ideally, herbs crave a warm, dry, and well-ventilated spot-think of it as a sunny spa day for your plants rather than a soggy basement.
Q4: Can the thickness or bunch size of my herb bundles make a difference?
A4: Oh yes! Bundling herbs too thickly is like wrapping them in a cozy blanket-they just hold onto moisture longer. Keep bundles small and allow air to weave through, so each leaf gets its moment in the drying spotlight.
Q5: Are there methods to speed up drying without sacrificing flavor?
A5: Indeed! You can try spreading your herbs on mesh screens or racks for better airflow instead of bunching them up. Using a fan to create gentle circulation helps evict the moisture faster without overheating or cooking your herbs. Alternatively, a low-temperature oven (around 95°F/35°C) or a dedicated herb dehydrator can do the trick with care.
Q6: How do I know when my herbs are properly dried?
A6: When herbs crumble easily between your fingers and the stems snap rather than bend, you’re in drying jackpot territory. If they still feel leathery or limp, they’re not quite finished their drying journey.
Q7: Can improper drying lead to spoilage?
A7: Yes! If herbs dry too slowly or remain damp, they may develop mold or lose their vibrant aroma and flavor. Drying isn’t just a chore; it’s an essential act of preservation to keep your herbs delicious and safe.
Q8: What’s the biggest mistake people make when drying herbs?
A8: The top faux pas? Impatience combined with neglecting airflow and humidity control. Trying to rush with high heat or stuffing too many herbs in one spot backfires, often leaving you with soggy or brittle herbs rather than fragrant, perfectly dried ones.
Q9: Could different herbs have different drying needs?
A9: Indeed! Delicate herbs like basil or parsley dry faster and need gentler conditions, while woody herbs like rosemary or thyme have tougher leaves and stems, tolerating longer drying times. Tailoring your approach keeps every herb happy.
Q10: Any last pro tip for a quicker, successful herb drying?
A10: Talk to your herbs! Just kidding-but treating them like the fragrant treasures they are means giving them the right conditions: dry air, good airflow, moderate warmth, and patience. With a little love and know-how, your herbs will dry faster and keep their flavor intact for your kitchen and beyond.
The Conclusion
Drying herbs doesn’t have to feel like watching paint dry-literally. By understanding the moisture content, airflow, and environmental factors holding your herbs hostage in a slow-drying limbo, you can take control and speed up the process without sacrificing quality. With a few simple adjustments-whether it’s trimming your bundles, tweaking your drying space, or choosing the right method-you’ll soon be savoring the vibrant flavors and aromas of perfectly dried herbs in no time. So go ahead, give your herbs the freedom they deserve, and turn that slow-dry frustration into a fragrant success story!


