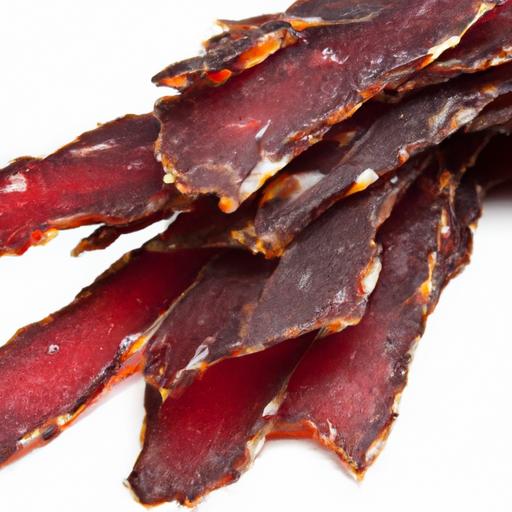
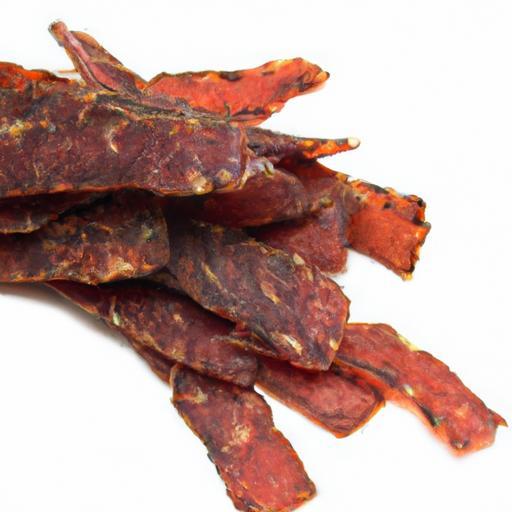
In a world where healthy snacking often means choosing between convenience and nutrition, homemade jerky emerges as the ultimate power-packed solution. Imagine transforming strips of your favorite meats into savory, protein-rich bites that fuel your day, delight your taste buds, and keep those mid-afternoon cravings at bay. Whether you’re a seasoned outdoor adventurer, a fitness enthusiast, or simply someone who loves a satisfyingly chewy snack, crafting your own jerky unlocks a world of flavors and endless customization. Dive into this guide as we unravel the art and science of DIY jerky-your gateway to mastering a high-protein snack that’s both delicious and perfectly tailored to your lifestyle.
Crafting DIY jerky is an art that combines meticulous meat selection with the perfect blend of marinades and drying techniques, promising a high-protein snack that’s both tender and bursting with flavor. This savory tradition, rooted in preserving cultures worldwide, now thrives in modern kitchens where creativity meets culinary expertise.
Prep and Cook Time
Preparation: 15 minutes (plus 12-24 hours marinating)
Drying Time: 4-8 hours depending on thickness and drying method
Yield
Approximately 6 servings (around 8 ounces of finished jerky)
Difficulty Level
Medium – requires patience and attention to detail
Ingredients
- 2 pounds lean beef (top round, flank steak, or sirloin tip), sliced thinly against the grain
- ½ cup soy sauce (low sodium preferred)
- ¼ cup Worcestershire sauce
- 2 tablespoons brown sugar
- 1 tablespoon smoked paprika
- 1 teaspoon garlic powder
- 1 teaspoon onion powder
- 1 teaspoon black pepper, freshly ground
- ½ teaspoon red pepper flakes (optional, for heat)
- 1 tablespoon liquid smoke (for that authentic smoky aroma)
- 1 teaspoon kosher salt
Instructions
- Prepare the Meat: Trim excess fat from the beef to prevent spoilage. Freeze the meat for 30-45 minutes beforehand for easier slicing. Slice the beef into thin, uniform strips about ¼ inch thick, cutting against the grain to maximize tenderness.
- Mix the Marinade: In a large bowl, combine the soy sauce, Worcestershire sauce, brown sugar, smoked paprika, garlic powder, onion powder, black pepper, red pepper flakes (if using), liquid smoke, and kosher salt. Whisk thoroughly until the sugar is dissolved and the mixture is well blended.
- Marinate the Meat: Add the sliced beef to the marinade, turning to coat each strip evenly. Cover the bowl tightly with plastic wrap or place meat in a resealable bag. Refrigerate for 12 to 24 hours, letting the flavors deeply infuse while tenderizing the meat.
- Drain and Pat Dry: Remove the beef from the marinade and gently pat the strips dry with paper towels. Dry surfaces help the jerky dehydrate efficiently and prevent sogginess. Discard excess marinade.
- Arrange for Drying: Place the beef strips in a single layer on dehydrator trays or wire racks, ensuring no overlap for even airflow. If using an oven, preheat to 160°F (70°C) and place strips on a wire rack set over a baking sheet.
- Dry the Jerky: Dry in the dehydrator for 4-8 hours or in the oven for 4-6 hours, flipping halfway through drying. The jerky is done when it bends without breaking and feels leathery but not brittle.
- Cool and Store: Let the jerky cool completely at room temperature. Store in an airtight container or vacuum-sealed bag. For best freshness, refrigerate and consume within 2 weeks, or freeze up to 3 months.
Tips for Success
- Choose lean cuts to reduce fat content, which can cause jerky to spoil more quickly.
- Slice meat against the grain for a tender chew; with the grain if you prefer a chewier texture.
- Marinate overnight for deeper flavor penetration and better tenderness.
- Maintain consistent drying temperature to ensure safe preservation and avoid cooking.
- If using an oven, leave the door slightly ajar to allow moisture to escape during drying.
- Experiment with marinades: Try incorporating teriyaki, spicy chipotle, or maple-glazed variations.
- Use a food thermometer to check that internal temperature reaches 160°F if you’re concerned about food safety.
- For vegetarian jerky lovers, try making sweet potato or tofu versions for a high-protein alternative.
Serving Suggestions
Slice your jerky into bite-sized pieces and serve alongside a handful of mixed nuts and dried fruits for a perfect hiking snack. Garnish the jerky with a sprinkle of fresh chopped parsley or cilantro for a pop of color. Pair with a sharp cheddar cheese and fresh crisp apple slices for an elevated protein-rich charcuterie board. For dipping, offer creamy horseradish sauce or garlic aioli to intensify each bite.

| Nutrient | Per 1 oz Serving (28g) |
|---|---|
| Calories | 70 |
| Protein | 12g |
| Carbohydrates | 3g |
| Fat | 1.5g |
Hungry to expand your high-protein snack repertoire? Discover more on creative high-protein snacks, and for expert guidance on meat safety, check USDA’s official jerky safety tips.
Q&A
Q&A: Crafting DIY Jerky – The Ultimate High-Protein Snack Guide
Q1: Why make your own jerky instead of buying it?
A: Homemade jerky lets you customize flavors, control ingredients, and avoid preservatives. Plus, it’s a satisfying way to ensure your high-protein snack is both tasty and clean-eating-friendly. Nothing beats the pride of munching on jerky you crafted with your own hands!
Q2: What kinds of meat work best for jerky?
A: Lean cuts are your jerky’s best friend. Think top round, flank steak, or eye of round for beef; turkey breast for poultry; and even venison if you’re feeling adventurous. The leaner the meat, the drier and longer-lasting your jerky will be.
Q3: How do I slice meat for perfect jerky?
A: Slice against the grain for tender jerky, or with the grain if you want a chewier bite. Keep slices uniform-about 1/8 to 1/4 inch thick-to ensure even drying. Pro tip: partially freeze the meat beforehand to make slicing easier and neater.
Q4: What are some creative marinade ideas?
A: Classic soy sauce and Worcestershire add a savory punch, but why stop there? Try maple syrup and smoked paprika for a sweet-smoky vibe, or go bold with chipotle and lime for a spicy zing. Don’t forget a good dose of garlic and black pepper to round out the flavors!
Q5: How long does jerky take to dry, and what’s the best method?
A: Drying time varies with thickness and method-usually 4 to 8 hours. Dehydrators are the jerky-maker’s dream for consistent heat and airflow. Your conventional oven works too; use the lowest temp (around 160°F/70°C) and keep the door slightly ajar for air circulation.
Q6: How do I know when my jerky is done?
A: Perfect jerky bends and cracks but doesn’t snap in half. It should feel dry yet still slightly pliable. If it’s brittle, it might be overdone; if it’s soft or moist, it needs more drying time.
Q7: What’s the best way to store homemade jerky?
A: Store jerky in airtight containers or vacuum-seal bags. Keep it cool and dry-refrigerate for longer freshness or freeze for months. Proper storage maintains that crave-worthy chew and flavor punch.
Q8: Can jerky be made from non-meat proteins?
A: Absolutely! Tofu, mushrooms, and even eggplants can be transformed into savory “jerky” snacks with the right marinade and dehydration technique. It’s perfect for vegetarians craving a chewy, protein-packed treat.
Q9: Any safety tips for DIY jerky?
A: Yes! Use lean meats and trim fat to prevent spoilage. Marinate in the fridge, not on the counter. Heat meat to 160°F (71°C) before drying to kill bacteria, especially if using an oven. Follow reputable recipes and guidelines for safe dehydration times and temperatures.
Q10: What if I want to spice things up beyond heat?
A: Dive into global flavors! Add Moroccan cumin and coriander, Korean gochujang paste, or tangy tamarind for a culinary adventure. DIY jerky is your blank canvas-let your taste buds run wild.
Future Outlook
Whether you’re a seasoned snack enthusiast or just beginning your journey into the world of homemade treats, crafting your own jerky opens up a realm of flavorful possibilities. With its high-protein punch and customizable ingredients, DIY jerky not only fuels your body but also sparks your culinary creativity. Armed with the techniques and tips from this guide, you’re ready to transform simple cuts of meat into irresistible, nutrient-packed bites. So fire up your dehydrator or oven, experiment with spices, and savor the satisfaction that comes from creating your ultimate high-protein snack-one chewy, savory strip at a time. Happy jerky making!


