In the world of dairy delights, few treasures rival the rich, velvety charm of Icelandic skyr. This ancient, creamy yogurt has been a staple in Icelandic households for centuries, cherished not only for its luscious texture but also for its remarkable health benefits. Imagine a yogurt so thick and smooth, it feels like a dessert and a wholesome snack all in one spoonful. Whether you’re a seasoned home cook or a curious beginner, crafting your own skyr at home is a rewarding journey into tradition and taste. In this simple guide, we’ll unravel the secrets to making your very own batch of creamy skyr-bringing a piece of Iceland’s pristine dairy heritage right into your kitchen. Ready to whisk, culture, and savor? Let’s dive into the art of homemade Icelandic yogurt.
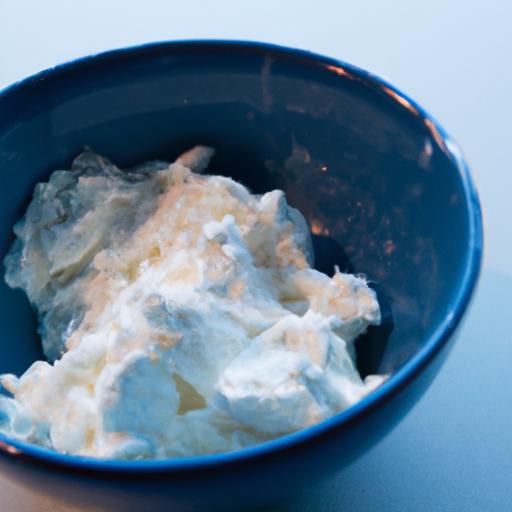
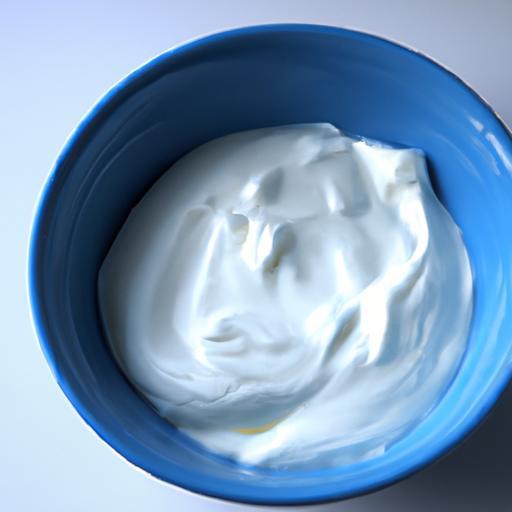
Crafting Creamy Skyr begins with embracing centuries of Icelandic tradition, where this lush, high-protein yogurt-like dairy has been a staple for generations. Originally cherished for its nourishing qualities and resilient texture, skyr offers a uniquely thick, velvety consistency that sets it apart from regular yogurt. Drawing from the purity of Iceland’s natural ingredients and time-honored methods, this guide will take you through selecting the perfect components, mastering techniques for that signature creaminess, and experimenting with delightful flavor twists.
Prep and Cook Time
- Preparation: 15 minutes
- Incubation & Straining: 12 hours
- Total Time: Approximately 12 hours 15 minutes
Yield
- Approximately 4 servings (about 2 cups)
Difficulty Level
- Easy to Medium – perfect for home cooks wanting authentic results without fuss
Ingredients
- 1 gallon whole milk (preferably fresh, high-quality, and non-UHT for best texture)
- 2 tablespoons skyr starter culture or plain live-culture yogurt (with active cultures)
- 1/4 cup non-fat dry milk powder (to boost thickness and creaminess)
- Cheesecloth or fine muslin for straining
- Optional: 1 teaspoon vanilla extract or citrus zest for flavor variations
Step-by-Step Techniques to Achieve Creamy Consistency
- Warm the Milk: Heat the whole milk gently to 185°F (85°C), stirring frequently to prevent scorching. This step enhances thickness by denaturing the proteins.
- Cool Down: Remove from heat and let the milk cool to 110°F (43°C), ideal for activating the starter cultures without killing them.
- Mix in Dry Milk Powder: Stir in the non-fat dry milk powder thoroughly to boost creaminess and body.
- Add Starter Culture: Whisk in the skyr starter culture or live-culture yogurt until completely combined, ensuring even distribution of beneficial bacteria.
- Incubate: Pour the mixture into a clean container, cover, and keep in a warm spot (100-110°F) for 8-12 hours to allow fermentation. A yogurt maker or oven with the light on works well.
- Strain: Line a sieve with cheesecloth, place over a bowl, and ladle the fermented mixture in. Allow it to strain in the refrigerator for 2-4 hours until achieving skyr’s characteristic thick texture.
- Transfer and Chill: Transfer strained skyr to an airtight container and refrigerate for at least 2 hours before serving to deepen flavor and texture.
Choosing the Perfect Ingredients for Authentic Skyr
Prioritizing fresh, unprocessed whole milk sets the foundation for rich creaminess. The addition of non-fat dry milk powder is a key tip often overlooked, which intensifies body without altering flavor. Using a reliable starter culture sourced from traditional skyr or high-quality live yogurt ensures the right tang and probiotic benefits.
Tips for Flavor Variations and Storing Your Homemade Skyr
- Enhance natural tartness by folding in fresh berries, honey, or vanilla bean paste just before serving for a sweet contrast.
- Try zesting a little lemon or orange rind during incubation for a subtle citrus punch.
- Swirl in ground cinnamon or cardamom to add a warm, spiced dimension perfect for breakfast.
- Store homemade skyr in airtight containers in the refrigerator for up to one week. The flavor will mildly intensify but the creamy texture remains luscious.
- If it becomes too thick upon refrigeration, whisk in a splash of cold milk to loosen it gently without losing creaminess.
Serving Suggestions
Present your skyr elegantly by layering it in glass bowls or jars with fresh fruit compote, crunchy granola, or toasted nuts. Garnish with a sprig of fresh mint or edible flowers to elevate the visual appeal. Use as a tangy base for smoothies, a substitute for sour cream in savory dishes, or drizzled with maple syrup for pure indulgence.
| Nutrient | Per Serving (½ cup) |
|---|---|
| Calories | 110 kcal |
| Protein | 17 g |
| Carbohydrates | 4 g |
| Fat | 0.5 g |
For further exploration, consider reading our detailed guide on Homemade Icelandic Dairy Recipes and learn more about the historic roots of skyr’s rich heritage.

Q&A
Q&A: Crafting Creamy Skyr – A Simple Guide to Homemade Icelandic Yogurt
Q1: What exactly is Skyr, and how is it different from regular yogurt?
A1: Skyr is a traditional Icelandic dairy delight, often mistaken for yogurt but technically a cheese. It boasts a thick, creamy texture and a mild, tangy flavor. Unlike typical yogurt, Skyr is strained more thoroughly, resulting in a much denser product with higher protein content and lower fat, making it a nourishing powerhouse.
Q2: Why should I try making Skyr at home instead of buying it?
A2: Homemade Skyr lets you tailor the creaminess and tang to your liking, using wholesome ingredients without preservatives or additives. Plus, the crafting process invites you into Iceland’s rich culinary heritage and gives you a satisfying, hands-on experience of dairy alchemy. Bonus: it’s surprisingly simple and budget-friendly!
Q3: What ingredients do I need to make Skyr at home?
A3: You’ll need just a few basics: skim or low-fat milk, a bit of live active Skyr culture or a plain Skyr yogurt with live cultures to kick-start fermentation, and optionally, a small amount of rennet to help thicken. Some recipes add a touch of cream for extra silkiness, but traditional Skyr sticks to leaner milk.
Q4: How long does it take to make Skyr from start to finish?
A4: Patience is part of the magic! The initial culturing phase takes about 12 to 24 hours at a warm temperature, allowing beneficial bacteria to work their tangy charm. After culturing, straining the Skyr to achieve that signature thick texture can take several hours, depending on your method and desired consistency.
Q5: What’s the secret to getting Skyr extra creamy and smooth?
A5: The trick lies in gentle heating and slow straining. Heat the milk carefully to around 185°F (85°C), then cool before adding cultures-temperature control ensures a perfect environment for bacteria. Strain through a fine cloth or cheesecloth slowly, letting gravity do the work rather than pressing hard, which keeps the texture silky, not grainy.
Q6: Can I flavor my homemade Skyr?
A6: Absolutely! Once your Skyr is done, stir in natural flavor enhancers like fresh berries, honey, vanilla extract, or spices such as cinnamon. Unlike store-bought versions loaded with sugar, homemade Skyr’s mild base lets your creativity shine without overwhelming sweetness.
Q7: How should I store homemade Skyr, and how long does it last?
A7: Store your Skyr in a clean, airtight container in the refrigerator. It keeps fresh for up to 1-2 weeks. Over time, its flavor intensifies, becoming tangier, so taste it along the way to enjoy it at your preferred stage.
Q8: Is making Skyr difficult for beginners?
A8: Not at all! With a bit of care and curiosity, anyone can master homemade Skyr. The key is following the temperature guidelines and allowing enough time for the cultures to develop. The process is forgiving and rewarding, making it a delightful project for yogurt lovers and kitchen adventurers alike.
Q9: What are some creative ways to enjoy homemade Skyr?
A9: Dive into bowls drizzled with honey and fruit, swirl it into smoothies for extra creaminess, or use it as a tangy base for salad dressings and dips. Skyr also shines as a topping on pancakes or mixed into baking recipes for moist, fluffy results with a protein boost.
Q10: Where can I find Skyr cultures or a starter for making Skyr?
A10: You can find live Skyr cultures online or at specialty stores. Alternatively, a small dollop of plain Skyr with live cultures from the store works splendidly as a starter. Just be sure it’s fresh and minimally processed to ensure active bacteria for fermentation.
Embark on your Icelandic dairy adventure, and craft a bowl of creamy Skyr that’s as rich in history as it is in flavor!
Wrapping Up
As you savor your first spoonful of homemade skyr, you’re not just tasting a creamy, tangy delight-you’re connecting with centuries of Icelandic tradition, crafted right in your own kitchen. With just a handful of ingredients and a touch of patience, you’ve unlocked the secret to a nourishing treat that’s as wholesome as it is delicious. Whether enjoyed plain, swirled with honey, or crowned with fresh berries, your handcrafted skyr is more than yogurt-it’s a celebration of culture, simplicity, and the joy of making something truly your own. So go ahead, embrace the ritual, experiment with flavors, and let your creamy creation be the start of many culinary adventures to come.