When the call of the wild beckons, every ounce counts-and not just in spirit. Enter the art of crafting lightweight feasts: DIY dehydrated camping meals that transform humble ingredients into nourishing, packable fuel for your adventures. Stripping away water but preserving flavor and nutrition, these homemade morsels redefine outdoor dining, offering freedom from bulky cans and clunky packages. Whether you’re a seasoned backpacker or a weekend wanderer, mastering the science and craft of dehydration empowers you to savor satisfying meals under starry skies, all while keeping your pack featherlight. Join us as we explore the creative, practical, and delicious world of DIY dehydrated camping cuisine-a feast designed for the trailblazer in you.
Choosing Ingredients for Maximum Nutrition and Minimal Weight
Crafting Lightweight Feasts: DIY Dehydrated Camping Meals begins with the artful selection of ingredients that deliver robust nutrition without adding bulk. When backpacking or camping, every ounce counts, so prioritizing nutrient-dense and dehydrator-friendly foods transforms your meals into powerhouse fuel.
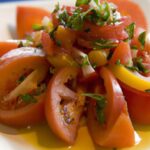
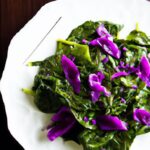
Focus on lean proteins like cooked chicken breast, turkey, or lentils-all excellent for drying and rich in essential amino acids. Complement these with a variety of vibrant vegetables such as bell peppers, carrots, zucchini, and spinach, which rehydrate well and provide vital vitamins and minerals.
Consider whole grains like quinoa, brown rice, or couscous for sustained energy; pre-cook and cool them before dehydrating to preserve texture. Incorporating hearty legumes and grains with fiber keeps digestion smooth on the trail. Avoid watery vegetables like cucumbers, which don’t dehydrate efficiently.
For flavor, gently dehydrate herbs like thyme, oregano, or parsley to infuse your meals with freshness without weight. Choosing low-fat, low-sodium ingredients ensures your lightweight feast is wholesome and energizing.
Step by Step Guide to Dehydrating Meals at Home
Transforming fresh meals into lightweight, preservable treats is both a science and a joy. Follow these steps to create perfectly dried meals:
- Prepare Ingredients: Wash and peel your vegetables and proteins. Slice consistently (about 1/4-inch thickness) for even drying.
- Pre-cook components: For meats and grains, fully cook and cool ingredients to minimize spoilage risk.
- Arrange items on dehydrator trays: Spread pieces evenly without overlapping to allow airflow.
- Set the dehydrator temperature: Aim for 130°F-145°F (54°C-63°C) for vegetables and fruits, 155°F (68°C) for meats to ensure safety and optimal drying.
- Drying time: Depending on moisture content, most ingredients take 6-12 hours. Check periodically; vegetables should be brittle or leathery, meats should snap easily.
- Test for dryness: Cool samples to room temperature-no moisture or stickiness should feel present. If any, continue drying in short intervals.
- Cool and store: Let dehydrated foods rest before packaging to prevent condensation.
Tips for Packaging and Storing Your DIY Dehydrated Creations
After crafting your DIY dehydrated camping meals, proper packaging is key to maintain freshness and lightweight convenience. Use vacuum-sealed bags or high-quality Mylar bags with oxygen absorbers to eliminate moisture and air exposure. Store packets in a cool, dark place to prolong shelf life-ideal temperature is below 75°F.
Consider portioning meals in one- or two-serving sizes for quick grab-and-go access. If you’re prepping for long trips, adding moisture-resistant labels with ingredients and date helps you track freshness. For ultra lightweight, resealable silicone bags can be reused and trimmed to fit your pack space.
Rehydration Techniques to Bring Your Lightweight Feasts to Life
Nothing brings your dehydrated meals back to life like the perfect rehydration method. The key is to reintroduce water gradually, restoring texture and flavor without turning meals mushy.
- Hot soak method: Add boiling water directly into your meal pouch or bowl, cover, and allow to steep for 10-20 minutes. Stir gently halfway through to ensure even hydration.
- Simmer on stove: For heartier meals, simmer your dehydrated mixture with a little extra broth or water for 5-10 minutes. This method reactivates flavors and softens tougher ingredients.
- Cold soak option: For warmer climates, soak your meal in cool water for several hours or overnight in a sealed container. This preserves delicate flavors and is great for fruits or lighter meals.
- Test texture: After soaking, check that vegetables bounce back with slight firmness and meats are tender but intact. Adjust soaking time as needed for your preference.
Rehydration is your moment to savor the full potential of your crafting. Watch colors brighten and aromas reawaken-each step a reward after the journey.
Prep and Cook Time
- Preparation: 30 minutes
- Dehydration: 8-12 hours, depending on ingredients
- Rehydration: 10-20 minutes
Yield
- 4 servings of lightweight dehydrated camping meals
Difficulty Level
- Medium
Ingredients
- 2 cups cooked chicken breast, shredded
- 1 cup cooked quinoa
- 1 cup sliced carrots
- 1 cup diced bell peppers (any color)
- 1/2 cup chopped spinach
- 1/4 cup chopped onions
- 1 tablespoon olive oil
- 1 teaspoon garlic powder
- 1 teaspoon dried thyme
- Salt and pepper to taste
Instructions
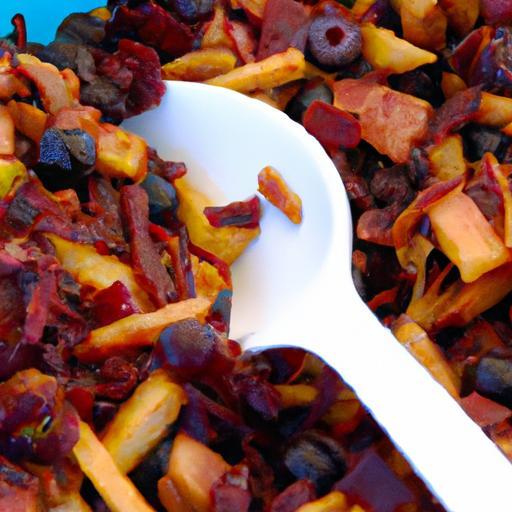
- Mix Ingredients: In a large bowl, combine cooked chicken, quinoa, carrots, bell peppers, spinach, and onions.
- Season and oil: Drizzle with olive oil and sprinkle garlic powder, dried thyme, salt, and pepper. Toss thoroughly to coat evenly.
- Spread mixture evenly: Place the mixture in a thin, uniform layer across dehydrator trays lined with parchment paper.
- Dehydrate: Set your dehydrator to 135°F and dry for 8-10 hours. Stir halfway to promote even drying and prevent clumping.
- Check dryness: Portions should feel crisp but crumble easily when pinched. If moist, extend drying time in 30-minute increments.
- Cool and package: Allow to cool fully before placing into vacuum seal or zip-lock bags with oxygen absorbers.
- Store: Label with date and ingredients, and keep in a cool, dark place until ready to use on your next adventure.
Chef’s Notes
- Substitute chicken for turkey or tofu for a vegetarian version.
- For added protein, sprinkle in powdered eggs or nutritional yeast before dehydrating.
- Ensure all ingredients are low moisture to prevent spoilage during storage.
- Test small batches first to perfect drying times according to your dehydrator model.
- Make ahead and store pre-measured portions for quick meal prep on busy days.
Serving Suggestions
Enjoy your rehydrated lightweight feast topped with freshly chopped herbs like parsley or cilantro for a pop of color. Add a squeeze of lemon or a touch of hot sauce to enhance brightness. Pair with a side of instant oatmeal or dehydrated fruit for a balanced trail meal.
| Nutrient | Per Serving |
|---|---|
| Calories | 320 kcal |
| Protein | 28 g |
| Carbohydrates | 20 g |
| Fat | 8 g |

For more in-depth advice on preserving nutrients during food drying, visit the University of Georgia Food Safety Extension.
Check out our Ultimate Camping Gear Checklist to complement your DIY dehydrated meals for an unforgettable outdoor experience.
Q&A
Q&A: Crafting Lightweight Feasts – DIY Dehydrated Camping Meals
Q1: Why choose DIY dehydrated meals for camping?
A: Imagine savoring a gourmet meal beneath a canopy of stars, all from a lightweight pouch you packed yourself! DIY dehydrated meals slash weight and bulk, letting you trek farther without feeling like a pack mule. Plus, crafting your own means you control every ingredient-no mystery additives or excess sodium, just pure trail fuel tailored to your taste buds.
Q2: What makes dehydration a good method for preserving food on the trail?
A: Dehydration is nature’s oldest trick for extending shelf life. Removing moisture halts microbial growth and decay, turning fresh foods into hardy travelers. It’s like pressing “pause” on spoilage-foods become lighter, compact, and ready to spring back to life with a splash of water and a little heat.
Q3: How do I start making my own dehydrated camping meals?
A: Begin with simple, nutrient-packed staples: lean proteins, veggies, grains, and legumes. Cook them thoroughly and spread them thin on your dehydrator trays or an oven on low heat. Patience is key-dry until brittle yet not burnt. Once dry, pack the morsels in airtight bags or jars to keep moisture out. Rehydrate with boiling water on the trail, and voilà-your lightweight feast awakens!
Q4: What are some creative meal ideas for DIY dehydrated camping fare?
A: The only limit is your imagination! Classic breakfast: dehydrated scrambled eggs with veggies and cheese flakes. Hearty dinners: beef stroganoff with dried mushrooms and noodles or a spicy chickpea curry with dehydrated peppers and tomatoes. Sprinkle in dried herbs and freeze-dried fruits for pops of flavor and nutrition that transform simple meals into trail-time delights.
Q5: Any tips for maximizing flavor and nutrition?
A: Absolutely! Marinate proteins before dehydration for punchy taste. Use broths or seasoned water to rehydrate instead of plain water-each sip becomes a flavor bomb. Don’t shy away from adding oils or fats pre-dry; though they reduce shelf-life somewhat, they enrich mouthfeel and satiety. Balance is vital: combine carbs, protein, and fats for lasting energy and trail stamina.
Q6: How do I store and pack these meals to ensure longevity on the trail?
A: Airtight is right! Oxygen and moisture are meal enemies. Vacuum seal bags or use oxygen absorber packets to extend shelf life. Keep pouches cool and dark when possible-heat and sunlight can degrade nutrients and flavor. Label meals clearly with ingredients and dates. Organize by meal type so you can grab and go easily.
Q7: Can anyone try this, or do I need special equipment?
A: Anyone with a curious palate and some patience can dive in! While a food dehydrator offers precise temperature control and convenience, your oven on low heat or sun drying in dry climates can work too. The important part is drying foods thoroughly and storing them properly. With practice, you’ll perfect your own personalized camping cuisine worthy of the wild’s finest table.
Q8: What’s the biggest benefit of crafting your own dehydrated meals?
A: Beyond the obvious weight savings and customization, it’s the joy of connection-to your food, your adventure, and yourself. Crafting meals you’ll savor after long days invigorates the spirit. It turns every bite into a celebration of self-reliance and creativity out in the wild. Lightweight feasts become memories, stories, and flavors you carry not just in your pack, but in your soul.
Closing Remarks
As the campfire’s glow fades and the stars take their place overhead, your lightweight, homemade meals stand ready-tiny bundles of nourishment born from your own careful crafting. Dehydrated camping food isn’t just about saving weight; it’s about embracing a spirit of self-reliance, savoring simplicity, and transforming ordinary ingredients into extraordinary trail companions. With a little time, creativity, and patience, you can take control of your culinary journey in the wild, ensuring every bite fuels your adventure without weighing you down. So pack your dehydrator, gather your favorite recipes, and set off knowing that delicious, lightweight feasts await at every stop along the trail. Happy trails and happy meals!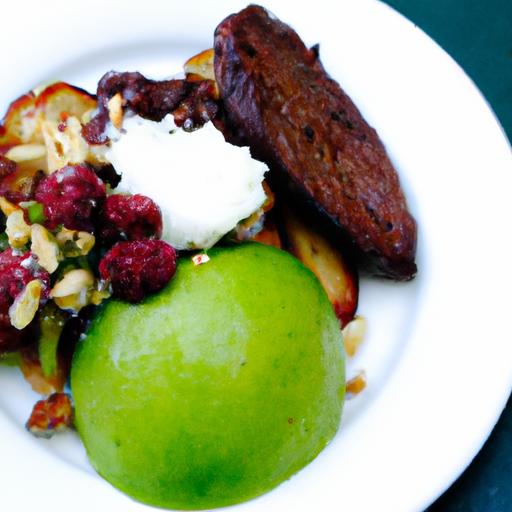


