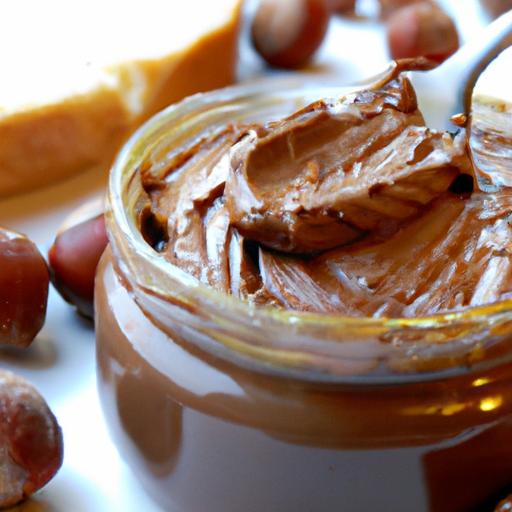
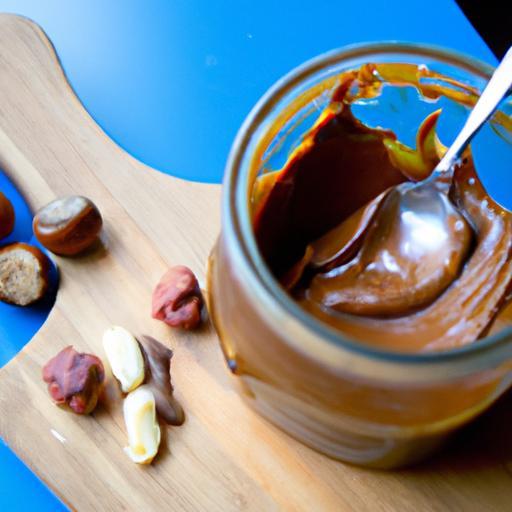
There’s something undeniably magical about the velvety swirl of hazelnut and chocolate in a spread-a symphony of nutty warmth and rich cocoa that effortlessly elevates toast, pastries, and desserts. But why settle for store-bought when you can transform your kitchen into a decadent chocolatier’s workshop? Crafting creamy hazelnut and chocolate spread at home is not only a journey into the heart of flavor, but also a celebration of simple, wholesome ingredients coming together in perfect harmony. In this article, we’ll unveil the secrets to whipping up your own luscious, silky spread that’s free from preservatives and tailored exactly to your taste buds-because homemade indulgence is truly unbeatable.
Crafting Creamy Hazelnut & Chocolate Spread at Home
Crafting creamy hazelnut & chocolate spread at home transforms a beloved pantry staple into an artisan delight filled with rich, nutty depth and luscious sweetness. Originating from the sun-soaked orchards of Piedmont, this spread channels the essence of roasted hazelnuts and velvety cocoa, revealing a world of flavor you can customize to your taste. Preparing it yourself not only lets you refine its creamy texture but also offers the joy of natural alternatives, free from additives.
Prep and Cook Time
Preparation: 15 minutes | Roasting & Grinding: 25 minutes | Total: 40 minutes
Yield
Approximately 2 cups (about 16 servings)
Difficulty Level
Medium – Ideal for home cooks eager to master the art of nut roasting and silky blending.
Ingredients
- 2 cups raw hazelnuts
- 1/2 cup high-quality cocoa powder
- 1/2 cup pure maple syrup (or honey for a more floral sweetness)
- 1/4 cup coconut oil, melted
- 1/4 teaspoon sea salt
- 1 teaspoon pure vanilla extract
- 1/4 cup almond milk (or any plant-based milk for creaminess)
Instructions
- Roast the Hazelnuts: Preheat your oven to 350°F (175°C). Spread the hazelnuts on a baking sheet in a single layer and roast for 15-18 minutes, stirring halfway through. Watch for a fragrant, toasted aroma and lightly cracked skins.
- Remove Skins: Transfer the warm hazelnuts to a clean kitchen towel. Rub vigorously to loosen and discard the skins-this step unlocks smoother texture and a less bitter taste.
- Grind the Nuts: Place the peeled hazelnuts in a food processor. Pulse continuously, scraping down the sides every minute. Begin with coarse crumbs, then after about 10 minutes, you’ll notice the nuts release oils and turn into a creamy butter. Patience here yields that perfect velvety texture.
- Incorporate Cocoa and Sweetener: Add the cocoa powder, maple syrup, melted coconut oil, sea salt, and vanilla extract into the nut butter. Blend until fully combined and glossy.
- Adjust Creaminess: Stream in the almond milk gradually while blending, until the spread reaches your desired texture-smooth, scoopable, and luscious.
- Taste and Tweak: Taste your spread and adjust sweetness or saltiness as needed. For a deeper chocolate flavor, add an extra tablespoon of cocoa powder.
- Store Properly: Transfer the spread into an airtight glass jar. Seal tightly and store in the refrigerator to maintain freshness and prevent oil separation.
Tips for Success
- Use Fresh Hazelnuts: Freshness ensures a vibrant nutty flavor and smooth buttery texture post-grinding.
- Roast Evenly: Toss nuts halfway so they toast uniformly-this not only enhances flavor but aids skin removal.
- Grinding Patience: Don’t rush the food processor; the oil must begin to release for the creamy ideal.
- Natural Sweetener Options: Use maple syrup for its caramel tones, or agave for a lighter sweetness to balance the cocoa.
- Make-Ahead: This spread keeps well for up to 3 weeks refrigerated; bring to room temperature before serving for best consistency.
Serving Suggestions
Spread generously on toasted artisanal bread for a decadent breakfast or dollop onto warm pancakes to elevate your brunch. Garnish with a few crushed roasted hazelnuts or a light dusting of cocoa powder to enhance presentation. For an indulgent treat, swirl into oatmeal or use as a dip for fresh fruit slices.

| Nutrient | Per Serving (1 tbsp) |
|---|---|
| Calories | 90 kcal |
| Protein | 2 g |
| Carbohydrates | 5 g |
| Fat | 7 g |
For a deeper dive into the art of nut roasting, explore our comprehensive guide to homemade nut butters. To ensure your nuts contain maximum nutrients and flavor, refer to this Nutrition.gov article on balanced diets and nuts.
Q&A
Q&A: Crafting Creamy Hazelnut & Chocolate Spread at Home
Q1: Why make hazelnut and chocolate spread at home instead of buying it?
A1: Making your own spread lets you control the ingredients-no hidden oils, excessive sugar, or preservatives. Plus, you can tailor the flavor and creaminess to your liking. It’s fresher, fun to create, and can be a unique gift!
Q2: What are the key ingredients for a luscious homemade hazelnut & chocolate spread?
A2: The essentials include toasted hazelnuts, high-quality chocolate (dark or milk, depending on preference), a touch of sweetener like maple syrup or honey, a pinch of salt, and a splash of vanilla extract. Some recipes add a little oil or milk for extra creaminess.
Q3: How important is toasting the hazelnuts?
A3: Toasting is the magic step! It enhances the nuts’ natural oils and deepens their flavor, creating that signature rich, nutty aroma. Skipping this means missing out on the spread’s signature depth.
Q4: Can I customize the sweetness or choose different types of chocolate?
A4: Absolutely! Wondering if you can make it less sweet? Simply adjust the sweetener. Prefer a fruity dark chocolate or creamy milk variety? Go for it. Customizing lets you craft your perfect jar of indulgence.
Q5: What’s the secret to getting a silky smooth texture?
A5: Time and a powerful food processor or blender are your best friends. Grinding the nuts down into a butter releases their natural oils, creating a creamy base. Adding melted chocolate and a bit of oil or milk helps the spread achieve that dreamy, spreadable consistency.
Q6: How long can homemade hazelnut & chocolate spread be stored?
A6: Stored in an airtight container in the fridge, your homemade spread can last about 2 to 3 weeks. Always use a clean spoon to avoid contamination, and bring the jar to room temperature before serving for best spreadability.
Q7: Are there any fun ways to use this spread besides spreading it on toast?
A7: Oh yes! Dollop it on pancakes, swirl it into yogurt or oatmeal, use it as a dip for fruits, or even bake it into brownies and cookies for a nutty chocolate surprise.
Q8: Can this recipe be made vegan or allergy-friendly?
A8: Definitely. Use dairy-free chocolate and substitute honey with maple syrup or agave to keep it vegan. For nut allergies, try swapping hazelnuts with roasted sunflower seeds or pumpkin seeds, though the flavor will be different-not quite traditional but delightfully unique!
Crafting your own hazelnut and chocolate spread is not just a recipe-it’s a journey from simple ingredients to pure, creamy bliss. Happy spreading!
Insights and Conclusions
Whipping up your own creamy hazelnut and chocolate spread at home is more than just a delicious endeavor-it’s a rewarding journey of flavors, textures, and personal touch. With simple ingredients and a bit of patience, you can transform humble hazelnuts and rich cocoa into a luscious spread that rivals any store-bought favorite. Not only do you gain control over the sweetness and quality, but you also unlock the joy of crafting a treat that’s truly yours. So next time cravings strike, skip the jar and dive into the wholesome magic of homemade hazelnut chocolate spread-a decadent delight that’s as gratifying to make as it is to savor. Happy spreading!


