
Milkshakes Mastery: 7 Expert Techniques for Perfect Shakes
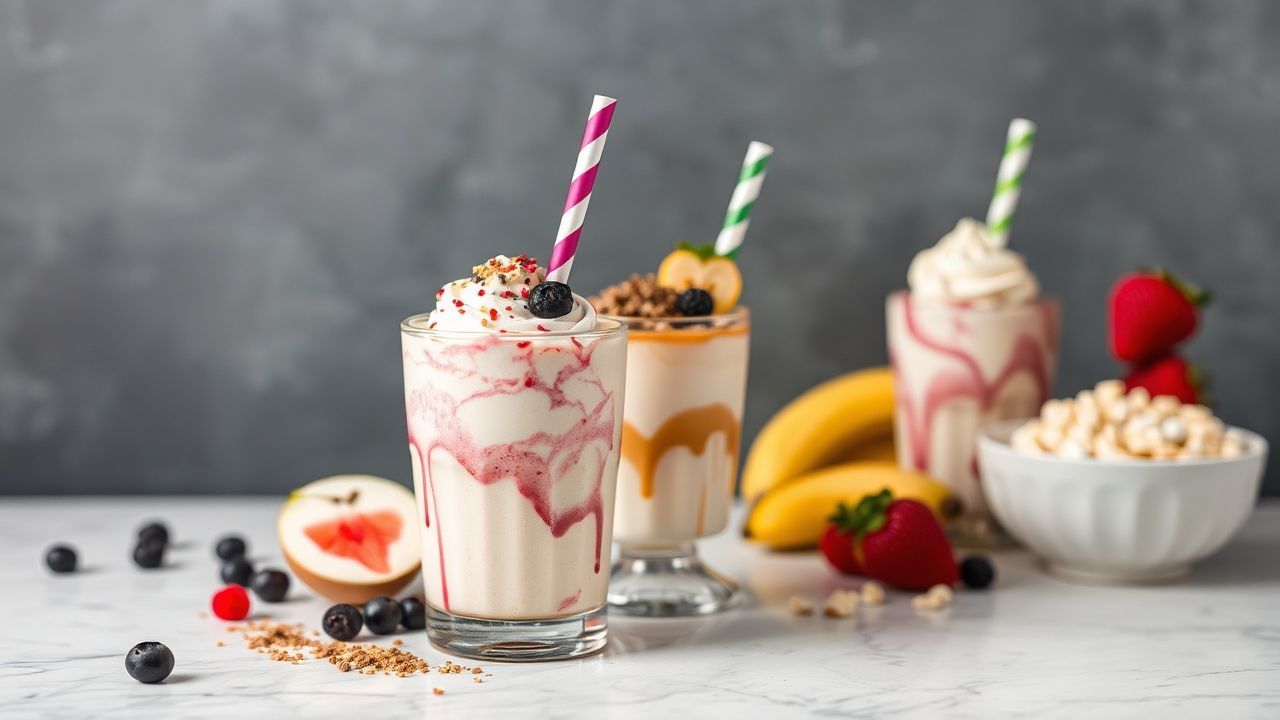
There is a precise pleasure in a perfectly balanced milkshake: cold, creamy mouthfeel, clear flavor notes, and the right sweetness. This guide explains seven expert techniques to produce thick, flavorful homemade milkshakes that hold structure and taste repeatable every time.
- Control texture: temperature and ratio determine perceived creaminess.
- Use quality base ingredients: a higher-fat ice cream and whole milk build body.
- Blending order and timing: short pulses and blending stages prevent over-aeration.
- Smart swaps: frozen fruit, avocado, or coconut cream replace dairy while maintaining richness.
Prep and Cook Time
Prep Time: 10 minutes. Select and chill equipment, measure ingredients, and allow ice cream to soften briefly.
Total Time: 10 minutes. No cooking required; time is assembly and controlled blending for best texture.
Yield and Difficulty
This recipe yields two generous servings. Scale by weight for consistent results and blend in small batches to preserve texture when making larger quantities.
Difficulty: Easy. You need a reliable blender and basic measuring. Technique and timing matter more than specialty gear.
Ingredients
Below is a classic, flexible base. Swap elements intentionally rather than randomly to keep results predictable.
Base: 2 cups premium vanilla ice cream; 1 cup whole milk; 2 tbsp pure maple or simple syrup; 1 tsp pure vanilla extract; pinch of salt. Optional boosters: 1/2 cup frozen strawberries, 1 ripe banana, 2 tbsp cocoa powder, or a concentrated shot of coffee.
When choosing a frozen dairy base, check fat percentage and overrun. Higher butterfat and moderate overrun give a denser shake. For background on frozen dairy science, see the ice cream entry.
For dairy-free shakes, use high-fat plant-based frozen desserts and natural thickeners like avocado or frozen banana. These maintain mouthfeel without dairy.
Equipment and Links
Use a heavy-duty blender for smooth emulsions. A high-torque motor and wide jar reduce strain and create a silkier texture.
Smaller single-serve blenders work if you blend in short pulses and avoid overheating. For a quick primer on blender types, consult the blender overview.
Instructions
Order and control matter. Start with softer components, add solids so the blades encounter them last, and limit run time to prevent over-aeration.
Step-by-step: Soften ice cream 3–5 minutes. Add ice cream and milk in a 2:1 ratio to the jar. Place fruit or cocoa on top. Blend low to combine, then medium for 20–40 seconds. Taste; add sweetener or a splash more milk only if needed. Pulse briefly after adjustments and serve immediately in chilled glasses.
Blending in Stages
Blend solids first with brief low-speed pulses to break them down. Add liquids gradually and finish with a short medium-speed burst to create an emulsion without excess foam.
If you add very cold frozen fruit, blend in alternating pulses to avoid sharp icy shards. For coffee or espresso boosts, fold in concentrated liquid at the end to preserve aromatics; see the milkshake entry for classic formulations.
Blending Speeds and Timing
Short, controlled bursts give the best body. Continuous high-speed blending traps air and yields a frothy rather than creamy texture.
Use low speed to combine, medium speed to finish. For thick mixes with frozen ingredients, rely on short pulses and rest periods to protect motor life and maintain texture.
Tips for Success
Temperature control is the primary variable for mouthfeel. Slightly soft ice cream blends easier and incorporates less air than rock-hard tubs.
Match fat content across components: high-fat ice cream plus whole milk will feel more luxurious. Adjust only one element at a time to learn its effect.
Small ingredients like a pinch of salt and a teaspoon of vanilla lift perceived sweetness without adding sugar. For vanilla detail, see vanilla.
Serving Suggestions
Presentation increases perceived value. Garnish with a light whipped cream, a drizzle of sauce, or a small cookie on the rim for contrast without overwhelming the base.
For to-go service, use insulated containers and add toppings at the point of consumption to preserve texture and appearance. Link to internal resources for ideas: Milkshakes collection and a general page with recipes: milkshake recipes.
Quick Variations and Flavor Builds
Use the base recipe as a template. Swap one component at a time—different ice cream fat, milk type, or thickener—to learn its effect on body and flavor.
Examples: chocolate base (add 2 tbsp cocoa), banana-coconut (coconut cream plus frozen banana), and coffee shake (add concentrated brew at the end for clarity of roast).
Vegan and Low-Sugar Options
Plant-based frozen desserts paired with unsweetened oat or full-fat coconut milk can mimic dairy richness. Use avocado or nut butter for added body without sugar.
For low-sugar builds, use pureed dates or erythritol/stevia blends sparingly and increase vanilla and salt to preserve flavor depth.
When serving fruit-forward shakes, macerate berries briefly with a little syrup to release juices and reduce the need for added sugar.
Keep toppings separate until serving to avoid moisture transfer that accelerates breakdown.
Nutrition and Portion Guidance
Milkshakes are energy-dense treats. Standard homemade shakes commonly range 350–500 kcal per serving depending on ingredients and portion size.
To reduce calories with limited textural loss, substitute lower-fat ice cream and add a frozen banana or Greek yogurt to retain body. For extended menu planning, track weight-based proportions rather than volume.
| Nutrient | Per Serving (approx.) |
|---|---|
| Calories | 420 kcal |
| Protein | 7 g |
| Carbohydrates | 58 g |
| Fat | 18 g |
References and Further Reading
Understanding fat and air explains why brands behave differently in shakes. For technical background on frozen dairy and structure, read the encyclopedic entry for ice cream.
For history and core definitions of the drink, see the milkshake page. For tools and small-equipment context, the blender page gives practical differences by design and motor type.
FAQ
What makes a milkshake thick and creamy?
Thickness comes from the ratio of ice cream to liquid and solids used as thickeners like frozen banana or avocado. Cold temperature keeps fat solid, contributing to a coating mouthfeel.
Processing technique matters: short, high-torque pulses maintain structure, while long high-speed blending creates foam and reduces perceived creaminess.
Can I make dairy-free milkshakes that still feel indulgent?
Yes. Choose high-fat plant-based frozen desserts or add avocado, nut butter, or coconut cream to achieve richness. Combine with a full-bodied plant milk for balance.
Frozen banana acts as an inexpensive thickener that supplies sweetness and a silky texture without dairy.
How do I stop my shake from separating quickly?
Serve immediately in chilled vessels and avoid over-thinning with extra milk. Small stabilizers like a spoonful of Greek yogurt or a pinch of xanthan gum (very small amount) can extend structure for service.
Keep toppings separate until serving to prevent moisture transfer that hastens breakdown.
What blender settings are best for a perfect shake?
Start on low to combine, then switch to medium for 15–30 seconds. Use short pulses for thick mixes with frozen fruit and rest between bursts.
If your blender struggles, soften ingredients slightly or blend in two stages: first solids, then liquids, to reduce motor strain and extend appliance life.
Can I prepare milkshake bases ahead?
You can freeze measured bases in airtight containers and re-blend with a splash of milk at service. Expect minor aeration differences; fresh blending yields the best texture but frozen bases save prep time.
Label portions and use within one month for best flavor and minimal ice crystallization. For recipe ideas, see the Milkshakes collection.
See also: Milkshakes


