
Acorn flour returns as a resilient, nutrient-dense option for cooks who seek unique flavor and sustainable pantry choices. This stepwise guide explains how to select acorns, remove tannins, dry, mill, and store flour so you get repeatable results at home.
- Choose mature, intact acorns to cut tannin work and protect flavor.
- Pick a leaching approach—cold for flavor retention, hot for speed—based on schedule and taste.
- Dry thoroughly before milling to prevent clumping and rancidity.
- Store airtight, cool, and dark to extend shelf life; freeze for long-term stability.
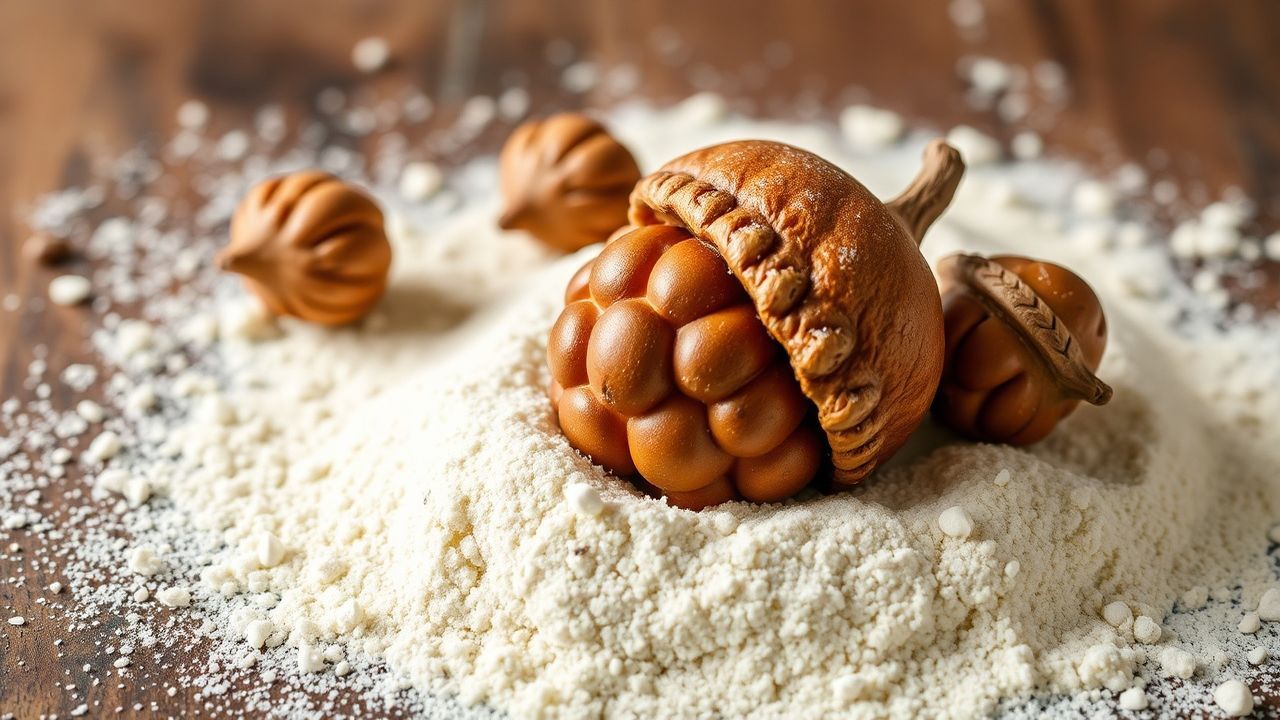
Choosing the Right Acorns for Superior Flavor and Quality
Selecting the correct acorns sets the stage for successful milling and predictable flavor. Seek fully brown nuts that feel heavy for their size and show no holes, mold, or soft spots.
Species matter: white oak group acorns generally taste milder and contain fewer tannins than many red oak species. For botanical context, review the oak taxonomy and nut biology on Oak and the acorn overview on Acorn.
Harvest timing and sorting
Harvest after acorns drop naturally, usually mid-to-late fall; collect soon after drop to limit insect damage and mold. Early picks often test higher in tannins and reduce edible yield.
Use the float test: submerge a sample in water and discard floaters, which often contain voids or insect damage. Recheck lots right before shelling to avoid processing compromised nuts.
Mastering the Leaching Process to Remove Bitter Tannins
Tannins are the target compound: they give bitterness and can cause gastric discomfort in high amounts. Remove them by repeated rinses or controlled heating until no bitterness remains.
Choose cold leaching to preserve heat-sensitive aroma compounds, or hot leaching when time pressures drive faster results. For chemical background on these polyphenols, consult Tannin.
Cold leaching protocol
Chop or crush shelled nutmeat to increase surface area, then cover with cool water and change water 3–4 times daily. Expect three to seven days until rinse water clears and bitterness disappears.
Keep containers cool and monitor for off-odors or visible fermentation; discard any batch that ferments. Cold leaching preserves subtle nutty aromatics and often yields a lighter-colored meal.
Hot leaching protocol
Boil chopped pieces for 20–30 minutes, drain, and renew water until bitterness subsides. Multiple short boils with fresh water often work better than one long boil for consistent, even leaching.
Maintain a gentle simmer and taste small pieces at each change; hot methods can reduce total leaching to a few hours but may slightly darken and soften kernel texture. Use hot leaching when you need faster turnaround.
Techniques for Grinding Acorns into Fine, Versatile Flour
Dry leached acorns completely before milling; retained moisture causes clumping and an uneven grind. Use a dehydrator or a low oven and dry until pieces snap cleanly under pressure.
Spread pieces in a single layer to ensure even airflow; rotate trays as required. If you want technical reading on milling and flour behavior, see the general Flour overview.
Choosing milling equipment
Home grain mills give the most consistent particle size for baking, producing a stable crumb and predictable hydration. High-powered blenders or food processors will work for small batches but pulse to avoid heat build-up.
Mill in small batches to keep temperature low, sift meal through a fine mesh, and regrind coarse bits until the texture resembles whole-wheat pastry flour. Consistent particle size improves hydration and baking performance.
Managing flavor and oxidation
Friction heats the meal; heat accelerates oil oxidation and dulls aroma. Stop and let equipment cool if the grinder warms noticeably between batches.
Use processed acorn flour within weeks at room temperature, or refrigerate or freeze to extend life. Proper processing and cool storage limit rancid off-flavors and preserve the nutty profile.
Storing and Using Acorn Flour for Delicious Recipes and Long Shelf Life
Acorn flour contains natural oils that oxidize when exposed to air, heat, or light. Store in airtight containers in a cool, dark place; for longer terms, freeze in moisture-proof bags.
When retrieving from cold storage, thaw only the portion you need to avoid repeated temperature swings that cause condensation. Label containers with dates and batch notes to track freshness and flavor changes over time.
Usage and substitution rates
Begin by substituting acorn flour at 10–30% of total flour by weight in wheat-based recipes to preserve structure while adding flavor. Adjust substitution based on crumb, hydration, and taste from test bakes.
Acorn flour blends well with rye, spelt, or gluten-free mixes. For gluten-free baking, add binding agents such as psyllium, xanthan gum, or extra egg to improve crumb structure and elasticity.
Recipe Details
The following practical metrics reflect typical home-scale yields and timing. Leaching time varies with species and particle size, so record times and observations to refine your process.
Work in small batches sized to your mill and drying capacity; this reduces heat build-up, improves consistency, and lowers loss. Keep notes on species, soak duration, and drying temperature.
Prep and Cook Time
Preparation: 3–7 days (primarily leaching time). Allow extra days for very tannic species or larger pieces.
Drying: 4–6 hours at 200°F / ~95°C in an oven or dehydrator until pieces are brittle and snap. Verify dryness by smell and texture.
Yield
Expect roughly 1 cup of acorn flour from 2 cups of shelled acorns, depending on moisture loss during drying. Different oak species and kernel densities change yields noticeably.
Weigh outcomes to refine your yield estimates. Over time, you will build a reliable conversion factor for your preferred species and drying method.
Difficulty Level
Difficulty rates medium: the process requires attention during sorting and leaching but uses accessible tools. Basic kitchen safety and a steady water source suffice for most home setups.
Patience and routine tasting determine bitterness removal and final flavor. Log variables like soak frequency, water temperature, and particle size to achieve repeatable results.
Ingredients
4 cups mature, shelled acorns (white oak group preferred for milder taste). Use only healthy, intact nuts.
Clean water for soaking and rinsing. If your tap water is high in minerals or has a taste, use filtered water to avoid off-flavors.
Instructions
- Shell the acorns: Crack shells with a nutcracker or small hammer and remove nutmeats without crushing them.
- Chop the nutmeats: Coarsely chop to increase surface area for efficient leaching.
- Leach the tannins: Cold: cover with water, change 3–4 times daily until clear (3–7 days). Hot: simmer in fresh water for 20–30 minute cycles until bitterness subsides.
- Dry the acorns: Spread pieces on baking trays and dehydrate at 200°F / ~95°C until crisp, 4–6 hours. Ensure pieces snap cleanly before grinding.
- Grind into flour: Mill in small batches; sift and regrind coarse bits for uniform texture.
- Store appropriately: Seal in airtight containers; refrigerate or freeze for extended keeping.
Work steadily through each step and document any deviations. Small adjustments to particle size and drying time change how the flour hydrates in recipes.
Tips for Success and Serving Suggestions
Start with a small test bake to understand how acorn flour affects dough hydration and crumb. Note adjustments in water, fat, and binders to reach a preferred texture.
Acorn flour pairs well with honey, toasted nuts, and robust herbs. Use it to thicken stews, enrich pancakes, or add body to rustic flatbreads.
- Flavor pairing: Combine with rye, spelt, or gluten-free blends for balanced results.
- Visual appeal: Garnish pancakes or breads with toasted seeds to highlight the rustic character.
- Labeling: Date containers and rotate stock to use older flour first.
Concluding Remarks
Transforming acorns into usable flour rewards careful sorting, consistent leaching, and measured drying. Each controlled step reduces bitterness, prevents spoilage, and improves final texture.
Keep a processing log for species, soak duration, drying temperature, and yield. Over a few batches you will build a dependable routine and predictable results that highlight acorn flour’s unique, storied flavor.
FAQ
How do I know when an acorn is ready to process?
Choose acorns that are fully brown, heavy, and intact. Immature green acorns retain more tannin and require longer leaching.
Perform a visual inspection and a float test before shelling to reduce time spent on compromised nuts.
Which leaching method preserves the most nutrients?
Cold leaching preserves heat-sensitive compounds and delicate aromatics but takes longer. Hot methods shorten time but can alter texture and color.
Test small batches with your preferred species to determine which method delivers the taste and texture you want.
Can I use acorn flour for gluten-free baking?
Yes. Acorn flour is naturally gluten-free but lacks gluten’s binding and elasticity. Combine it with other gluten-free flours and use binders like psyllium or xanthan gum.
Start with modest substitution ratios—10–30%—and adjust based on crumb and moisture from trial bakes.
How long will homemade acorn flour keep?
Stored cool and airtight, acorn flour lasts several weeks at room temperature and several months in the freezer. Rancidity is the primary spoilage mode.
Check for off-odors before use and label containers with the processing date to monitor freshness over time.
Is processing acorns safe regarding toxins or allergens?
Proper leaching removes tannins that cause bitterness and potential digestive upset for some people. Always leach until no bitterness remains.
People with tree-nut allergies should avoid acorn consumption unless they have medical clearance. For allergy concerns, consult a healthcare professional.
For additional technical context on drying and preservation, see the dehydration overview on Food dehydration. These references help when adapting milling and storage methods.
See also: Acorn flour


