
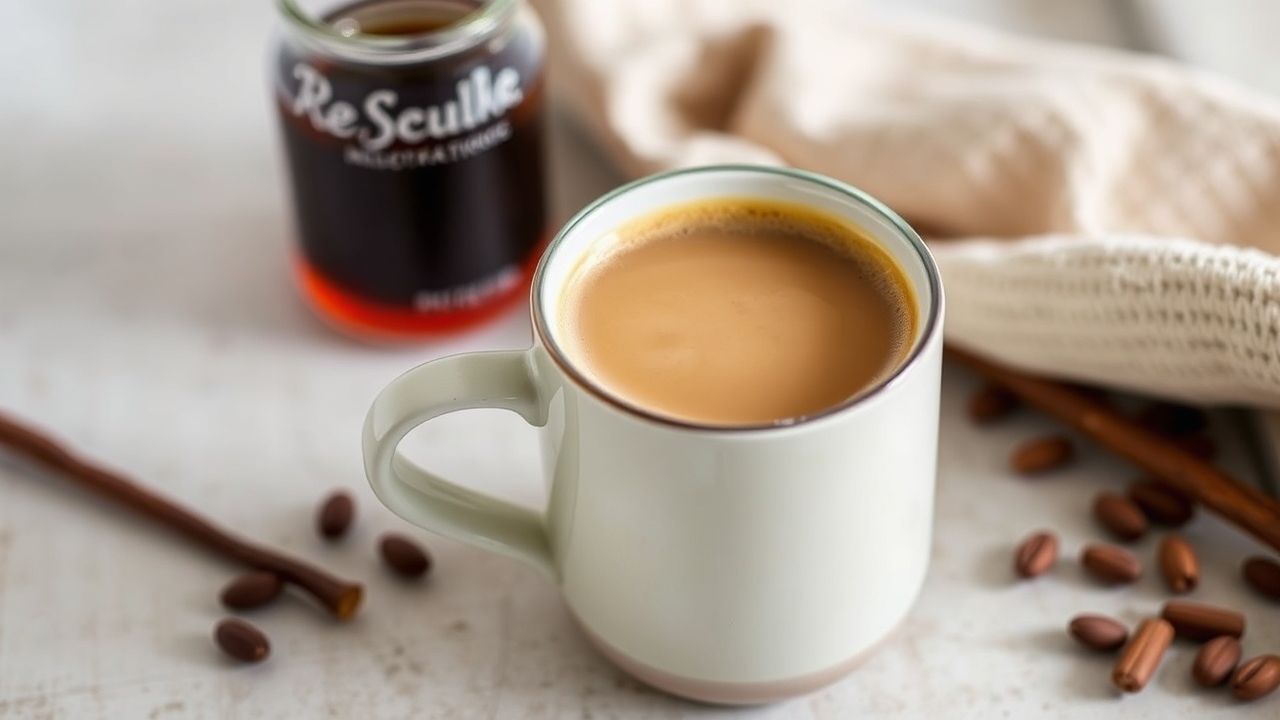
There is a simple ritual that improves every morning: a splash of homemade vanilla creamer. This version uses whole ingredients and controlled sweetness to deliver consistent flavor and texture.
- Make vanilla creamer with real pods or pure extract for authentic aroma.
- Balance heavy cream and milk for silky body without overpowering your brew.
- Adjust sweetness and spices to match espresso, drip coffee, or cold brew.
- Store in the fridge in an airtight container and use within two weeks for best quality.
Choosing the Perfect Vanilla Beans and Extracts for Your Creamer
Vanilla defines the profile of this creamer, so select the ingredient intentionally. Use whole vanilla beans for the deepest aroma; split them and scrape the seeds into the warm base to maximize extraction.
Alternatively, a high-quality vanilla extract provides consistent flavor and less prep time. Compare the flavor notes of Bourbon, Tahitian, and Mexican vanilla to match your desired aroma.
For background on the crop and varieties, review general vanilla information at vanilla on Wikipedia. For details on commercial extracts, see vanilla extract.
Beans vs. Extract: Practical differences
Whole beans deliver visible seeds and a rounded, complex flavor when steeped. They require a small time investment but reward with authentic notes and natural flecks in the creamer.
Pure extract gives predictable intensity and scales easily. When using extract, add it after removing the pot from heat to preserve volatile aromatics.
Mastering the Cream Base for a Smooth and Creamy Texture
Texture depends on the dairy ratio and gentle heat management. A 1:1 ratio of heavy cream to whole milk creates a rich yet pourable creamer that blends cleanly into coffee.
Warm the mixture slowly over medium-low heat; stop heating when the mix steams and small bubbles form at the edge. Vigorous boiling breaks down proteins and dulls flavor.
Need dairy context? The composition and processing of milk relate to broader dairy science described at milk on Wikipedia. Use that as a reference for fat content and labeling.
Dairy-free bases and emulsification
For vegan alternatives, use full‑fat coconut milk or a creamy oat milk. These bases alter mouthfeel, so test small batches to match your texture expectation.
When using plant milks, whisk the creamer well and consider a small stabilizer like a pinch of xanthan gum to reduce separation if you plan to store for more than a few days.
Customizing Sweetness and Flavor Notes to Suit Your Taste
Begin with a baseline: 2 tablespoons of sweetener per cup of base, then adjust. Taste while warm; sweetness perception changes as the mixture cools.
Choose sweeteners by flavor profile. Granulated sugar gives neutral sweetness, maple syrup adds caramel notes, and honey contributes floral complexity.
Use small amounts of complementary extracts or ground spices to build layers. A quarter teaspoon of cinnamon or a few drops of almond extract can shift the creamer toward seasonal or dessert profiles.
After adjusting flavors, allow the creamer to rest for several hours in the fridge so the profile harmonizes. Re-taste before final bottling and tweak if needed.
Storing and Serving Tips to Keep Your Vanilla Coffee Creamer Fresh
Store creamer in an airtight glass jar and refrigerate immediately after cooling. Proper cooling and sealing reduce microbial risk and preserve aroma.
Refrigerated, the creamer keeps well for up to two weeks. Always shake before use to re-emulsify fats and dispersed solids for consistent texture.
For refrigeration science and food safety context, see refrigeration on Wikipedia.
Reheat gently when serving warm: microwave short bursts or warm on the stovetop, stirring often. Avoid prolonged high heat which will degrade vanilla aromatics.
Prep, Yield, Time and Difficulty
Preparation Time: 10 minutes active; infusion 10–15 minutes; total about 25 minutes. These steps yield approximately 2 cups of creamer.
Yield: Roughly 16 fluid ounces per batch. Difficulty: Easy. The method suits beginners and home baristas who want better control than store-bought options.
Ingredients
1 cup heavy cream and 1 cup whole milk form the basic ratio. Use full-fat coconut milk for a dairy-free swap.
1 Madagascar Bourbon vanilla bean, split and scraped or 2 tablespoons pure vanilla extract. Add 2 tablespoons granulated sugar or equivalent sweetener. Optional: 1/4 teaspoon ground cinnamon or nutmeg.
Instructions
1) Combine cream and milk in a medium saucepan. Warm over medium-low heat until steaming but not boiling, about 5 minutes. Stir periodically to prevent skin formation.
2) Add scraped vanilla seeds plus the split pod; lower heat and simmer gently for 10–15 minutes to infuse. Stir occasionally. Remove from heat and discard the pod.
3) Stir in vanilla extract (if using) and sugar. Taste and adjust sweetness. Cool to room temperature, then transfer to a sanitized airtight container and chill.
4) Shake well before each use. Use within two weeks and always check for off-odors or separation that doesn’t recombine after shaking.
Chef’s Notes
Use pure vanilla extract labeled as such; vanillin-only imitation extracts lack the compound complexity of real vanilla. When in doubt, favor whole beans for maximum aroma.
For richer mouthfeel without raising fat content drastically, reduce milk slightly and increase cream. Conversely, to lighten the creamer, increase milk ratio and reduce cream.
Serving Suggestions
This creamer pairs with espresso, drip coffee, and cold brew. Adjust concentration: use more creamer for drip coffee, less for espresso to retain body and crema.
Garnish options include a dusting of cinnamon, a small curl of vanilla pod, or a cinnamon stick stirrer for presentation. For a mocha variation, whisk in a teaspoon of unsweetened cocoa before bottling.
Nutrition Per Serving
Per 2-tablespoon serving: approximately 50 calories, 1 g protein, 3 g carbohydrates, and 4 g fat. Values vary by exact ingredients and substitutions.
| Nutrient | Per 2 tbsp Serving |
|---|---|
| Calories | 50 |
| Protein | 1 g |
| Carbohydrates | 3 g |
| Fat | 4 g |
Related Notes and Variations
To create a shelf-stable commercial-style creamer requires pasteurization and stabilizers; this home recipe prioritizes flavor and freshness over long shelf life. Keep batches small for peak quality.
Try flavor swaps: espresso-friendly caramel, cocoa for mocha, or a light citrus twist using finely grated orange zest. Test small batches to refine ratios.
FAQ
How long does homemade vanilla creamer last?
Refrigerated in a sealed jar, it stays fresh up to two weeks. Discard if you detect sour smell, visible mold, or separation that doesn’t mix after shaking.
Can I make this creamer vegan?
Yes. Use full-fat coconut milk or creamy oat milk and replace heavy cream with coconut cream. Note that flavor and mouthfeel will differ from dairy versions.
Should I pasteurize homemade creamer?
Home pasteurization is unnecessary for short-term refrigerated use; however, heating to at least 160°F (71°C) briefly reduces microbial load. Cool and refrigerate promptly.
Can I scale the recipe for gifts or parties?
Yes. Multiply ingredients proportionally and bottle in clean, sterilized jars. Include a label with the preparation date and recommended use-by date.
Why use a vanilla bean instead of only extract?
Beans add natural volatile compounds and visual appeal from the seeds. They create depth that pure extract alone may not achieve in a single batch.
For background reading on coffee as a beverage and how creamers interact with brew profiles, consult general coffee information at coffee on Wikipedia.
See also: vanilla creamer


