
Creamy Delight: Your Ultimate Homemade Cream Cheese Guide
Imagine a velvety spread that turns every bite into indulgence. This guide explains how to make smooth, tangy homemade cream cheese using straightforward techniques you can replicate in any kitchen.
- Fresh flavor: Homemade cream cheese delivers brighter tang and cleaner ingredients than most mass-produced spreads.
- Simple tools: A pot, cheesecloth, thermometer and blender produce consistent results.
- Versatile base: The finished cheese adapts to sweet or savory infusions, from herbs to citrus.
- Storage: Proper chilling extends freshness; freeze small portions for long-term use.
Introduction
Homemade cream cheese combines texture control with flavor freedom. Many cooks prefer it for its fresh tang and ability to carry added flavors precisely.
Also, making your own teaches useful dairy techniques that apply to other soft cheeses. For background on the product, review the cream cheese overview on Wikipedia.
Prep and Cook Time
Preparation: About 15 minutes active. Heat and curd steps require attention but not constant work.
Straining/Setting: 8–12 hours is typical; overnight chilling produces the best texture. Allow time for whey to drain naturally.
Yield
Yield for this ratio is approximately 1 cup (8 ounces) of finished cream cheese. That amount serves four as a spread or flavors two dishes when used as an ingredient.
Scaling is linear: double the milk and cream to double the yield. Adjust straining time for larger volumes to ensure consistent firmness.
Difficulty Level
Easy to intermediate. The method uses heat, acid, and straining rather than cultures or rennet, which simplifies sanitation and timing.
However, achieving perfectly smooth texture benefits from careful temperature control and a high-speed blender or food processor.
Essential Ingredients and Tools
These items produce a reliable, creamy result. Use whole milk with a proportion of heavy cream for richness and structure.
Refer to the milk overview for differences between pasteurization types and how they affect curd formation.
Ingredients
- 4 cups whole milk (avoid ultra-pasteurized for best curd)
- 2 cups heavy cream, cold
- 3 tbsp white vinegar or freshly squeezed lemon juice (acid for curdling)
- 1/2 tsp fine sea salt (adjust to taste)
Tools
- Large heavy-bottomed pot
- Digital thermometer
- Fine-mesh strainer and cheesecloth
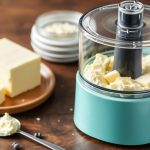
- Mixing bowl and food processor or high-speed blender
Step-by-Step Guide to Ideal Texture
This method focuses on temperature control and gentle handling to preserve fat structure. Measure temperature to avoid overheating the dairy, which can yield a grainy result.
Note that milk curdling by acid differs from culture-based cheese making. For technical context, consult the cheese entry on Wikipedia.
Steps
- Heat the dairy blend: Combine milk and cream in the pot. Warm over medium heat to 185°F (85°C), stirring occasionally. Use a digital thermometer to hold the setpoint without boiling.
- Add the acid: Remove from heat and stir in vinegar or lemon juice slowly. Let sit undisturbed for 10–15 minutes while curds form and whey separates.
- Strain the curds: Line a fine-mesh strainer with double-layer cheesecloth. Pour in the curds and allow whey to drain into a bowl. Cover and refrigerate for 8–12 hours to thicken the curd mass.
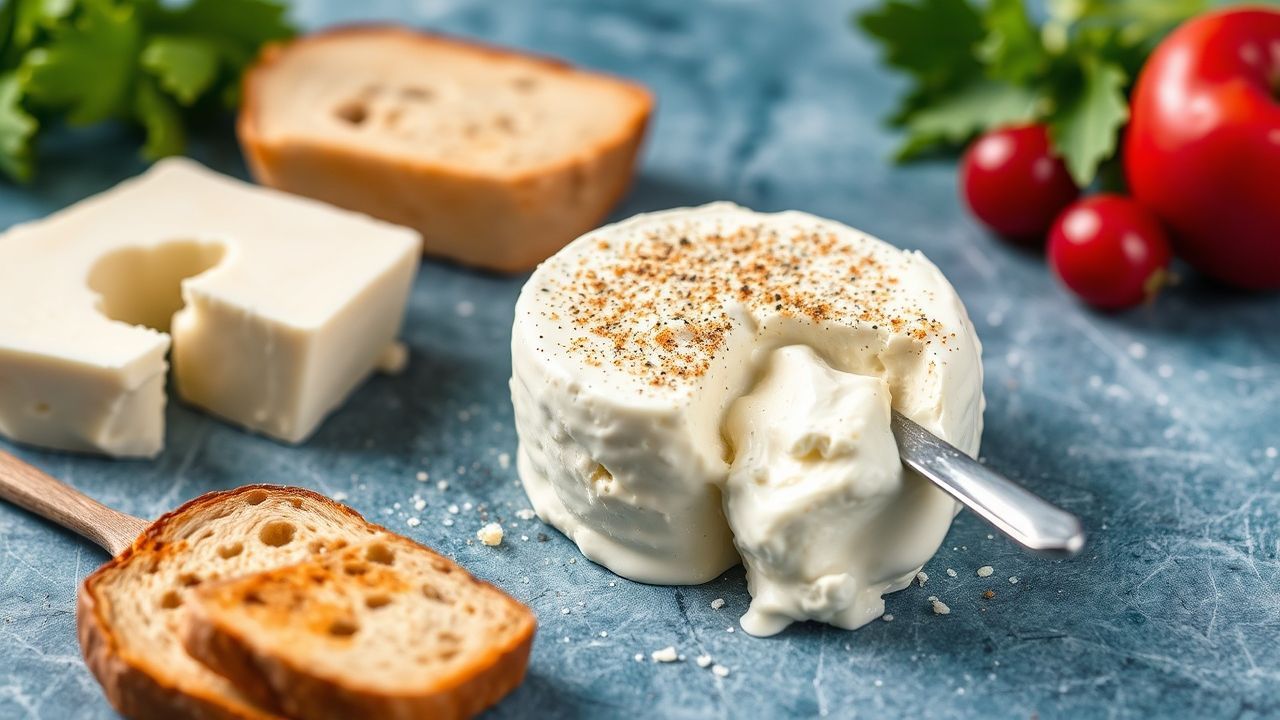
- Blend to smoothness: Transfer drained curds to a food processor. Add salt and pulse until smooth and spreadable. Add a tablespoon of cream if you need extra silkiness, then blend briefly.
- Chill and store: Spoon into an airtight container and chill for at least two hours before serving. The flavor will settle and the texture will firm slightly.
Notes on Technique
Slow cooling and gravity drainage produce a silkier mouthfeel than forced pressing. Also, cold cream added at the blending step helps keep fat emulsified.
If you prefer a tang from cultures, you can introduce a cultured dairy starter instead of acid. That approach changes flavor and aging potential.
Creative Flavor Infusions
Use homemade cream cheese as a neutral canvas. It holds both delicate and bold additions without losing structure.
For dessert-focused applications, consider citrus zest and honey. For savory spreads, herbs, smoked spices, or roasted vegetables provide depth.
Suggested Infusions
- Herb Garden: Finely chop dill, chives, and parsley and fold into the finished cheese for a fresh profile.
- Citrus & Honey: Add lemon or orange zest with a light drizzle of honey for sweet-tart balance that pairs with fruit or pastries.
- Smoky Heat: Blend smoked paprika and chipotle powder for a smoky, spicy kick that suits savory toasts.
- Roasted Pepper & Garlic: Mash roasted peppers and roasted garlic into the cheese for a robust sandwich spread.
Chef’s Notes & Tips for Success
Small process adjustments yield measurable texture improvements. For example, longer draining time increases density and reduces moisture.
Also, keep equipment and hands clean. Milk is a hospitable environment for bacteria, so sanitation prevents off-flavors and spoilage.
Try different acids for subtle flavor shifts. Lemon juice tends to give a bright, floral tang, while white vinegar yields a neutral acidity.
If texture issues arise, add a tablespoon of yogurt or sour cream during blending to increase creaminess without thinning the cheese.
Pro-Cautions
Follow basic food safety. Always refrigerate within two hours and discard any batch with off-odors or visible mold.
When freezing, portion into small containers or silicone molds. Thaw in the refrigerator and re-whip briefly to refresh texture.
Remember that added ingredients like herbs and garlic can reduce shelf life slightly, so plan use accordingly.
Serving Suggestions
Homemade cream cheese shines on toasted artisan bread or warm bagels. Also, it pairs exceptionally well with smoked salmon and thinly sliced cucumber for a classic combination.
For desserts, use it as a base for frostings or a lighter cheesecake. For reference on cheesecake techniques and history, see the cheesecake article.
Nutritional Snapshot
Estimate per 2 tbsp: roughly 100 kcal, 2 g protein, 1 g carbs, 9 g fat. Values vary by milk-fat content and added ingredients.
For lower-fat options, reduce heavy cream and accept a slightly less dense mouthfeel. Alternatively, blend in yogurt to lighten the profile.
| Nutritional Info (per 2 tbsp) | Calories | Protein | Carbs | Fat |
|---|---|---|---|---|
| Homemade Cream Cheese | 100 kcal | 2 g | 1 g | 9 g |
Troubleshooting
If curds remain too soft, extend straining time and refrigerate longer. Also, ensure your cheesecloth is fine enough to retain particles.
If the result is crumbly, incorporate a small amount of cream or yogurt during blending and pulse until cohesive. Also, check that you did not overcook the milk.
FAQ
Q: Why make cream cheese at home?
A: Fresh-made cream cheese offers cleaner flavor and ingredient control. Also, you can tailor texture and salt level to precise preferences.
Moreover, it avoids many preservatives found in commercial varieties and allows creative infusions for unique spreads.
Q: Can I use low-fat milk?
A: You can, but expect a thinner, less rich texture. Heavy cream provides the fat matrix that gives cream cheese its characteristic mouthfeel.
Therefore, to mimic full-fat results with low-fat milk, add cream or a small amount of mascarpone during blending.
Q: How long will homemade cream cheese last?
A: Stored in an airtight container in the refrigerator, it keeps about one week. For longer storage, freeze small portions up to three months.
Always inspect visually and by smell before using. If in doubt, discard to avoid foodborne risk.
Q: Can I use this for cheesecakes and desserts?
A: Yes. Homemade cream cheese works well in cheesecakes and frostings. For baked cheesecakes, ensure your batter is smooth and free of excess whey.
Also, for professional texture, some bakers blend homemade cream cheese with a small proportion of store-bought cream cheese to standardize moisture.
Q: Are there lactose-friendly options?
A: Homemade cream cheese still contains lactose unless you use lactose-free milk. Alternatively, use plant-based recipes designed for dairy-free spreads.
For readers exploring alternatives, adjusting technique and emulsifiers is necessary when switching to non-dairy bases.
Enjoy experimenting with textures and flavors. With measured steps and a few trials, you will consistently produce smooth, flavorful cream cheese that elevates breakfasts, snacks, and desserts.
See also: cream cheese


