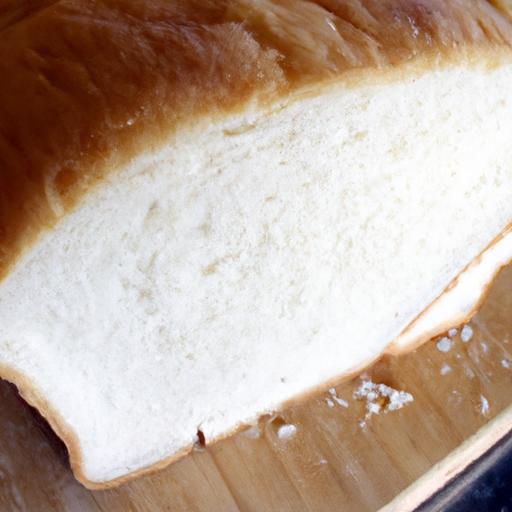
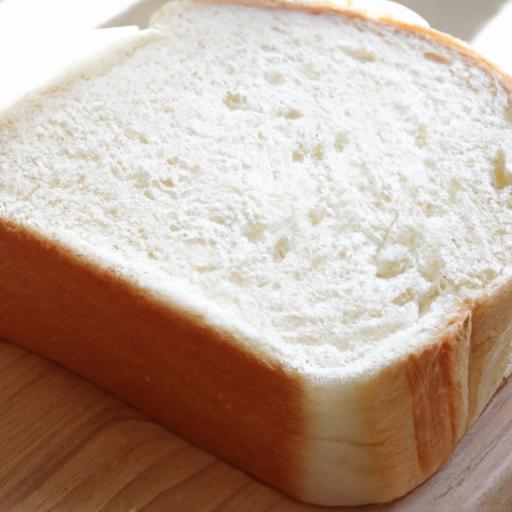
There’s something undeniably comforting about the soft, pillowy texture of homemade white sandwich bread-a humble staple that holds the power to elevate any meal. Whether it’s the base of a cherished childhood sandwich, the perfect companion to a bowl of soup, or simply a warm slice slathered with butter and jam, white bread has a timeless appeal. But here’s the secret: creating that irresistibly fluffy loaf from scratch is simpler than you might think. In this guide, we’ll walk you through an easy, straightforward recipe that turns basic ingredients into a soft, golden masterpiece. Say goodbye to store-bought loaves and hello to the rewarding aroma and taste of your very own homemade white sandwich bread.
Fluffy homemade white sandwich bread embodies the heart of comfort baking, transforming simple pantry staples into a pillowy loaf that melts in your mouth. This classic bread, cherished worldwide for its irresistibly soft texture and even crumb, recalls childhood memories of warm kitchen aromas and the satisfaction of a perfect sandwich. Achieving this delightful texture is both an art and a science-combining carefully chosen ingredients with precise techniques to coax tenderness and heighten the bread’s rise.
Prep and Cook Time
- Preparation: 20 minutes
- First rise (bulk fermentation): 1 to 1.5 hours
- Shaping and proofing: 45 minutes to 1 hour
- Baking: 30 to 35 minutes
- Total Time: Approximately 3 hours
Yield
- 1 loaf (about 12 slices)
Difficulty Level
- Easy to Medium – perfect for beginners ready to elevate their bread-making skills
Ingredients
- 3 ½ cups all-purpose flour, sifted (approx. 420g)
- 1 cup whole milk, warm (110°F / 43°C)
- ¼ cup unsalted butter, softened
- 2 tbsp granulated sugar
- 1 ½ tsp fine sea salt
- 2 ¼ tsp (1 packet) active dry yeast
- 2 tbsp warm water (110°F / 43°C) for proofing yeast
- 1 large egg, room temperature
- Optional: 1 tbsp honey or malt syrup for extra softness and subtle sweetness
Instructions
- Proof the yeast: In a small bowl, combine the warm water and active dry yeast with 1 tsp of sugar. Let it sit for 5 to 10 minutes until frothy and bubbly-this signals that your yeast is active and ready.
- Mix wet ingredients: In a large mixing bowl, whisk together the warm milk, softened butter, remaining sugar, salt, and egg until smooth and uniform.
- Combine yeast mixture with wet ingredients: Pour in the proofed yeast mixture and optional honey or malt syrup, stirring gently.
- Add flour gradually: Incorporate the sifted flour, 1 cup at a time, mixing with a wooden spoon or dough hook attachment on low speed. Once the dough begins to hold together, transfer it to a floured surface.
- Knead to perfect elasticity: Knead vigorously for about 10 minutes until the dough is smooth, soft, and slightly tacky but not sticky. Proper kneading develops gluten, essential for that open, even crumb texture.
- First rise (bulk fermentation): Lightly grease a large bowl with butter or oil. Place the dough inside, turning once to coat evenly. Cover with a clean towel or plastic wrap and allow to rise in a warm, draft-free spot for 1 to 1.5 hours, or until doubled in size.
- Shape the dough: Gently deflate the dough on a lightly floured surface. Shape it into a tight loaf by folding the edges underneath to create surface tension, which encourages an even rise and beautiful crust formation.
- Second proofing: Place the shaped dough in a greased 9×5-inch loaf pan. Cover again with a towel or plastic wrap and let it proof for 45 minutes to 1 hour, until it’s slightly above the rim of the pan.
- Bake to golden perfection: Preheat your oven to 350°F (175°C). Bake the loaf for 30-35 minutes, rotating halfway for even browning. The bread is done when the crust is golden brown and the internal temperature reaches 190°F (88°C).
- Cool completely: Remove the bread from the pan and cool on a rack before slicing to prevent a gummy texture and maintain fluffiness.
Tips for Success: Mastering Fluffy Homemade White Sandwich Bread
- Milk and Butter: These enrich the dough, providing tenderness and moisture that keep bread soft for days. Using full-fat milk and melted unsalted butter improves flavor and crumb texture.
- Precise Kneading: Developing gluten through kneading creates that signature fluffy structure. Avoid under-kneading, which results in dense loaves, or over-kneading, which can make the bread tough.
- Proofing Temperature: Keep your proofing environment warm (75°F-85°F) to encourage yeast activity. Cold areas slow rise and affect crumb development.
- Shaping with Intention: Proper shaping eliminates large air pockets, leading to an even crumb. Perform gentle but deliberate folds to build tension on the dough’s surface.
- Variations: Add crushed garlic and shredded cheese for savory blends, or swirl in cinnamon and raisins for a sweet twist. Substituting half the flour with bread flour can yield a chewier result.
- Storage: Keep sliced bread in an airtight container at room temperature for up to 3 days or freeze slices individually, wrapped tightly, for up to a month to retain freshness.
Serving Suggestions
Enjoy your fluffy homemade white sandwich bread fresh with classic toppings like creamy butter, homemade jam, or your favorite nut butter. Elevate your sandwiches by layering roasted vegetables, deli meats, or melting sharp cheddar between toasted slices. For a charming brunch, serve thick-cut French toast dusted with powdered sugar and fresh berries. Garnish with a scattering of sesame seeds or poppy seeds before baking to add a delightful crunch and visual appeal.
| Nutrition per Slice (Approx.) | Calories | Protein | Carbohydrates | Fat |
|---|---|---|---|---|
| 1 Slice | 110 kcal | 3 g | 20 g | 2 g |
Related Recipe: Check out our Classic Whole Wheat Bread for a hearty alternative.
For detailed yeast science and bread-making tips, visit the King Arthur Baking Guide.

Q&A
Q1: What makes homemade white sandwich bread fluffier than store-bought versions?
A1: Fluffiness in homemade white sandwich bread comes down to a perfect balance of ingredients, kneading, and proving times. Using quality bread flour with a good protein content, the right amount of yeast, and allowing the dough to rise slowly helps develop gluten strands that trap air bubbles, resulting in that soft, pillowy texture. Plus, gentle handling and precise baking temperatures ensure a tender crumb that melts in your mouth.
Q2: Can I make this fluffy white sandwich bread without any fancy equipment?
A2: Absolutely! This recipe is designed to be simple and accessible. All you need is basic kitchen tools: a mixing bowl, a spoon or spatula, a loaf pan, and your oven. No stand mixers or bread machines required-just a little elbow grease and patience for kneading and rising, and you’ll be rewarded with fresh, warm slices straight from your own oven.
Q3: How long does it take to prepare and bake this bread?
A3: From start to finish, expect about 3 to 4 hours. This includes mixing, kneading (about 10 minutes), the first rise (typically 1 to 1.5 hours), shaping, second rise (around 45 minutes), and then baking for approximately 30 minutes. While it’s not “instant,” the wait is well worth the end result.
Q4: Can I customize the recipe to make it healthier?
A4: Definitely! While this is a classic white bread recipe focusing on fluffiness and simplicity, you can incorporate whole wheat flour for added fiber or swap some sugar for natural sweeteners like honey. Keep in mind that changing flours alters the dough’s hydration and texture, so experiment gradually to maintain that soft crumb you’re aiming for.
Q5: What are some tips to ensure my sandwich bread doesn’t turn out dense?
A5: Avoid dense bread by making sure your yeast is fresh and active-proof it in warm water if needed. Knead enough to develop gluten but don’t overdo it. Let the dough rise until it doubles in size, not more or less. Also, don’t skip the second rise; it helps create that airy structure. Finally, bake at the recommended temperature-too low and your loaf might be heavy rather than fluffy.
Q6: How should I store homemade white sandwich bread to keep it fresh?
A6: Cool your bread completely before wrapping it tightly in plastic wrap or placing it in a sealed container. Store it at room temperature for up to 3 days. For longer keeping, slice and freeze the bread in airtight bags-toast slices directly from the freezer for a fresh-baked taste anytime.
Q7: Is this recipe suitable for beginners learning to bake bread?
A7: Yes! This recipe is perfect for new bakers because it uses simple ingredients and straightforward steps without requiring specialized equipment or skills. Plus, the clear instructions and forgiving technique help build confidence, making it a delightful introduction to bread baking.
Wrapping Up
Baking your own fluffy homemade white sandwich bread is more than just a kitchen task-it’s a rewarding journey that fills your home with the warm aroma of fresh-baked goodness. With this simple recipe guide in hand, you have all the tools you need to create bread that’s soft, pillowy, and perfect for every sandwich or slice. So why settle for store-bought when you can master the art of homemade bread? Roll up your sleeves, enjoy the process, and savor each tender bite-because the best sandwiches start with the freshest, fluffiest bread made by you. Happy baking!


