
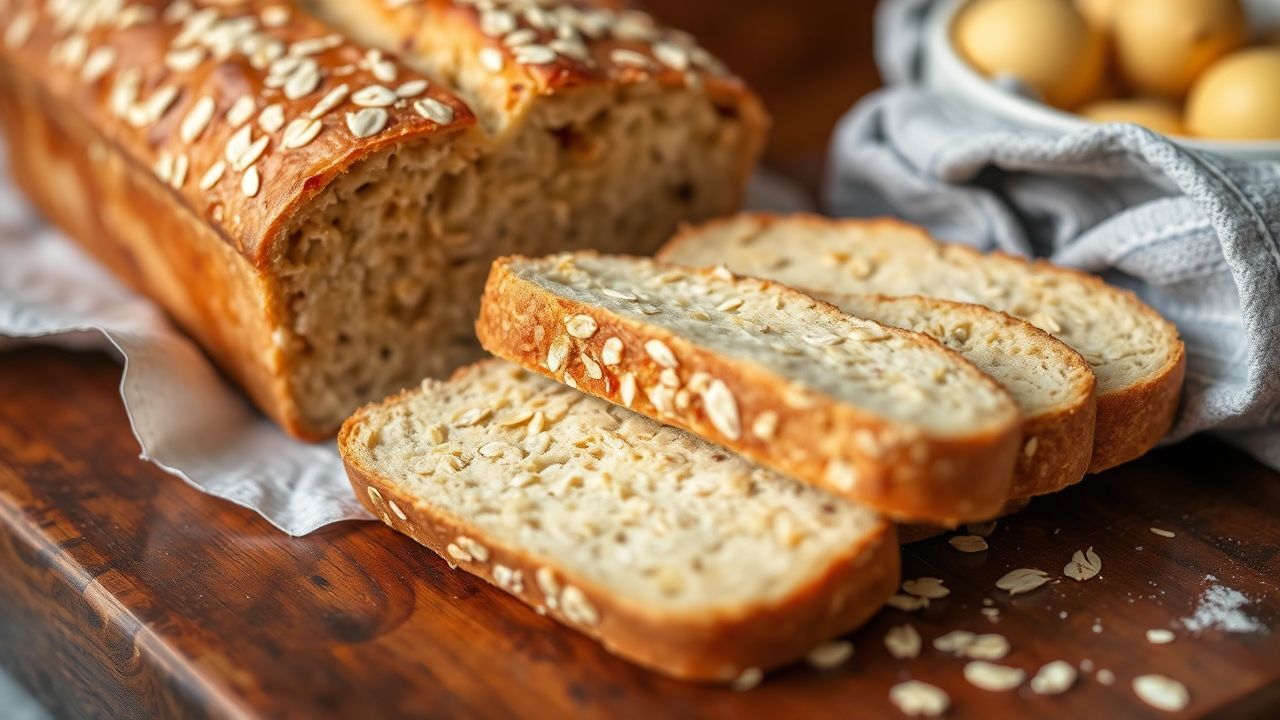
There is a particular charm to a warm, freshly baked loaf that draws people to the kitchen. Honey oat bread pairs the soft, sweet notes of honey with the nutty texture of oats, producing a loaf that feels wholesome and satisfying.
- Make-ahead friendly: dough freezes well after the first rise.
- Balanced sweetness: honey hydrates and feeds yeast while keeping the crumb tender.
- Texture matters: rolled oats add chew while milk and butter soften the crumb.
Why Honey Oat Bread Works
Honey acts as a natural humectant. It holds moisture, so the crumb stays soft longer than basic white bread.
Oats contribute both flavor and structure. They absorb liquid and provide a pleasant chew without overpowering the loaf.
For a focused primer on bread science, consult the overview on bread.
Prep and Cook Time
Set realistic timing before you start. Most of the time is passive proofing; active hands-on time stays moderate.
Use the timeline below to plan kitchen space and serving schedule.
- Preparation: 25 minutes
- First Rise: 1 hour 15 minutes
- Second Rise: 45 minutes
- Baking: 30-35 minutes
- Total Time: Approximately 3 hours
Yield and Difficulty
This recipe yields one standard 9×5 inch loaf, about 10 slices. It suits home bakers with basic kneading experience.
Label the recipe as medium difficulty. You will practice kneading, shaping, and judging proof.
Ingredients
Gather ingredients precisely. We quantify key items so you can reproduce consistent results.
Substitutions appear later in the tips section to help with dietary needs.
- 3 cups all-purpose flour, sifted
- 1 cup rolled oats, plus extra for topping
- 2 tbsp honey (raw or wildflower recommended)
- 1 cup warm water (about 110°F / 43°C)
- 2 ¼ tsp active dry yeast (one packet)
- 2 tbsp unsalted butter, melted and slightly cooled
- 1 tsp fine sea salt
- ½ cup whole milk, warmed
- 1 large egg, room temperature
Instructions
Work in clear stages: activate yeast, combine, knead, proof, shape, then bake. Each stage affects crumb, rise, and crust.
Maintain short, timed steps and monitor dough texture rather than rigid flour amounts—dough hydration can vary.
1. Activate the yeast
Combine warm water and honey in a small bowl. Sprinkle the yeast over the surface and let sit for 5–10 minutes until foamy.
Foam confirms yeast vitality and readiness. If no foam appears, discard and try fresh yeast.
2. Mix wet ingredients
In a large bowl, whisk the egg, warm milk, and melted butter until smooth. Fold in the yeast mixture gently so temperature stays controlled.
Use a wooden spoon or mixer on low speed to integrate liquids before adding flour.
3. Combine dry ingredients
Whisk sifted flour, rolled oats, and salt in a separate bowl. Add the dry mix gradually to the wet ingredients until a shaggy dough forms.
Stop adding flour when the dough pulls together but remains slightly tacky—this prevents a dry, dense loaf.
4. Knead the dough
Turn the dough onto a lightly floured surface. Knead for 8–10 minutes using the push-fold-turn method until smooth and elastic.
Proper gluten development gives the loaf chew and oven spring. The dough should feel soft and resilient, not excessively sticky.
5. First proof (bulk fermentation)
Place dough in a lightly greased bowl and cover with plastic wrap or a damp towel. Let it rise in a warm spot until doubled, about 1–1¼ hours.
A slightly warm oven (turned off) with the light on works well. Avoid hot spots that kill yeast.
6. Shape and second proof
Punch down the dough gently to release large gas pockets. Shape into a tight loaf and transfer to a greased 9×5-inch pan.
Sprinkle extra oats on top and press lightly. Cover and let rise until slightly puffed, 40–45 minutes.
7. Bake and cool
Preheat oven to 375°F (190°C). Bake for 30–35 minutes until the crust turns golden and the loaf sounds hollow when tapped.
Brush baked loaf with melted butter for sheen and flavor. Cool on a wire rack to set the crumb before slicing.
Tips for Success
Small adjustments make a big difference. Control dough hydration and proofing temperature for repeatable results.
Use fresh yeast and measure liquids by weight when possible for precision.
Honey and oat choices
Choose a mild honey for subtle sweetness or a varietal honey for more character. Both affect aroma and color of the crumb.
Rolled oats give structure and chew. For a softer loaf, process half of the oats into a finer texture before mixing.
When kneading, rely on tactile cues: the dough becomes smooth and springs back when gently poked. Over-kneading is rare by hand but avoid adding excessive flour.
Substitutions and Variations
Swap whole milk for plant-based milks to make the loaf dairy-free. Replace butter with neutral oil or plant-based margarine.
For higher protein, use a portion of bread flour. For gluten-free, choose a tested gluten-free blend and follow binder recommendations.
Serving Suggestions
Serve slices warm with butter, additional honey, or soft cheeses. The loaf pairs well with apples, tangy spreads, or as sandwich bread for savory fillings.
For a quick upgrade, toast slices and top with mashed avocado, lemon, and chili flakes for contrast.
Nutrition Snapshot
This table gives a general estimate per slice (1/10 loaf). Values vary by ingredient brands and substitutions.
| Nutrient | Per Slice (approx.) |
|---|---|
| Calories | 160 kcal |
| Protein | 5 g |
| Carbohydrates | 28 g |
| Fat | 3 g |
Resources and Further Reading
Expand your technical knowledge using reliable references on core ingredients and methods.
Read about yeast biology and fermentation on the yeast entry. Explore the properties of honey and its hygroscopic behavior. Learn more about oat varieties at the Avena sativa page.
FAQ
How do I know if my yeast is active?
Proof yeast in warm water and a little honey. If it becomes foamy and rises within 5–10 minutes, it is active and safe to use.
Can I use quick-rise yeast in this recipe?
Yes. If you use instant or quick-rise yeast, reduce the first rise time and watch the dough closely to prevent over-proofing.
How should I store the finished loaf?
Keep the loaf at room temperature in a paper bag or bread box for 2–3 days to preserve crust and texture. For longer storage, slice and freeze.
What if my dough feels too sticky?
Add flour sparingly, one tablespoon at a time, until the dough is manageable. Sticky dough can still produce a good loaf if handled gently.
Can children help with this recipe?
Yes. Kids can measure, mix, and decorate with oats. Supervise heating, kneading, and any tasks around the oven.
Mastering honey oat bread rewards patience and small technical gains. Follow the steps, watch dough behavior, and adjust to your kitchen environment for consistent, golden loaves.
See also: Honey Oat


