
Rye bread delivers that dense crumb, deep flavor, and crackling crust that define a true rustic loaf. This guide supplies precise ratios, proofing cues, and oven-steam technique so you can reproduce bakery-style rye bread at home with confidence.
- Flavor focus: Controlled fermentation develops rye’s earthy, tangy notes.
- Hydration matters: Rye absorbs water differently than wheat; small changes alter texture.
- Oven finish: Early steam and a hot stone maximize oven spring and crust shine.
- Track and refine: Log hydration and proof times to tune the recipe to your flour.
Prep and Cook Time
Plan roughly four hours from start to finish for a single rustic loaf. Most of that time is passive proofing and flavor development.
Hands-on work should take 30–40 minutes. Use bench rests and folds during that window to build structure without overworking the dough.
Yield
This recipe produces one medium loaf that slices into about 10–14 pieces depending on thickness. Expect a moist, dense crumb that keeps well for several days when stored correctly.
Scale easily by doubling ingredients for two loaves, and stagger baking so the oven recovers between batches. Wrap extra loaves in a cotton towel to preserve crust quality and avoid refrigeration unless freezing.
Difficulty Level
Difficulty: Intermediate. You should know how to proof yeast and judge dough feel before attempting rye-heavy loaves.
Rye dough feels stickier and less elastic than wheat dough. Use gentle folding rather than forceful kneading to protect the crumb structure and prevent tearing.
Ingredients
Measure by weight for repeatability. Below are tested ratios that balance rye’s enzymatic behavior with enough gluten to hold structure.
- 350g rye flour, sifted
- 150g bread flour
- 10g active dry yeast
- 10g sea salt
- 320ml lukewarm water (about 40°C)
- 1 tbsp molasses
- 1 tbsp caraway seeds (optional)
- 2 tsp apple cider vinegar
Rye contains active enzymes that digest starch differently than wheat. For structural context consult the rye overview and the gluten entry for how protein differences affect dough.
Instructions
Follow the eleven steps below in order. Each phase targets yeast activation, controlled hydration, and staged baking for an even crumb and glossy crust.
- Activate the yeast: Dissolve yeast and molasses in lukewarm water and wait until frothy, about 10 minutes. A foamy head confirms active yeast before you mix.
- Mix flours and salt: Combine rye and bread flours with salt in a large bowl, and stir in caraway seeds if using. Even distribution prevents dry pockets and uneven seasoning.
- Blend wet and dry: Make a well and add the yeast mix and vinegar, stirring until a rough, sticky dough forms. Rye dough will be tacky; resist adding excess flour to stiffen it.
- Kneading mastery: Lightly flour a work surface and knead 6–8 minutes with moderate pressure until cohesive. Expect less elasticity than wheat dough; cohesion matters more than stretchiness.
- First proof: Shape into a ball, oil the bowl, and cover. Let rise in a warm spot about 90–120 minutes until noticeably risen but not fully doubled.
- Shape and final rise: Deflate gently, shape into a round loaf, and place on parchment or a floured banneton. Cover and proof another 45–60 minutes for structure and flavor buildup.
- Preheat and prepare the oven: Heat to 230°C (450°F) with a baking stone or heavy tray inside. Place a shallow pan of water on the lower rack to produce steam during the initial bake.
- Score and bake: Score the loaf to control expansion. Bake 15 minutes at 230°C, then reduce to 200°C (400°F) and bake 20–25 minutes until deep brown and hollow-sounding.
- Cool completely: Transfer to a wire rack and let the loaf cool fully before slicing; this sets the crumb and prevents gumminess. Cooling takes at least one hour for dense loaves.
- Adjust for tang: For a tangier profile, increase final proof time or fold in a small rye sourdough starter. See the sourdough entry for wild-fermentation basics.
- Slice and store: Slice as needed. For longer storage freeze slices and toast from frozen to retain texture and flavor.
These steps prioritize controlled hydration and staged heat to balance oven spring with a strong crumb. Keep notes on timings and small adjustments to repeat success in future bakes.
Tips for Success
Small adjustments significantly influence rye bread outcomes. Control hydration deliberately and avoid overworking the dough into a fragile structure.
Use a digital scale and measure ingredients by weight rather than volume for consistent results. Weighing removes variability from flour compaction and humidity.
Allow at least one bench-rested paragraph after the warning so the layout separates the expert callouts. Then check crumb development visually and by touch before baking.
Dough hydration: Rye absorbs more water than wheat; a wetter dough usually yields a moister crumb. Adjust water in 10–20 ml increments if your flour behaves differently.
Bind with bread flour: Adding bread flour gives elastic support and helps the loaf rise. That blend balances rye’s density with extra gluten for improved sliceability.
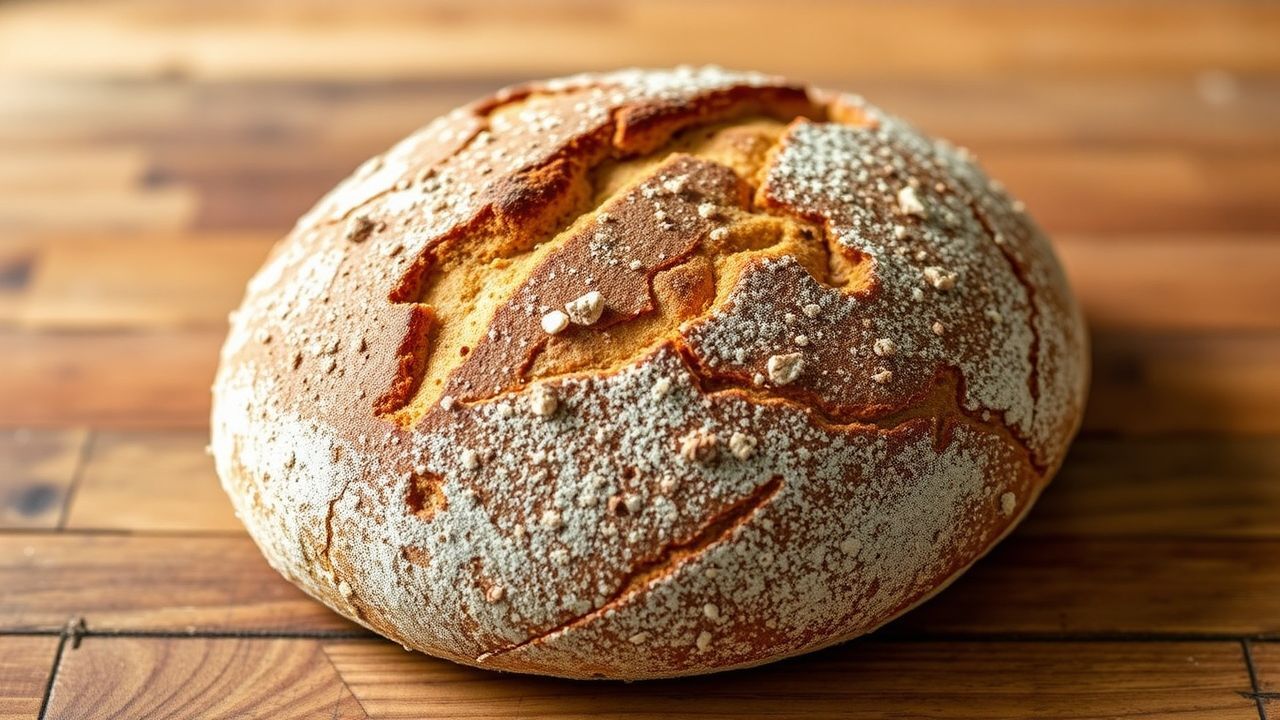
Steam and Crust
Early steam delays crust setting and encourages oven spring. Use a preheated pan of water or quick spritzing during the first bake phase to hold the crust thin while the loaf expands.
After the initial steam window, vent the oven by removing the water pan or opening briefly. That helps the crust crisp and develop a glossy, blistered surface.
Make-Ahead and Storage
Rye freezes well. Slice before freezing and toast straight from frozen for the best texture and convenience.
Wrap cooled loaves in parchment and place inside an airtight bag for the freezer. At room temperature keep a loaf under a cotton towel to preserve the crust for several days.
Serving Suggestions: Elevating Your Rye Bread Experience
Slice rustic rye bread thinly to pair with bold toppings that match its earthy profile. Creamy cheeses, smoked fish, and robust stews complement rye’s density effectively.
Try an open-faced sandwich with smoked salmon, dill, and lemon, or serve with lentil stew for a hearty meal. Simple toppings let rye’s flavor remain the focal point.
Nutritional Snapshot
Below is a concise nutritional estimate per slice to help with meal planning. Values vary by brands and exact slice size.
| Nutrient | Per Slice |
|---|---|
| Calories | 120 kcal |
| Protein | 4.5g |
| Carbohydrates | 22g |
| Fat | 1.2g |
Use this snapshot as a planning tool rather than an exact label. For precise dietary needs compute values using your exact ingredient brands.
Practical Notes on Ingredients and Science
Yeast activity is temperature-sensitive; water around 40°C activates without stressing cells. For starter science consult the yeast article for basic microbiology relevant to proofing.
Acidity softens rye’s crumb and improves flavor stability; the small amount of vinegar in this recipe helps control pH. Experiment with longer, cooler proofs to boost tang while monitoring dough strength.
Key Takeaways
Rustic rye rewards focus on hydration, gentle handling, and oven steam to produce a deep-flavored, sliceable loaf. Repeated bakes sharpen your judgment of dough feel and timing.
Start with the structured steps here, adjust for your flour and environment, and keep a simple log. Over several bakes you will standardize hydration and proofing windows for consistent results.
FAQ
What makes rye bread “rustic”?
Rustic rye relies on coarse flour, hands-on shaping, and simple techniques to produce a hearty crust and dense crumb. The approach emphasizes grain flavor over an airy crumb.
Can I use only rye flour?
Yes, but expect a denser, flatter loaf due to reduced gluten. Blending with bread flour improves rise and makes the bread easier to slice for sandwiches.
How should I store homemade rye bread?
Store at room temperature wrapped in a cotton towel or paper bag for several days to keep the crust. For longer storage freeze slices and toast from frozen.
Is steam necessary for a good crust?
Early steam improves oven spring and gives a glossy, crackled crust. You can use a preheated pan of water or spritz the oven briefly during the first few minutes of baking.
How can I vary flavor?
Add caraway seeds, toasted nuts, or dried fruit sparingly to enhance rye’s earthiness. For sour notes extend proof time or incorporate a small rye starter.
See also: internal baking techniques and bread recipes for related methods and recipes on this site.
See also: rye bread


