
Masterful Water Bath Canning: 7 Expert Techniques to Unlock Flavor
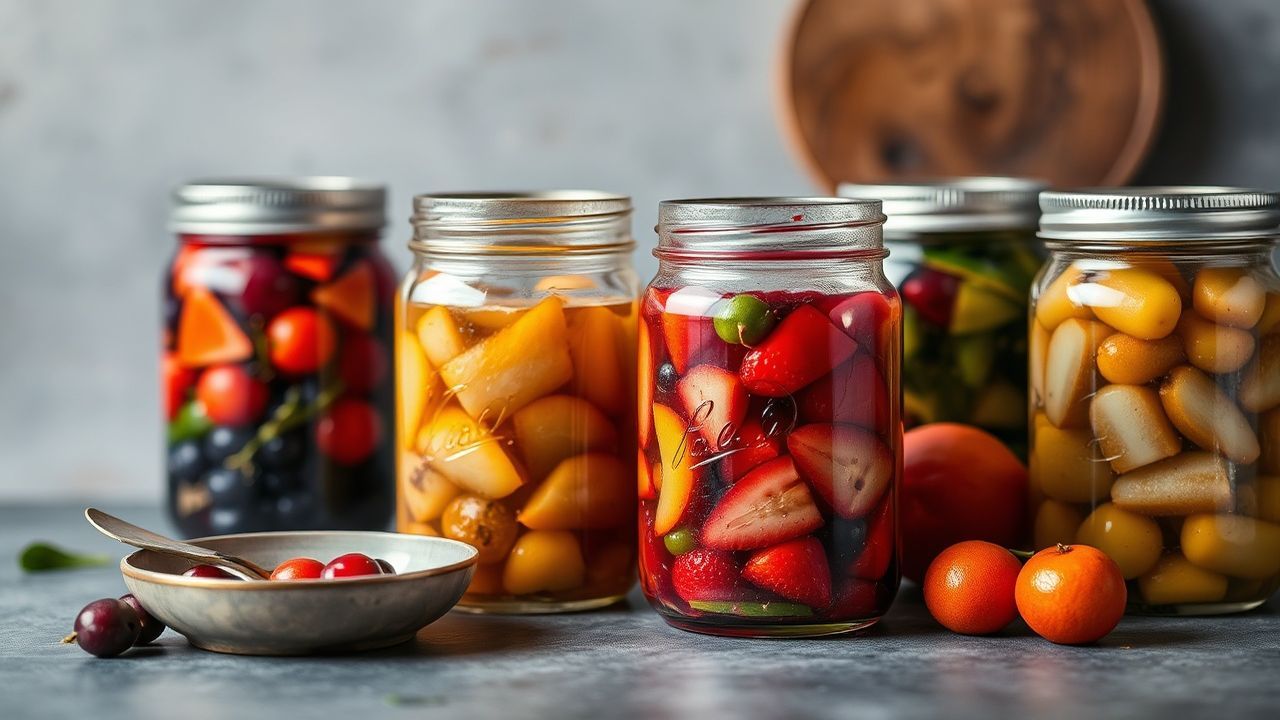
Canning turns high-acid produce into shelf-stable jars that concentrate taste and texture. Start every batch knowing the critical steps for water bath canning and how they influence safety and flavor.
- Key takeaway: Always use tested acidity and correct processing time for safe jars.
- Key takeaway: Consistent headspace and new two-piece lids give reliable seals and longer shelf life.
- Key takeaway: Small technique changes—syrup strength, spice timing, maceration—lift flavor without risking safety.
Mastering the Foundations of Water Bath Canning: Safety, Sterilization, and Flavor
Water bath canning applies to high-acid foods such as fruit preserves, pickles, and properly acidified tomatoes. These products rely on acidity and heat to prevent growth of spoilage organisms and pathogens.
Understand the microbial risk and sterilization basics. Learn the microbiology concepts behind safe preservation by consulting authoritative topics like canning (food preservation) and sterilization (microbiology) for technical context.
Prep and Cook Time
Plan active prep and processing separately so you do not rush a step. Processing time depends on jar size, type of food, and altitude; always follow a tested recipe for the precise time.
Allow buffer time for washing, heating syrup, and staging jars. Adjust times for altitude as listed in reliable guides and extension resources.
Yield and Difficulty
Expect roughly 4–6 half-pint jars from 4 cups of fruit; yields change with fruit density and packing method. Estimate jars and lids before you start to avoid mid-batch runs to the store.
Skill level rates as moderate: success follows precise headspace, sanitation, and timing. New canners should follow a single tested recipe until comfortable with each step.
Ingredients & Equipment
Choose ripe produce for optimal natural sugars and flavor; underripe fruit yields weak taste even after canning. For jams and preserves, combine fruit, measured sugar, and acid that meet tested pH targets.
Gather a water bath canner or large stockpot, jar lifter, wide-mouth funnels, non-metallic spatula, new two-piece lids, thermometer, and clean jars. A headspace tool or ruler improves consistency across jars.
Standard Ingredient List
Use this baseline for a simple fruit preserve batch and modify only with verified recipe guidance. Deviations to acid or processing time invalidate safety assumptions.
- Fresh produce: 4 cups ripe, washed fruit (berries, peaches).
- Granulated sugar: 2 cups, adjusted per tested formula.
- Acid: 2 tablespoons lemon juice or measured vinegar when required.
- Filtered water: 4 cups for light syrup.
- Canning salt: 1 tablespoon, optional.
- Glass canning jars: 4–6 half-pint jars with new two-piece lids.
For more on tools and technique, see the internal equipment guide: Canning equipment guide. For tested preserve recipes and timing, visit our recipe hub: Preserve recipes and processing times.
Step-by-Step Instructions
Follow each step deliberately; skipping sanitation or headspace checks risks seal failure or spoilage. Work in stages: prepare jars, then produce, then syrup, then fill and process.
Keep jars hot while you fill to avoid thermal shock and to reduce seal failures. Maintain a steady workflow so hot syrup and jars go into the water bath without delay.
- Prepare jars and lids. Wash jars and lids in hot, soapy water. Sterilize jars in simmering water for 10 minutes and keep lids warm to help the sealing compound seat properly.
- Prepare produce and syrup. Peel and chop fruit as recipe indicates. Heat sugar and water until the sugar dissolves and the syrup is hot for filling.
- Fill jars with produce and syrup. Pack warm produce into warm jars and pour hot syrup over, leaving a 1/4-inch headspace for half-pints. Headspace variance affects vacuum strength.
- Remove air bubbles and adjust headspace. Slide a non-metallic spatula along jar sides to release trapped air; top up syrup if needed to restore headspace.
- Wipe rims and seal. Clean the jar rims, center lids, and screw on bands finger-tight—avoid overtightening, which can prevent sealing.
- Process in a boiling water bath. Place jars on a rack with 1–2 inches of water above jar tops; maintain a steady boil for the recipe time and adjust for altitude.
- Cool and check seals. Remove jars and cool upright for 12–24 hours. Press the lid center: it should be concave and not move.
- Label and store. Date each jar and store in a cool, dark place; consume high-acid preserves within one year for peak quality.
When a jar fails to seal, either refrigerate and use within a week or reprocess with a new lid using the original processing time. Clearly label reprocessed jars so you track them later.
Small technique changes affect texture and flavor. Add delicate herbs near the end of cooking, and stagger spice additions to layer flavor without extending processing time.
Tips for Success
Consistent headspace and jar temperature are simple, high-impact controls. Use a dedicated headspace tool or ruler and keep jars warm until you fill them.
Follow tested recipes for acidity and processing times. Altering acid levels or processing times creates unsafe conditions that compromise jars and health.
When in doubt about a recipe, stop and consult extension service guidelines or national preservation centers. Safety must remain the constraint that guides every flavor decision.
Serving, Storage & Shelf Life
Store sealed jars in a cool, dark pantry to protect color and flavor. Label jars with contents and pack date so you can rotate older jars first.
High-acid preserves retain best quality for about one year; texture and color may decline after that even if seals remain intact. Once opened, refrigerate and use per recipe guidance.
- Serve ideas: Jams on toast or yogurt, preserved fruit with cheese, pickles as a bright side.
- Gifting: Add sturdy labels and clear storage notes for recipients to follow.
Science Behind the Seal
Water bath canning relies on two core principles: sufficient heat during processing and adequate acidity to prevent microbial growth. These factors work together to render the jar shelf-stable for high-acid foods.
For deeper reading on microbial hazards and the organism of primary concern, consult Clostridium botulinum and broader discussions in food preservation. Those resources clarify why low-acid foods require pressure canning.
Nutrition Snapshot
Nutritional values vary by recipe. Jams concentrate fruit sugars and raise calories per serving; pickled vegetables remain low-calorie but contain added sodium from brines.
When reducing sugar, use tested reduced-sugar formulas or approved gelling agents to maintain texture. Unapproved substitution changes can alter both safety and quality.
| Nutrition (Per ½ Cup) | Calories | Protein | Carbs | Fat |
|---|---|---|---|---|
| Traditional Strawberry Jam | 120 kcal | 0.5 g | 30 g | 0 g |
| Pickled Cucumbers | 15 kcal | 0.3 g | 3 g | 0 g |
Further Reading and Trusted References
Consult university extension services and national preservation centers for tested recipes and exact processing times. These institutions perform lab testing that translates directly into safe household practice.
For technical context, explore the fundamental topics on Wikipedia: canning (food preservation), Clostridium botulinum, and sterilization (microbiology) to understand the science that underpins safe preserves.
FAQ
What foods are safe for water bath canning?
High-acid foods—fruit preserves, most fruit juices, pickles with added vinegar, and properly acidified tomatoes—are appropriate for water bath canning. The added or natural acidity prevents growth of harmful microbes when processed correctly.
How do I check if a jar sealed correctly?
After 12–24 hours of cooling, press the lid center; it should be concave and should not move. A clear popping sound during cooling usually indicates a good vacuum.
How long do canned preserves last?
Store sealed high-acid preserves in a cool, dark place and use within one year for best quality. Once opened, refrigerate and follow recipe guidance for refrigeration timeframes.
Can I change sugar or vinegar amounts in recipes?
Do not alter acidity or required processing times unless the adjusted recipe has been scientifically tested. Changing acid levels can create unsafe conditions; sugar adjustments may affect texture but do not substitute for proper acidification.
Where can I find reliable, tested recipes?
Look to university extension services and national preservation centers for tested recipes and processing charts. Combine those recipes with precise technique—accurate headspace, proper jar prep, and consistent boiling—to achieve reliable results.
See also: canning


