

There is a special satisfaction in harvesting fresh herbs and picturing their aromas brightening meals, teas, and remedies. When vivid leaves stay damp and limp for weeks, the drying process feels endless and wasteful.
- Control humidity and airflow to cut drying time dramatically.
- Adjust bundle size and trim stems to expose more surface area.
- Choose the right method—air drying, dehydrator, or low-heat oven—based on herb anatomy.
- Store correctly to keep oils and color after drying.
Understanding the science and solutions behind herb drying delays
Drying herbs removes free water from tissue so moisture becomes vapor and leaves the plant. The rate of that transfer depends on temperature, relative humidity, airflow, and tissue structure.
Different garden herbs vary in leaf thickness, surface area, and oil content; those traits change drying behavior and final quality. For background on the plant category, see herb.
Key environmental drivers
Relative humidity controls the vapor-pressure gradient that pulls moisture out of leaves. High humidity reduces that gradient and slows evaporation, sometimes allowing mold to form.
Temperature and airflow act together: warm air holds more water and moving air removes the saturated layer that clings to leaf surfaces. For general context, read about humidity.
Prep and cook time
Preparation: a few minutes to trim and sort. Proper prep avoids starting with extra surface water that stalls drying.
Drying time: air drying usually takes 7–14 days; dehydrators reduce that to hours depending on settings.
Practical, step-by-step instructions
Follow a simple, repeatable protocol to eliminate slow drying. Each step targets a known bottleneck: excess starting moisture, poor airflow, or crowded bundles.
Standardizing harvest time, trimming, and layout makes drying predictable across herb types and seasons.
Ingredients and basic kit
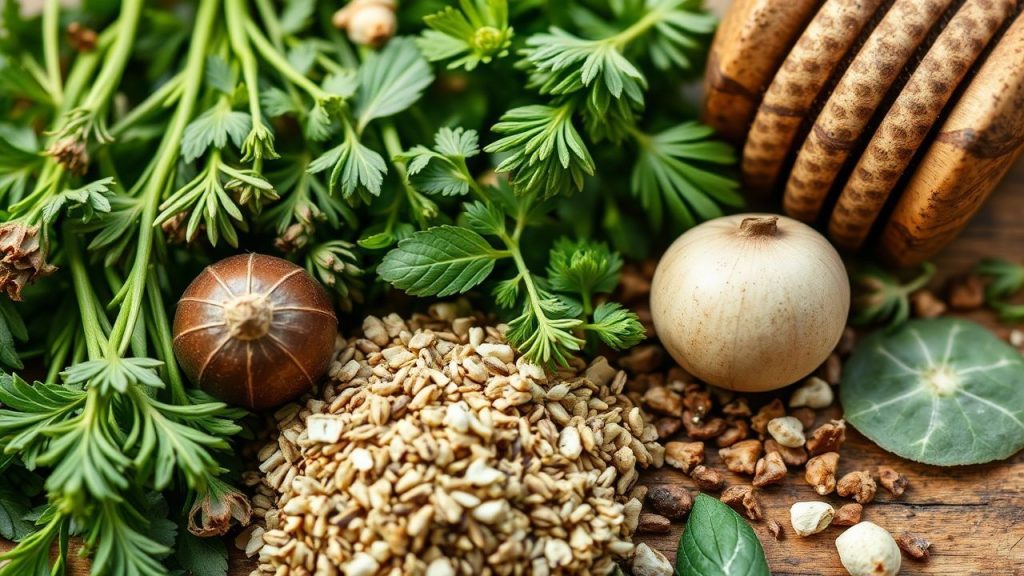
1 cup fresh herbs (basil, thyme, rosemary), rinsed and patted dry. Use clean tools and surfaces to avoid contamination.
Optional: cotton string, paper bags, mesh screens, a small fan, and a food dehydrator for consistency.
Step-by-step instructions
- Assess environmental conditions. Choose a warm, dry, ventilated area. If the room feels muggy, move herbs or run a dehumidifier.
- Prepare herbs. Harvest after dew dries and before midday heat concentrates oils. Shake or pat leaves to remove extra water rather than rinsing right before drying.
- Bundle properly. Tie small, loose bundles—no thick bunches. Small bundles let air reach stems and inner leaves.
- Pick a drying method. Hang in an airy room out of direct sun, lay flat on mesh racks, use a dehydrator at low settings, or oven-dry at very low heat for quick batches.
- Monitor. Check daily. Leaves should crumble and stems snap; leathery texture means more time.
- Store. Place dried herbs in airtight, opaque containers away from light and heat to preserve essential oils and color.
Innovative drying techniques to speed the process
A food dehydrator provides controlled temperature and consistent airflow, which shortens drying time and preserves volatile oils. Match temperature and time to herb anatomy for best results.
Mesh screens plus a gentle fan create steady air exchange without exposing leaves to high heat. That setup accelerates evaporation while reducing the risk of cooking the herb material.
Paper bags with perforations concentrate aroma and shield leaves from strong light while still letting moisture escape. Use them for softer-leaved herbs that lose color in bright sun.
For larger batches, moving-air drying rooms use cross-ventilation and dehumidification to maintain a steady vapor-pressure gradient. Small-scale setups work the same way: increase airflow and lower ambient humidity.
[NOTE: The preceding block is intentionally not an external link and provides practical safety guidance.]
Chef’s notes
Humidity matters: High-humidity zones slow drying dramatically; move herbs to a less humid area or use a dehumidifier to restore the vapor-pressure gradient.
Bundle size: Keep bundles small to maximize surface exposure and speed evaporation. Loose ties let air circulate between stems.
Oven method: Use the lowest oven setting with the door cracked and check frequently to avoid discoloration and loss of aroma.
Storage tips: Store in opaque, airtight jars at room temperature. Avoid long-term storage in thin plastic bags, which let light and small amounts of air degrade oils.
[IDEA: place a desiccant packet when humidity fluctuates significantly.]
Common problems and precise fixes
Slow drying usually traces to three culprits: excess starting moisture, insufficient airflow, or high ambient humidity. Addressing these reduces total drying time and prevents spoilage.
Use targeted fixes: spread leaves on mesh, add a fan, isolate bundles, or switch to a dehydrator to speed evaporation safely.
Problem: Herbs stay limp for weeks
Symptom: Leaves remain flexible and feel cool to the touch. Likely cause: trapped moisture from thick bundles or high ambient humidity.
Fix: Spread herbs out on mesh racks, add a small fan to increase air exchange, or move them to a drier room. If you see mold, discard affected material immediately.
Problem: Leaves lose color or aroma
Symptom: Herbs brown or smell weak after drying. Likely cause: excessive heat or direct sun during drying.
Fix: Move drying to shaded, ventilated areas or use a dehydrator at controlled low temperatures. Protect delicate leaves from direct light during drying and storage.
Problem: Mold or musty odor
Symptom: White fuzz, slimy spots, or stale smell. Likely cause: drying too slowly in humid conditions or packing bundles too tightly.
Fix: Isolate affected bundles, increase airflow, and accelerate drying with a dehydrator or low oven heat. Discard any moldy herbs to avoid spore spread.
Practical troubleshooting checklist
Use this quick checklist when drying stalls: check room humidity, reduce bundle thickness, improve airflow, and consider a dehydrator or oven as a backup. Record conditions so you can repeat what works.
Keeping notes (temperature, humidity, method, and time) will quickly reveal patterns. Over time you’ll build a short protocol tailored to each herb type.
Q&A
Below are focused answers to common questions about slow herb drying. Each answer is short and actionable so you can test fixes quickly.
These responses reflect practical experience and basic drying science so you can improve results without guesswork.
Why do my herbs seem to never finish drying?
Most often, ambient humidity and poor airflow prevent moisture from leaving leaf surfaces. Even with warm air, a saturated room will stall drying.
Correct by lowering room humidity and circulating air around the herbs to strengthen the vapor-pressure gradient.
Does harvest timing matter?
Yes. Harvest after morning dew evaporates and before the afternoon heat concentrates oils. Starting with dry leaves prevents carrying extra water into the drying stage.
Trim stems so leaves have exposure on both sides; thinner cross-sections dry faster and more evenly.
Can I speed drying without losing flavor?
You can safely accelerate drying by improving airflow and keeping temperatures low. Avoid high heat that drives off volatile oils and flattens aroma.
Controlled dehydrator settings preserve aroma better than high-heat oven methods because they separate airflow control from temperature control. See food dehydrator for equipment basics.
How do I know when herbs are done?
Dried herbs should crumble and release aroma; stems should snap. If leaves bend like leather, they need more time.
Test several leaves from different parts of the bundle to ensure uniform dryness before storing.
Any last pro tip for reliable results?
Standardize a drying protocol: harvest dry, form small bundles, dry in a ventilated space, and use a dehydrator for consistency. Consistency reduces failures and preserves flavor.
Also, label jars with date and herb name to track potency and replacement cycles.
The conclusion
Slow herb drying rarely stems from a mystery; it reflects controllable environmental and handling factors. Fix humidity, improve airflow, and match drying method to herb structure to restore speed and quality.
Apply the checklist—trim, small bundles, ventilate, and choose heat carefully—and your dried herbs will keep aroma and color for months.
FAQ
How long should most herbs take to dry?
Air drying generally takes 7–14 days depending on humidity and airflow. Dehydrators can cut that to 2–8 hours at low heat.
Can I mix herb types in one bundle?
Don’t mix herbs with different drying profiles. Woody stems and delicate leaves dry at different rates; separate them to avoid under- or over-drying.
Is oven drying safe for all herbs?
Oven drying works for small batches when time is limited. Keep temperatures low, prop the door slightly, and check frequently to avoid loss of aroma.
How should I store dried herbs long-term?
Use opaque, airtight containers and store in a cool, dark place. Label jars with the date and herb name to track potency.
When should I discard dried herbs?
Discard herbs that show mold, off-odors, or a severe loss of aroma and flavor. Proper drying and storage minimize deterioration.
See also: Herb drying and CookHarvest home
Further reading on airflow and building ventilation principles is available at ventilation (architecture) and brief background on drying processes at food drying.
Recommended Reading:
- Brew Bliss: Crafting the Perfect Digestive Tea Blend
- Sweet Alchemy: Crafting Herbal-Infused Honey at Home
- Perfecting Chamomile: A Step-by-Step Guide to Drying Flowers


