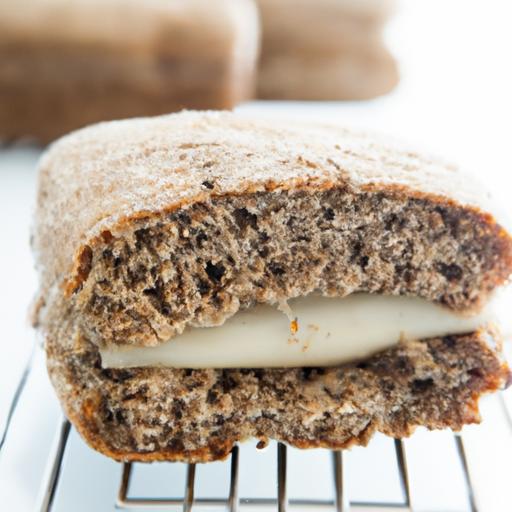
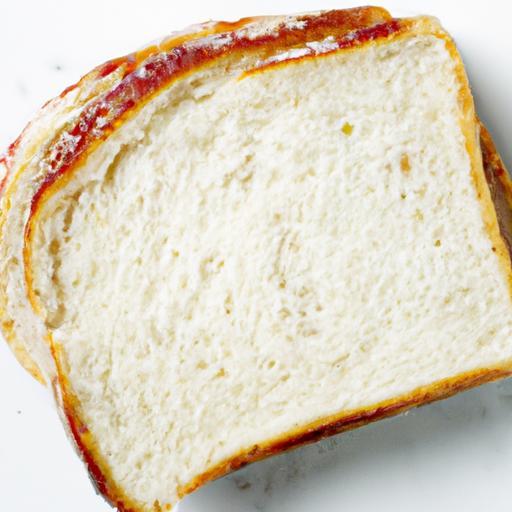
There’s something undeniably magical about the perfect sandwich bread – that pillowy, tender texture that cushions every bite, wrapping flavors in a warm, gentle embrace. Whether you’re building a classic BLT, a towering club, or a simple PB&J, the right bread can elevate your creation from ordinary to extraordinary. In this ultimate guide, we’ll unravel the secrets to crafting fluffy and tender sandwich bread at home, blending time-honored techniques with fresh insights. Prepare to transform your kitchen into a bakery and your sandwiches into unforgettable experiences. Let’s dive in and discover how to bake bread that’s as soft as a cloud yet sturdy enough to hold your favorite fillings with pride.
Fluffy & Tender sandwich bread begins with choosing the perfect flour to balance softness and structural integrity, creating that ideal crumb and sliceability beloved in classic sandwiches. The magic lies in selecting flour with the right protein content-typically bread flour with 11-13% protein offers enough gluten strength, ensuring your bread rises well without being tough. A blend of bread flour and a bit of all-purpose flour can add a subtle tenderness to every bite.
Prep and Cook Time
- Preparation: 20 minutes
- First Rise: 1 to 1.5 hours
- Kneading: 10 minutes
- Second Rise: 45 minutes
- Baking: 30 minutes
- Total Time: Approximately 3 hours
Yield
One standard loaf, yielding approximately 12 sandwich slices.
Difficulty Level
Medium – Perfect for bakers ready to deepen their craftsmanship with simple but impactful techniques.
Ingredients
- 3 ½ cups bread flour, sifted
- ½ cup all-purpose flour
- 2 teaspoons active dry yeast
- 1 ¼ cups warm water (110°F / 43°C)
- 3 tablespoons unsalted butter, melted and slightly cooled
- 3 tablespoons granulated sugar
- 1 ¼ teaspoons salt
- Optional: 2 tablespoons milk powder for enhanced tenderness
Instructions
- Activate the yeast: In a small bowl, combine warm water, yeast, and a teaspoon of sugar. Stir gently and let it sit for 5-7 minutes until frothy and bubbly.
- Mix dry ingredients: In a large bowl, whisk together bread flour, all-purpose flour, salt, sugar, and milk powder if using.
- Combine wet and dry: Make a well in the center of the dry mixture and pour in the yeast mixture and melted butter. Stir with a wooden spoon until a shaggy dough forms.
- Knead the dough: Transfer to a floured surface and knead briskly for 8-10 minutes, or until the dough is smooth, elastic, and slightly tacky. This gluten development is crucial for that fluffy & tender texture.
- First proofing: Place the dough in a lightly greased bowl, cover with a damp cloth or plastic wrap, and let it rise in a warm, draft-free area. It should double in size, about 1 to 1.5 hours.
- Shape the loaf: Punch down the dough gently to release gas. Shape it into a tight loaf by rolling and tucking the edges underneath.
- Second proofing: Place the shaped dough into a greased loaf pan. Cover and let it rise again until it reaches just over the rim (about 45 minutes).
- Bake: Preheat oven to 375°F (190°C). Bake the bread for 28-32 minutes until the crust is golden and a skewer inserted in the center comes out clean.
- Cool: Remove the bread from the pan and cool on a wire rack. Allowing it to cool completely before slicing keeps crumbs tender and prevents a gummy texture.
Tips for Success
- Flour choice: For a softer crumb, experiment by substituting up to ¼ cup of bread flour with cake flour or oat flour, but never replace all bread flour as it weakens the structure.
- Kneading: Opt for windowpane testing to check elasticity-stretch a small dough piece; if thin and translucent without tearing, you’re set.
- Proofing environment: Create a warm, moist space by placing your covered dough near a bowl of hot water or inside the oven with the light on.
- Storage: Store cooled bread wrapped in a clean kitchen towel or bread bag on the counter for 2-3 days to maintain softness.
- Freeze extras: Slice before freezing for easy grab-and-go sandwich perfection later.
Serving Suggestions
This versatile sandwich bread pairs incredibly well with fresh butter and jam for breakfast or hearty fillings like avocado, turkey, and crisp lettuce for lunch. Consider toasting lightly to enhance the golden crust and add a crunchy contrast to the tender crumb. Garnish open-faced sandwiches with fresh herbs like parsley or microgreens for a pop of color and freshness.

| Nutrient | Per Slice (approx.) |
|---|---|
| Calories | 120 kcal |
| Protein | 4 g |
| Carbohydrates | 22 g |
| Fat | 2 g |
For further baking inspiration, explore our Artisan Breads Collection, and deepen your understanding of gluten science with this King Arthur Baking gluten guide.
Q&A
Q&A: Fluffy & Tender – The Ultimate Guide to Perfect Sandwich Bread
Q1: Why is sandwich bread often dense and dry, and how can I avoid that?
A1: Dense, dry sandwich bread usually means the dough wasn’t hydrated enough or lacked proper kneading and rising time. To achieve that fluffy, tender texture, use a higher hydration dough, knead until smooth and elastic, and allow for a full, gentle rise so the yeast can work its magic. Adding a touch of fat like butter or oil also keeps the crumb moist.
Q2: What type of flour is best for making soft sandwich bread?
A2: Bread flour with a higher protein content is your best friend for structure, but pairing it with a bit of all-purpose flour can soften the crumb. Some bakers also add a small amount of vital wheat gluten to boost elasticity and fluffiness. Ultimately, it’s about balancing strength and tenderness.
Q3: How important is yeast in making fluffy bread? Can I substitute it with baking powder?
A3: Yeast is crucial for that classic airy, sponge-like crumb in sandwich bread. It ferments the dough, creating gas bubbles that expand and rise. Baking powder won’t replicate this effect; it produces a different crumb-more cake-like and crumbly. For perfect sandwich bread, stick to yeast or a sourdough starter.
Q4: What’s the secret to getting a beautifully golden crust without it becoming hard or crunchy?
A4: To keep the crust tender, bake with a little steam at the beginning of baking, which helps the crust stay flexible. Using milk or butter in the dough also softens crust texture. Lightly brushing the loaf with melted butter right after baking locks in softness while giving that lovely golden sheen.
Q5: Can I make sandwich bread without using an electric mixer or bread machine?
A5: Absolutely! Classic hand-kneading done with a bit of elbow grease is a wonderful way to connect with your bread. The key is technique: fold, press, and turn the dough repeatedly until it’s smooth and elastic. It might take about 10-15 minutes, but the reward is worth every wrist stretch.
Q6: How do I store sandwich bread to keep it fresh and soft?
A6: Cool completely before storing in a breathable but protective environment-like a cloth bread bag or a loosely closed plastic bag at room temperature. Avoid refrigeration-it dries bread out quickly. For longer storage, slice and freeze; then toast or thaw slices as needed.
Q7: Are there any fun variations to add to the basic sandwich bread recipe?
A7: Definitely! Mix-ins like herbs, cheese, or seeds add flavor and texture dimension. Swirling in a bit of cinnamon and sugar or incorporating whole wheat flour can elevate the loaf while keeping it tender. Just remember to adjust hydration and flavours carefully so the bread stays soft and rises well.
With this guide, your sandwich bread can graduate from simple staple to bakery-worthy bliss-fluffy, tender, and always perfect!
In Summary
As you close the chapter on your journey to mastering sandwich bread, remember that achieving that perfect fluffy and tender crumb is both a science and an art. With the tips and techniques shared in this guide, your kitchen is now equipped to transform simple ingredients into loaves that elevate every sandwich experience. Whether you’re layering classic deli meats or crafting a veggie delight, the bread beneath will always be the true hero-a soft, pillowy canvas ready to hold your culinary creations. So, roll up your sleeves, embrace the dough’s gentle resistance, and bake with confidence. Perfect sandwich bread is not just a recipe; it’s the foundation of unforgettable meals. Happy baking!