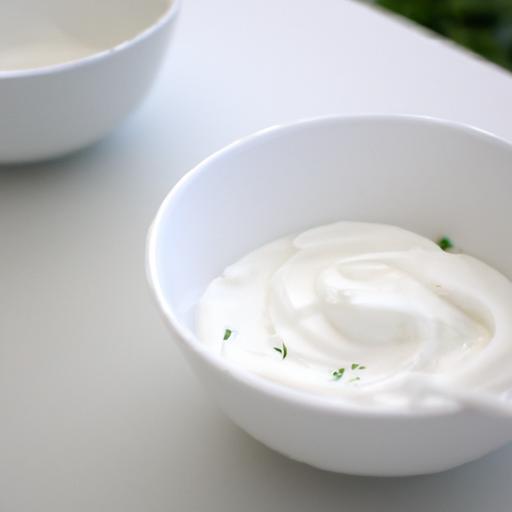
There’s something irresistibly luscious about Greek yogurt-its thick, creamy texture and tangy flavor make it a favorite in breakfasts, desserts, and savory dishes alike. But what if you could skip the store shelves and transform your regular yogurt into that velvety indulgence right in your own kitchen? Welcome to the simple art of straining yogurt, a magical step that turns everyday curds into rich, protein-packed Greek yogurt. In this article, we’ll guide you through the easy, hands-on process that brings the creamy goodness of Greece to your countertop, all while saving money and customizing flavor exactly to your liking. Ready to elevate your yogurt game? Let’s get straining!
Choosing the Perfect Yogurt for Thickening: Mastering the Straining Process for Ultimate Creaminess
Transforming regular yogurt into creamy Greek yogurt at home begins by selecting the right base ingredient. The quality and consistency of your starting yogurt will influence the final thickness and flavor, setting the stage for a luscious, velvety texture that elevates every bite.
Prep and Cook Time
- Preparation: 10 minutes
- Straining: 4-6 hours (or overnight for best results)
- Total Time: Up to 6 hours
Yield
- Approximately 1 cup of rich Greek yogurt from 2 cups of regular yogurt
Difficulty Level
- Easy – Perfect for home cooks and yogurt enthusiasts
Ingredients
- 2 cups plain whole milk yogurt (non-fat or low-fat can be used, but full-fat yields the creamiest results)
- Cheesecloth or a clean, fine-mesh kitchen towel
- Fine mesh strainer
- Bowl to catch whey
- Optional: A pinch of salt or natural sweetener to enhance flavor
Instructions
- Choose high-quality plain yogurt: Begin by selecting yogurt made with live active cultures for the most authentic tang and creamy mouthfeel. Full-fat adds richness, but any plain yogurt without additives works.
- Prepare your straining setup: Line a fine mesh strainer with a double layer of cheesecloth or a clean kitchen towel and place it over a large bowl to catch the draining whey.
- Pour the yogurt carefully: Transfer your yogurt into the lined strainer. Use a spatula to smooth the surface, allowing whey to escape evenly.
- Strain patiently: Cover the setup loosely with plastic wrap or a cloth and refrigerate. Let the yogurt strain for 4-6 hours or overnight-this slow process removes excess liquid, intensifying creaminess and thickening the texture.
- Check for desired consistency: Once thickened to your preference, lift the cheesecloth gently and transfer the strained Greek yogurt into a clean container. Optional: stir in a pinch of salt or honey for enhanced taste and balance.
- Store appropriately: Seal and refrigerate your homemade Greek yogurt. Use within 5-7 days for maximum freshness and flavor.
Tips for Success
- Yogurt selection: Avoid sweetened or flavored varieties to achieve authentic thickening and flavor clarity.
- Straining material: Use cheesecloth for smooth texture; alternatively, a fine cotton towel works but may impart slight texture changes.
- Temperature matters: Always strain in the refrigerator to maintain food safety and optimal flavor development.
- Utilize whey: Don’t discard the liquid whey; it’s nutrient-dense and perfect for smoothies, baking, or cooking (learn more in our guide to whey benefits).
- Achieving creaminess: For ultra-thick Greek yogurt resembling store-bought styles, extend straining time up to 12 hours, checking periodically to avoid over-thickening.
Serving Suggestions
Enjoy your freshly strained Greek yogurt topped with a drizzle of golden honey, a scattering of toasted nuts, or a handful of fresh berries to highlight its creamy tang. Incorporate it as a base in smooth, cooling dips like tzatziki, or swirl into hearty breakfast bowls with granola and seasonal fruit. For an indulgent touch, garnish with a sprinkle of cinnamon or a light dusting of cocoa nibs, bringing depth to every spoonful.
| Nutrient | Per 1 cup Greek yogurt |
|---|---|
| Calories | 130 |
| Protein | 11g |
| Carbohydrates | 6g |
| Fat | 7g |

By transforming regular yogurt into creamy Greek yogurt at home, you unlock the secret to a decadent texture and a pure flavor that only homemade results can offer. This approachable process invites you to connect with traditional culinary techniques while tailoring each batch to your desired richness and taste. Ready your kitchen and savor the satisfaction of crafting your own creamy masterpiece.
For more insights on dairy fermentations and homemade yogurt variants, visit Cultures for Health, a trusted resource on yogurt cultures and fermentation science.
Q&A
Q&A: Transform Regular Yogurt into Creamy Greek Yogurt at Home
Q1: What exactly is Greek yogurt, and how does it differ from regular yogurt?
A1: Greek yogurt is regular yogurt that’s been strained to remove much of the liquid whey, lactose, and sugar, resulting in a thicker, creamier texture and a tangier flavor. It boasts higher protein content and lower carbs compared to its unstrained cousin.
Q2: Can I turn any store-bought regular yogurt into Greek yogurt?
A2: Absolutely! Just make sure your yogurt is plain and unsweetened for best results. Full-fat yogurts create an extra creamy final product, but you can use low-fat varieties too.
Q3: What do I need to transform regular yogurt into Greek yogurt at home?
A3: Simple kitchen tools-cheesecloth or a clean kitchen towel, a fine mesh strainer, and a bowl to catch the liquid. Patience helps too, since the straining process takes several hours.
Q4: How do I strain regular yogurt to make it Greek-style?
A4: Line your strainer with cheesecloth and place it over a bowl. Spoon the yogurt into the cloth, cover loosely, and refrigerate. Let it drain for 2 to 4 hours, or overnight if you want it really thick. The longer it strains, the creamier it becomes.
Q5: What happens to the liquid that drains out? Can I use it?
A5: That tangy liquid is whey, packed with nutrients! Save it for smoothies, baking bread, or even as a natural fertilizer for plants. Waste not, want not!
Q6: How does homemade Greek yogurt taste compared to store-bought?
A6: Homemade Greek yogurt is delightfully fresh with a rich, creamy texture and a pleasantly tangy kick. You control the thickness and the tartness-customized indulgence in every spoonful.
Q7: Are there any tips to enhance the flavor or texture of homemade Greek yogurt?
A7: Add a dash of honey, vanilla extract, or fresh fruit once thickened. For extra creaminess, stir in a spoonful of cream or milk powder before straining. Experiment to find your signature blend!
Q8: Is homemade Greek yogurt healthier than store-bought options?
A8: Often yes! Homemade Greek yogurt lets you avoid additives, preservatives, and excessive sugars. Plus, you choose the quality of milk and yogurt you start with, tailoring it to your dietary needs.
Q9: How long does homemade Greek yogurt keep in the fridge?
A9: Store it in an airtight container, and it stays fresh for up to a week. Stir before serving if any separation occurs.
Q10: Can I use homemade Greek yogurt in recipes?
A10: Definitely! Use it as a creamy base for dips, smoothies, sauces, or just enjoy it with granola, nuts, and fresh fruit. The possibilities are deliciously endless!
Crafting your own creamy Greek yogurt at home is a simple, satisfying kitchen adventure that rewards you with rich texture, natural flavor, and wholesome goodness. Happy straining!
To Conclude
Transforming regular yogurt into creamy Greek yogurt at home is a simple kitchen magic that brings both flavor and nutrition to your table. With just a little patience and a fine strainer, you unlock a thicker, richer delight that can elevate your breakfasts, snacks, and recipes. Not only do you save money, but you also gain control over the ingredients, ensuring every spoonful is fresh and wholesome. So next time you reach for your yogurt, remember: a creamy Greek treat is just a few steps away-ready to turn ordinary moments into creamy, dreamy indulgences. Happy straining!


