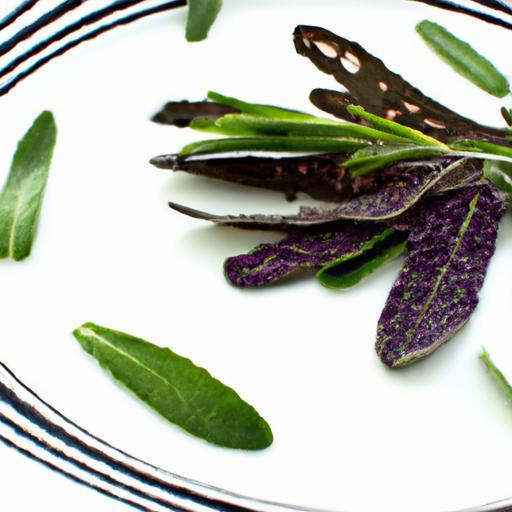
There’s nothing quite like the fresh, vibrant flavors of herbs plucked straight from your garden-each leaf a tiny treasure bursting with nature’s artistry. But what if you could capture that essence long after the growing season fades, preserving those aromatic wonders to sprinkle magic into your meals year-round? Welcome to the simple, satisfying world of drying garden herbs at home. In this guide, we’ll walk you through easy, effective methods to transform your fresh harvest into fragrant, shelf-ready delights. From clipping to curing, get ready to bring the garden’s bounty indoors and enjoy the taste of summer in every dish, no matter the season.
Harvest to Home: Easy Steps to Dry Your Garden Herbs
Harvest to Home: Easy Steps to Dry Your Garden Herbs is your ultimate guide to preserving the vibrant flavors and aromas of your garden bounty. Whether you’re growing fragrant basil, rosemary, or delicate thyme, mastering the art of drying herbs naturally ensures you savor their essence long after the seasons change. This journey celebrates the timeless tradition of home herb drying, inspired by gardens around the world and nourished by personal experiences that transform fresh leaves into pantry treasures.
Prep and Cook Time
- Preparation: 15 minutes
- Drying Time: 7-14 days (depending on herb type and drying method)
Yield
- Approximately ¼ cup dried herbs from 1 cup of fresh herbs
Difficulty Level
- Easy
Ingredients
- Fresh herbs from your garden (such as 1 cup basil leaves, 1 cup rosemary sprigs, 1 cup thyme sprigs)
- String or twine for bundling
- Paper bags (optional, for certain drying methods)
Instructions
- Choose herbs at peak freshness: Harvest your herbs early in the morning after the dew evaporates. Select healthy, unblemished leaves and stems to ensure the best drying results.
- Prepare your garden herbs: Rinse gently under cool water to remove dirt. Pat dry with a clean towel or use a salad spinner to remove excess moisture, as dampness can promote mold.
- Bundle and hang: Gather small bunches of herbs (about 4-6 stems) and tie tightly with string at the base. Hang bundles upside down in a warm, dry, and well-ventilated area away from direct sunlight to preserve vibrant color and essential oils.
- Dry naturally: Allow herbs to dry slowly for 7-14 days. They’re ready when leaves crumble easily between your fingers. For delicate herbs like basil, consider placing bundles in brown paper bags with holes punched for airflow to prevent leaves from scattering.
- Alternative drying methods: If natural drying isn’t an option, consider oven drying at 100°F (37°C) for 2-4 hours or using a food dehydrator according to manufacturer instructions, maintaining gentle heat to protect delicate oils.
- Remove leaves from stems: Once fully dried, strip leaves from stems by running your fingers downward. Discard tough stems.
- Store your dried herbs: Place herbs in airtight containers such as glass jars or resealable bags. Store in a cool, dark cabinet to maximize freshness and aroma.
Chef’s Notes: Tips for Success
- Choose hardy herbs like rosemary and thyme for easier drying; more delicate herbs like basil and mint require extra care to avoid browning.
- Avoid washing herbs unnecessarily; moisture slows drying and can cause mold.
- Rotate bundles every few days to ensure even air circulation and drying.
- Label jars with the herb name and date.
- Crush dried herbs just before using to awaken oils and boost flavor.
- Make-ahead: Large drying batches can be stored for up to a year, but potency diminishes over time.
Serving Suggestions
Use your dried herbs to elevate everyday dishes: sprinkle rosemary over roasted vegetables, stir basil into fresh tomato sauces, or infuse hot water with thyme for soothing herbal teas. Garnish rustic breads and flavor homemade dressings with an aromatic touch that connects every bite to your garden’s summer bounty.

| Herb | Drying Time | Ideal Storage | Flavor Preservation |
|---|---|---|---|
| Basil | 7-10 days | Dark jar, room temperature | High |
| Rosemary | 10-14 days | Glass jar, cool spot | Very High |
| Thyme | 7-10 days | Opaque container | High |
For more imaginative ways to enhance your culinary skills with dried herbs, check out our article on infusing oils with dried herbs. Learn about the science behind herb preservation on Epicurious for trusted expert tips.
Q&A
Q&A: Harvest to Home – Easy Steps to Dry Your Garden Herbs
Q1: Why should I dry my garden herbs instead of using them fresh?
A1: Drying your herbs locks in their vibrant flavors and aromas, allowing you to enjoy your garden’s bounty long after the growing season ends. Plus, dried herbs make for convenient seasoning and beautiful, natural décor!
Q2: When is the best time to harvest herbs for drying?
A2: Harvest herbs just before they flower, when their essential oils are at their peak and flavors richest. Early morning, after the dew evaporates but before the sun’s heat sets in, is the magic moment for picking.
Q3: How do I prepare my herbs for drying?
A3: Give your herbs a gentle rinse under cool water to wash away dirt and bugs, then pat them dry with a clean towel. Keeping your herbs dry is key because moisture can lead to mold during drying.
Q4: What are the easiest methods to dry herbs at home?
A4: Try these simple methods:
- Air Drying: Tie small bunches and hang them upside down in a warm, airy space away from direct sunlight.
- Dehydrator: A low-heat dehydrator speeds up the process while preserving flavors.
- Oven Drying: Use the lowest oven setting with the door slightly cracked open for a quick fix.
Q5: How do I know when my herbs are fully dried?
A5: Your herbs are ready when the leaves crumble easily between your fingers and the stems snap cleanly – no squishy spots or limpness!
Q6: How should I store dried herbs to keep their flavor fresh?
A6: Store dried herbs in airtight containers, like glass jars, away from heat and light. Label each jar with the herb’s name and drying date for easy kitchen magic all year!
Q7: Can all herbs be dried using the same technique?
A7: Most leafy herbs like basil, thyme, and oregano dry beautifully with air drying. However, delicate herbs like cilantro or parsley may do better with a dehydrator or freezer drying to keep their vibrant flavor intact.
Q8: Any tips for the best flavor when cooking with dried herbs?
A8: Since dried herbs are more concentrated, start with smaller amounts and add gradually. For a flavor burst, crumble dried herbs between your fingers just before cooking to release their aromatic oils.
Embrace the joy of preserving your garden’s fragrant gifts, turning each harvest into a pantry full of sunshine and flavor!
Concluding Remarks
As the sun sets on your vibrant garden, the journey from harvest to home doesn’t have to end with fresh leaves alone. Drying your garden herbs transforms fleeting freshness into long-lasting flavor and fragrance, preserving the garden’s essence for months to come. With these simple steps, you can capture nature’s bounty and bring the garden’s magic into your kitchen, teas, and remedies year-round. So, gather your snips and string, embrace the art of drying, and let your herbs tell their story long after the last bloom fades-because every leaf deserves a second season of life. Happy drying!


