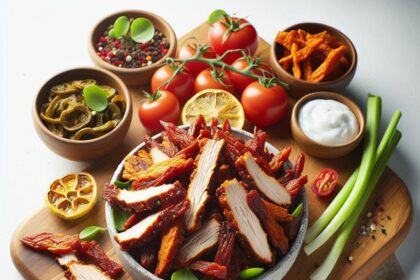
In a world where bold flavors and savory snacks reign supreme, crafting your own ground beef jerky is a culinary adventure that requires no gunpowder-just your passion for taste and a dash of creativity. Say goodbye to store-bought mediocrity and hello to homemade goodness, where every bite bursts with hand-crafted flavor. Whether you’re a seasoned jerky enthusiast or a curious kitchen explorer, this guide will walk you through the art of transforming humble ground beef into a mouthwatering snack that’s as satisfying to make as it is to eat. So roll up your sleeves, fire up your dehydrator or oven, and let’s dive into the irresistible world of ground beef jerky-no guns, just pure flavor!
Crafting Ground Beef Jerky: No Gun Needed, Just Flavor!
Crafting ground beef jerky is a game changer in the world of homemade snacks. Unlike traditional strips, this method offers unmatched control over texture and flavor, liberating you from the need for specialized equipment like a jerky gun. With simple ingredients and a touch of culinary creativity, you can produce tender, juicy jerky that bursts with bold spices and satisfying chew-perfect for on-the-go fuel or a savory treat any time.
Prep and Cook Time
- Preparation: 15 minutes
- Marinating: 6-8 hours (preferably overnight)
- Drying: 4-6 hours (depending on thickness and method)
- Total Time: Approximately 10-14 hours
Yield
Approximately 60 grams (2 oz) of flavorful ground beef jerky per serving, yielding about 6 servings.
Difficulty Level
Medium – This recipe requires some patience in marinating and drying but is straightforward for home cooks of all skill levels.
Ingredients
- 500g lean ground beef (90% lean for ideal tenderness)
- 2 tbsp soy sauce (low sodium)
- 1 tbsp Worcestershire sauce
- 1 tbsp honey or maple syrup for subtle sweetness
- 1 tsp smoked paprika
- 1 tsp garlic powder
- 1 tsp onion powder
- ½ tsp cracked black pepper
- ½ tsp crushed red pepper flakes (optional for heat)
- 1 tsp kosher salt
Instructions
- Choosing the Cut: Start with lean ground beef. To ensure tender, juicy jerky, 90% lean is ideal – this balances fat for moisture without excessive grease.
- Prepare the Marinade: In a medium bowl, whisk together soy sauce, Worcestershire sauce, honey, smoked paprika, garlic powder, onion powder, black pepper, red pepper flakes, and salt until smooth.
- Combine: Add the ground beef to the marinade, folding gently with a spatula until fully coated. Cover and refrigerate for 6-8 hours or overnight to allow bold flavors to penetrate deeply.
- Form the Jerky: Line a baking sheet with parchment paper. Spread marinated ground beef evenly into a thin, uniform layer (about ⅛ inch thick). Smooth the surface carefully for consistent drying.
- Drying Technique: Preheat your oven or dehydrator to 70°C (160°F). If using an oven, prop the door slightly ajar with a wooden spoon to maintain air circulation.
Place the tray on the middle rack and dry for 4-6 hours, flipping halfway through if needed. The jerky should be pliable but dry, without any wet spots. - Cooling and Cutting: Remove from heat and let cool completely on a wire rack. Using a sharp knife or kitchen scissors, cut into bite-sized strips or your preferred shape for easy snacking.
- Storage: Store jerky in airtight containers or zip-lock bags. For extended freshness, refrigerate or freeze.
Tips for Success
- Patience is Key: Allow ample marinating time-this unlocks deep, complex flavors making each bite unforgettable.
- Uniform Thickness: For consistent drying, keep the meat layer even, avoiding thick or thin patches that cause uneven texture.
- Experiment with Spices: Incorporate fresh herbs like thyme or rosemary, or swap honey for brown sugar for a deeper caramelized note.
- Safe Drying: Always dry at a minimum of 70°C (160°F) to ensure food safety, particularly with ground meat.
- Make Ahead: Jerky can be prepared days in advance and stored well, making it a convenient protein-rich snack.
Serving Suggestions
Elevate this homemade ground beef jerky by pairing it with contrasting textures and flavors. Try:
- Serving with a crisp pickle spear and sharp cheddar cheese for a satisfying snack platter.
- Chopping jerky and garnishing over a fresh, peppery arugula salad with a lemon vinaigrette.
- Incorporating bite-sized jerky pieces into wraps or grain bowls for added protein and smoky depth.
- Using small jerky chunks as a flavorful topping on creamy mashed potatoes or roasted vegetable dishes.
- Offering alongside a homemade spicy mustard or smoky BBQ aioli for dipping.
| Nutrient | Per Serving (60g) |
|---|---|
| Calories | 150 kcal |
| Protein | 18 g |
| Carbohydrates | 3 g |
| Fat | 7 g |
Discover more jerky recipes and tips here.
For a deeper dive into meat safety and preservation techniques, visit the USDA Food Safety and Inspection Service.

Q&A
Q&A: Crafting Ground Beef Jerky: No Gun Needed, Just Flavor!
Q1: Why make ground beef jerky instead of traditional strips?
A1: Ground beef jerky offers a uniform texture that’s easier to chew and quicker to dry. Plus, it allows you to infuse flavors evenly throughout every bite-no surprises, just consistent deliciousness!
Q2: Do I need fancy equipment to make ground beef jerky?
A2: Absolutely not! Forget guns or gadgets-just a good mixing bowl, a baking sheet or dehydrator tray, and a bit of patience. Your trusty oven or dehydrator is all it takes to dry that flavorful meat into jerky perfection.
Q3: What cuts of beef work best for jerky?
A3: Lean cuts like sirloin, round, or flank steak are your best friends-they’re low in fat, so your jerky won’t turn greasy and will keep longer. For ground beef jerky, choose lean ground beef (90% lean or higher).
Q4: How do I pack flavor into ground beef jerky?
A4: Creativity is key! Start with salt to preserve and enhance taste, add soy sauce or Worcestershire for umami, sprinkle in your favorite herbs and spices-think smoked paprika, garlic powder, black pepper, or even a dash of cayenne for heat. Mix well, then taste before drying.
Q5: What’s the trick to shaping ground beef for jerky?
A5: Lay out the seasoned ground beef in a thin, even layer on a silicone mat or parchment paper atop your dehydrator tray or baking sheet. Keep it thin-about 1/8 inch-to ensure even drying and that perfect chewy texture.
Q6: How long does it take to dry ground beef jerky?
A6: Typically 4-8 hours at 160°F (70°C) if using an oven or dehydrator. Check periodically-jerky should be dry but still bendable, not brittle.
Q7: How do I store homemade jerky?
A7: Once fully dried and cooled, store your jerky in an airtight container or vacuum-sealed bag. It lasts best in a cool, dark place or refrigerated for longer shelf-life.
Q8: Any tips for the best jerky experience?
A8: Patience and experimentation! Don’t rush drying, or your jerky may spoil. Try different spice blends and marinades-like teriyaki, BBQ, or spicy chili-to find your signature flavor. And remember, the best jerky is the one made with love (and plenty of taste-testing).
Ready to ditch the guns and amp up your snack game? Ground beef jerky is here to bring bold flavor, DIY fun, and a protein-packed punch-no firing necessary!
To Conclude
As the last strips of ground beef transform into savory, chewy bites of homemade jerky, it’s clear that crafting this snack is a journey powered not by guns or gadgets, but by patience, creativity, and an adventurous palate. With just a few simple ingredients and a touch of know-how, you’ve turned humble ground beef into a flavorful masterpiece that’s perfect for on-the-go fueling or a satisfying treat. So next time the craving hits, remember: no need for fancy equipment or complicated techniques-just good meat, bold seasoning, and a little time to let flavor work its magic. Happy jerky crafting!