
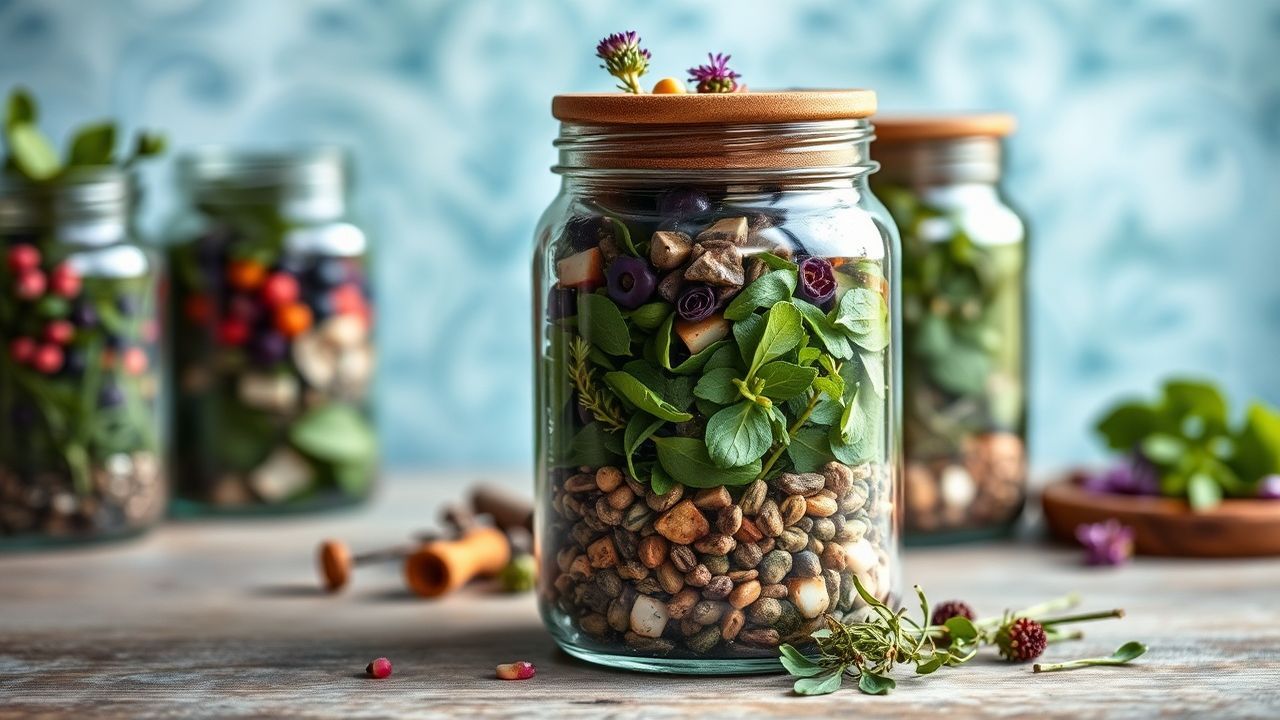
Crafting layered herb jars puts fresh aromatics on display and keeps them handy for cooking. You will learn a clear, repeatable method to build colorful, fragrant jars that store well and look beautiful.
- Visual impact: Layer herbs by color and texture for an instant kitchen accent.
- Preservation tips: Dry herbs fully, use salt or oil sparingly, and refrigerate jars.
- Practical use: Pull fresh leaves for pesto, garnishes, or teas without wasting space.
- Gift-ready: Create small-batch presents that pair aroma with aesthetic.
Prep and Cook Time
Preparation for layered herb jars takes little active time but benefits from planning. Expect about 15 minutes for washing, trimming, and arranging per two 16 oz jars.
There is no cook time; this is an assembly and preservation effort. Allow an extra 10–15 minutes for sterilizing jars and final drying of herbs.
- Preparation Time: 15 minutes
- Cook Time: None (assembly and preservation only)
Yield
This method yields roughly two medium 16 oz herb jars using typical herb volumes. You can scale up or down easily by proportionally increasing ingredients and jars.
Small jars work well for single herbs; larger jars suit mixed displays. Choose jars that match the serving or gifting intent.
- Approximately 2 medium herb jars (16 oz each)
Difficulty Level
Layered herb jars rate from easy to medium depending on your attention to drying and arrangement. The technical skill centers on moisture control and aesthetic spacing.
Anyone with basic kitchen tools can assemble these jars. Practice improves layering speed and visual balance.
- Easy to Medium
Ingredients
Choose aromatic, intact leaves for best results. Common choices include basil and cilantro for soft leaves, and rosemary and thyme for structure.
For background on what constitutes an herb and how varieties differ, see herbs on Wikipedia.
- Fresh basil leaves: 1 cup, whole and washed (basil)
- Fresh rosemary sprigs: 1/2 cup, trimmed (rosemary)
- Fresh thyme sprigs: 1/2 cup
- Fresh cilantro leaves: 1 cup, washed and dried thoroughly
- Coarse sea salt: 2 tablespoons (optional for preservation)
- Extra virgin olive oil: 1/4 cup (optional, to pour over herbs)
- Wide-mouth glass jars with airtight lids: 2 (16 oz each), sterilized and dried (mason jars are a good choice)
- Clean kitchen scissors or herb snips
- Small wooden skewers or chopsticks (for arranging layers)
Instructions
Start by sterilizing jars and drying them completely. Any residual moisture invites spoilage, so work in a clean, low-humidity area.
Next, handle herbs gently. Rinse under cold water, spin or pat dry, and leave on a towel until completely moisture-free.
- Prepare your jars: Sterilize jars in boiling water for 10 minutes, then invert on a clean rack to dry. Use oven-dry only if jars have no rubber seals to preserve gasket integrity.
- Pick and wash fresh herbs: Select unblemished leaves. Rinse and dry with a spinner or paper towels until fully moisture-free.
- Trim and sort herbs: Remove tough stems from rosemary and thyme as needed. Cut large basil or cilantro leaves into uniform pieces for neat layers.
- Begin layering: Lay a thin bed of coarse salt or a light oil drizzle if you want extra preservation and flavor. Salt draws moisture and can extend shelf life; oil adds aroma but requires cold storage.
- Alternate herbs by color and texture: Build bands of similar color and contrast. Use rosemary sprigs for vertical lines and basil for broad swaths of green.
- Use a skewer or chopstick: Press layers gently to settle them without crushing. Rotate the jar and adjust elements to keep bands distinct.
- Fill the jar carefully: Stop before the jar is tightly packed; leave a small headspace so jars seal effectively and herbs breathe slightly.
- Add a finishing layer: Top with a thin salt sprinkle or a small olive oil drizzle to coat exposed leaves.
- Seal and store: Close lids and refrigerate. Refrigerated jars maintain best appearance and aroma for up to two weeks.
If you choose oil, refrigerate jars and use them within 7–10 days. Oil creates anaerobic pockets that can favor unwanted microbes at room temperature, so keep jars cold.
For technical background on preservation science, consult general resources on food preservation.
Tips for Success
Drying, arrangement, and jar choice determine both longevity and display value. Straight-sided, clear jars produce the cleanest visual bands.
Small tools improve precision: a teaspoon, bamboo skewer, and kitchen snips help you place and compact herbs without bruising leaves.
Rotate design and composition seasonally. Use edible flowers or citrus zest for contrast, but keep additions dry to avoid spoilage.
Serving Suggestions
Bring jars to the table as garnishes or use leaves directly from the jar for pesto, salads, and finishing oils. They add aroma and visual interest to any spread.
For quick use, keep one jar on a chilled shelf in the refrigerator for daily cooking and another as a display. They work well on wooden trays, cheese boards, or pantry shelves.
Try pulling basil leaves for immediate pesto; see our internal recipe collection for ideas: pesto recipes.
Nutritional Snapshot
Herbs add aroma and micronutrients with minimal calories. A jar provides small amounts of vitamins and trace minerals that complement dishes.
| Nutrient | Per Jar Serving |
|---|---|
| Calories | 25 |
| Protein | 1.5g |
| Carbohydrates | 4g |
| Fat | 2g |
For additional storage techniques and shelf-life tips, explore our internal guide: Herb Storage Tips. That page expands on drying methods and temperature control for longer freshness.
Q&A — Layered Herb Jars
This short Q&A addresses common quick questions about layered herb jars. Each answer gives practical, actionable advice you can apply immediately.
Use these notes to troubleshoot common issues like moisture, color fading, and jar selection.
Q1: What makes layered herb jars visually appealing?
A1: Contrasting leaf shapes and colors create clear bands that the eye reads like a natural stripe. Arrange dense textures next to fine leaves to maximize contrast.
Q2: Which herbs last best in jars?
A2: Woody herbs such as rosemary and thyme hold shape, while basil and cilantro offer bright color. Combine both types for display and utility.
Q3: How do I keep layers crisp and separate?
A3: Use dry ingredients, pat layers into place gently, and avoid overpacking. A skewer helps settle layers without crushing them.
Q4: Can I make these in advance for gifts?
A4: Yes, but package refrigerated and instruct recipients to keep jars chilled if they contain oil. Otherwise, use dry salt-only layers for longer shelf life in cool, dark storage.
FAQ
How long do layered herb jars last?
When refrigerated and kept dry, layered herb jars typically keep fresh-looking herbs for up to two weeks. If you add oil, shorten that to 7–10 days to minimize microbial risk.
Do I need to dry herbs completely before layering?
Yes. Moisture shortens shelf life and promotes mold. Use a salad spinner or paper towels and ensure leaves are crisp before layering.
Are mason jars necessary?
No, but clear, straight-sided glass jars make the layers more visible and seal better. Mason jars are a convenient, widely available option.
Can I use dried herbs instead of fresh?
You can, but dried herbs won’t provide the same visual impact. Dried layers work as decorative spice jars rather than fresh-flavor storage.
How do I gift these safely?
Package jars cold and include storage instructions. Recommend refrigeration and a suggested use-by date to keep recipients safe and satisfied.
See also: Herb Jars


