
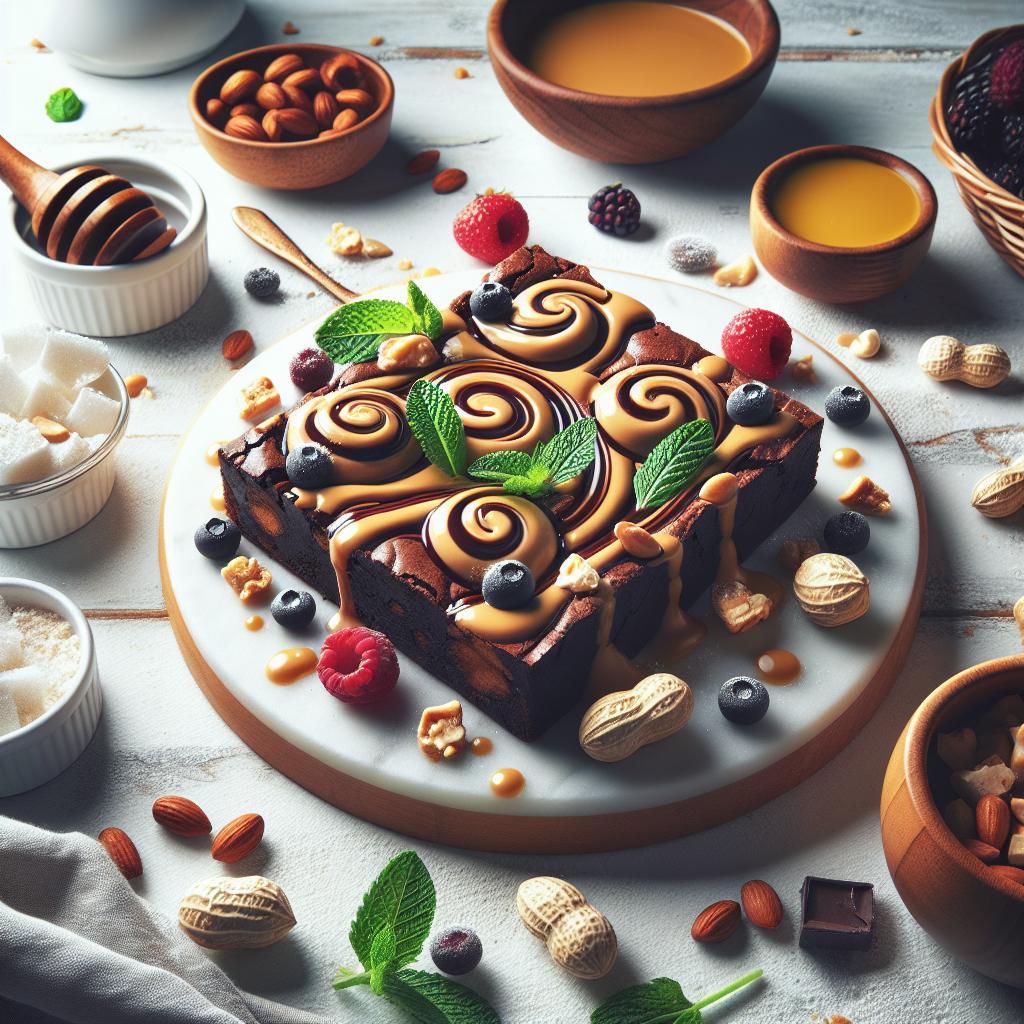
Peanut brownies marry a glossy, fudgy brownie base with creamy peanut butter ribbons for bold flavor and striking presentation. This 7-step approach preserves a shiny crust and dense interior while creating clear peanut butter swirls that remain distinct in each square.
- Fudgy, glossy crust: precise emulsion and minimal folding produce the dense texture you want.
- Simple swirl method: dollop-and-swipe creates defined peanut butter ribbons without overmixing.
- Make-ahead benefits: flavors settle and texture firms after 12–24 hours for cleaner slices.
- Flexible ingredients: swap nut butters or adjust bake time for chewier edges or fudgier centers.
Prep and Cook Time for Peanut Brownies
Preparation: 20 minutes. Cooking: 28–32 minutes depending on oven tendencies. These times assume a 350°F (175°C) oven and a 9×9-inch pan for predictable heat distribution.
Allow additional time for cooling; removing brownies hot will collapse the crumb. Plan 40–60 minutes total including cooling so the peanut butter ribbons set for neat cutting.
Yield and Difficulty for Peanut Brownies
Yield: 12 generous bars. Cut sizes will change serving count; for tasting platters, slice smaller to increase portions.
Difficulty: Medium. The technique demands controlled mixing and precise timing to keep centers fudgy. This recipe rewards attention to emulsion and gentle folding.
Ingredients for Peanut Brownies
Accuracy matters. Weigh ingredients when possible to control density and moisture. The balance between fat, sugar and cocoa solids defines chew, gloss and mouthfeel.
Core ingredients below include substitutions and texture notes that affect the final chew and shine.
- 1 cup unsalted butter, melted and slightly cooled
- 2 cups granulated sugar
- 4 large eggs at room temperature
- 1 teaspoon pure vanilla extract
- 1 cup all-purpose flour, sifted
- 3/4 cup unsweetened cocoa powder, sifted (cocoa)
- 1/2 teaspoon baking powder
- 1/4 teaspoon salt
- 1 cup creamy peanut butter (natural, no added sugar preferred)
- 2 tablespoons heavy cream or milk (to loosen peanut butter)
For background on structure and texture, review the technique behind the classic brownie and how emulsions form in batters. These references clarify why fresh eggs and correct fat ratios create a glossy top.
Instructions for Peanut Brownies
Work in stages to protect emulsion and prevent excess aeration. Start with room-temperature eggs and cooled melted butter to avoid scrambling and to promote a shiny crust.
Follow the steps below exactly to layer batter and peanut butter for the best visual ribboning and fudgy set.
Step 1: Prepare Pan and Batter
Preheat to 350°F (175°C). Line a 9×9-inch pan with parchment leaving a 1–2 inch overhang for easy removal. An even liner prevents sticking and gives crisp edges.
Whisk melted butter and sugar until smooth and glossy. Add eggs one at a time, whisking vigorously to build an emulsion, then fold in vanilla. This emulsion helps form the crackly top that characterizes quality brownies.
Step 2: Combine Dry Ingredients
Sift flour, cocoa, baking powder and salt to remove lumps and distribute leavening. Folding rather than beating keeps the crumb dense rather than cake-like.
Gently fold the dry mix into the wet batter until just combined. Overworking introduces air that converts fudgy brownies into a lighter, cakier result.
Step 3: Layer and Dollop Peanut Butter
Spread half the batter into the pan in an even layer. Thin natural peanut butter with 1–2 tablespoons of cream until spoonable; you want pourable ribbons, not a glaze.
Dollop peanut butter in tablespoons across the batter and finish with the remaining batter in uneven spoonfuls. This creates height contrasts that translate into visible ribbons after swirling.
Swirl Technique
Use a thin-bladed knife or skewer to draw figure-eights across the surface with broad, shallow strokes. One deliberate pass per swirl keeps colors distinct and prevents the peanut butter from fully blending into the chocolate.
Avoid overstirring. Minimal motion produces wide, marbled ribbons rather than blurred streaks. If peanut butter is too runny, chill it briefly before dolloping to preserve shape.
Bake and Cool
Bake 28–32 minutes. Test near the center with a toothpick — moist crumbs attached indicate fudgy doneness. Pull at the lower end of the time if you prefer a gooier center.
Cool completely on a wire rack before removing from the pan. Full cooling firms the interior and yields clean squares when cutting, which is especially important for presentation.
Tips for Peanut Brownies
Ingredient quality: use high-fat cocoa or a mix of cocoa and chopped dark chocolate for deeper flavor. Fresh eggs and properly melted butter support a glossy top and stable batter.
Texture control: press batter lightly for chewier edges; shorten baking time for extra fudginess. Oven calibration matters — use an oven thermometer to confirm actual temperature.
For technique refinements and variations, consult our guide on best brownie recipes which covers chocolate choices and mixing strategies that translate directly to peanut brownies.
Small process changes yield big texture differences. For example, swapping a portion of cocoa for chopped chocolate increases gloss and depth. Use a food thermometer to make bake decisions more precise.
Serving Suggestions for Peanut Brownies
Serve slightly warm to highlight molten peanut butter ribbons and the glossy chocolate crust. A scoop of vanilla ice cream complements the salty-sweet contrast of peanut brownies.
Finish with flaky sea salt or chopped roasted peanuts for texture contrast. For plated desserts, drizzle warm chocolate or caramel and garnish with a small mint sprig for color.
If you make brownies ahead, store at room temperature in an airtight container for 2–3 days. For longer storage, refrigerate up to a week or freeze individual squares for up to three months.
Nutritional Info for Peanut Brownies
Estimate per-serving values to help guests with dietary choices. Nutrition varies by brand and portion size; the table below gives a baseline for a 12-piece batch.
Per serving (approx.): 320 calories, 6g protein, 38g carbs, 18g fat. Adjust values for swaps like almond butter or vegan fats.
| Nutritional Info (per serving) | Calories | Protein | Carbs | Fat |
|---|---|---|---|---|
| Peanut Butter Swirl Brownie | 320 | 6g | 38g | 18g |
Variations and Substitutions for Peanut Brownies
Swap creamy peanut butter for crunchy for added texture, or use almond butter for a milder nut profile. For vegan versions, replace butter with coconut oil and eggs with flax eggs.
For gluten-free peanut brownies, use a tested 1:1 gluten-free flour blend with xanthan gum. Adjust liquid ratios slightly when using alternative flours, as absorption varies compared with all-purpose flour.
Want a richer chocolate hit? Stir in 2–3 ounces of finely chopped dark chocolate into the batter. For a lighter swirl, reduce peanut butter by 1–2 tablespoons so ribbons stay thinner and more delicate.
For more on precise techniques like tempering chocolate or batter layering, see our procedural primer on swirl technique and layering, which applies directly to peanut brownies.
FAQ
What makes peanut brownies different from regular brownies?
Peanut brownies combine a dense, fudgy base with distinct peanut butter ribbons. The swirl adds salted richness and textural contrast in each bite, elevating the standard brownie profile.
The peanut butter contributes additional fat and salt, which accentuate chocolate notes and enhance mouthfeel compared to a plain brownie.
How do I get defined peanut butter swirls without overmixing?
Dollop slightly thinned peanut butter and use wide, shallow strokes with a skewer. Limit passes and avoid circular stirring to prevent homogenization of colors.
If your peanut butter separates or is too runny, stir thoroughly and chill briefly. Add cream sparingly — you want spoonable ribbons, not a pourable glaze.
Can I make peanut brownies ahead of time?
Yes. Brownies often taste better after 12–24 hours as flavors blend and moisture redistributes. Store at room temperature in an airtight container for up to three days.
Freeze individual squares in airtight packaging for up to three months; thaw at room temperature before serving to maintain texture and flavor integrity.
Can I make these gluten-free or vegan?
Absolutely. Use a certified gluten-free flour blend and replace eggs with flax or chia eggs for vegan versions. Use a firm plant-based fat instead of butter for vegan peanut brownies.
Adjust liquid and bake time as needed since alternative flours and fats have different absorption and heat transfer properties compared with all-purpose flour and dairy butter.
Why did my peanut brownies turn out cakey instead of fudgy?
Overmixing after adding flour and overbaking are the primary causes. Mix only until combined and test for moist crumbs at the lower end of the bake time to preserve fudginess.
Oven calibration matters; use an oven thermometer to verify actual temperature and rotate the pan if you encounter hotspots. These process controls produce consistent, high-quality peanut brownies each time.

See also: our collection of peanut brownie ideas in the site recipe index and the swirl technique guide above for extra technique details.
For technical background on batter behavior, review fundamentals of baking and how sugar, fat and protein interact to shape crumb and gloss in chocolate-based confections.
See also: peanut brownies