
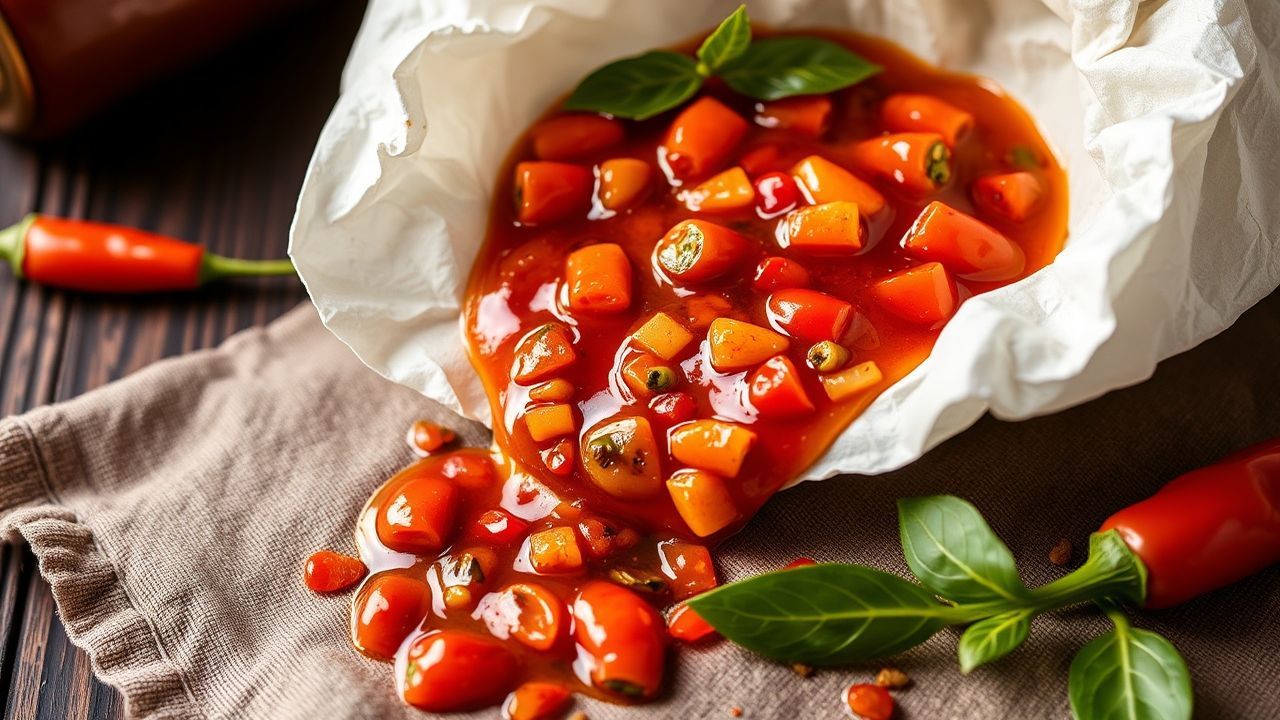
A spicy condiment does more than just heat up a meal. It fundamentally changes the eating experience. Hot pepper relish stands out as a versatile champion in the world of preserves. It brings a symphony of heat, acidity, and sweetness that elevates humble burgers and sophisticated charcuterie boards alike.
You do not need to be a professional chef to master this recipe. The process is straightforward, yet the results are complex and rewarding. This guide breaks down the selection of peppers, the cooking process, and the preservation methods needed for success. Prepare to fill your pantry with jars of homemade zest that outshine anything found on a grocery store shelf.
At a Glance: Key Takeaways
- Safety First: Handling hot peppers releases oils that can burn skin; gloves are mandatory equipment.
- Flavor Balance: The secret lies in the ratio of vinegar to sugar, balancing the raw heat of the chilies.
- Patience Pays Off: While edible immediately, the relish develops a deeper flavor profile after resting for 24 hours.
- Versatility: This condiment works as a marinade, a topping, or a mix-in for creamy dips.
Understanding the Heat Spectrum
Great relish starts with understanding your main ingredient. Peppers vary wildly in flavor profiles, textures, and heat levels. The Scoville scale measures this pungency. Selecting the right combination of peppers determines the character of your final product.
Selecting Your Peppers
Jalapeños act as the backbone for most standard relishes. They offer a grassy, bright flavor with manageable heat. For those seeking a fruitier, more intense kick, Habaneros are an excellent addition. They bring floral notes that pair exceptionally well with the sugar and vinegar base.
Red bell peppers are equally important. They provide zero heat but add essential body, vibrant color, and natural sugars. A relish made entirely of hot peppers would be unpalatably spicy for most people. The bell peppers dilute the heat without diluting the flavor.
Prep and Cook Time
Preparation: 20 minutes
Cooking: 15 minutes
Total Time: 35 minutes
Yield
About 2 cups (8 servings)
Difficulty Level
Medium
Essential Ingredients
Quality ingredients are non-negotiable for a preservative-free condiment. Fresh produce ensures a crisp texture that holds up during the simmering process.
- 1 cup fresh jalapeño peppers, seeds removed, finely chopped.
- 1/2 cup fresh red bell pepper, finely diced (provides sweetness and color contrast).
- 1/4 cup fresh habanero peppers, finely minced (adjust this amount to control heat).
- 1 medium red onion, finely chopped for savory depth.
- 3 cloves garlic, minced.
- 1 cup apple cider vinegar (5% acidity is crucial for safe preservation).
- 1/2 cup granulated sugar to balance the acidity and heat.
- 1 tsp salt, preferably canning or kosher salt.
- 1 tbsp olive oil for sautéing aromatics.
- 1 tbsp freshly squeezed lime juice for a citrus finish.
- 1/2 tsp smoked paprika for depth.
Step-by-Step Instructions
1. Pepper Preparation
Wash all vegetables thoroughly before cutting. Wear nitrile or latex gloves to protect your hands from pepper oils. Finely chop the jalapeño, habanero, and red bell peppers. Uniformity in size helps the relish cook evenly and improves the mouthfeel of the finished jar.
2. Sautéing the Aromatics
Heat the olive oil in a medium skillet over medium heat. Add the chopped onion and garlic. Sauté these ingredients until they are translucent and fragrant, which usually takes about 5 minutes. This step removes the raw bite of the onion and mellows the garlic flavor.
3. Combining the Elements
Transfer the sautéed onion and garlic mixture into a medium non-reactive saucepan. Stainless steel or enamel-coated pans are best. Vinegar is highly acidic and can react with aluminum or cast iron, imparting a metallic taste. Add the chopped peppers, apple cider vinegar, sugar, salt, lime juice, and smoked paprika.
4. The Simmering Process
Bring the mixture to a gentle boil over medium-high heat. Immediately reduce the heat to low to maintain a steady simmer. Cook uncovered for 10-12 minutes. Stir frequently to ensure the sugars dissolve completely and nothing sticks to the bottom.
5. Cooling and Storage
Remove the pan from the heat once the mixture has thickened slightly and the peppers are tender. Let the relish cool completely at room temperature. Transfer the product into sterilized glass jars. Seal them tightly and place them in the refrigerator.
The Science of Preservation
Understanding why this recipe works helps you modify it safely. The combination of vinegar, sugar, and heat creates an environment where bacteria cannot thrive. This method is known as pickling.
Acidity is Key
The apple cider vinegar provides the necessary acid to lower the pH of the mixture. Safe preservation requires a pH below 4.6. Do not reduce the amount of vinegar in the recipe, as this compromises safety. If you find the relish too tart, increase the sugar rather than decreasing the vinegar.
Sugar’s Role
Sugar does more than sweeten the pot. It acts as a preservative by drawing water out of the microbial cells, inhibiting their growth. It also helps set the texture of the relish. Using cane sugar offers a neutral sweetness, while brown sugar would add molasses notes that might conflict with the fresh pepper flavor.
Serving Suggestions
Elevate Everyday Meals
This hot pepper relish is incredibly versatile. It pairs beautifully with fatty meats like grilled sausages or pork chops. The acidity cuts through the fat, cleansing the palate with every bite. Try spooning it over a block of cream cheese for an instant, crowd-pleasing appetizer served with crackers.
Breakfast Upgrades
Spicy foods in the morning jumpstart your metabolism. Add a teaspoon of relish to your scrambled eggs or an omelet. It also works wonders on avocado toast, adding a necessary textural crunch and acidic bite to the creamy avocado.
Nutritional Breakdown
| Nutrient | Per Serving (2 tbsp) |
|---|---|
| Calories | 25 |
| Protein | 0.5 g |
| Carbohydrates | 6 g |
| Fat | 0.2 g |
Frequently Asked Questions
What distinguishes hot pepper relish from salsa?
The primary difference lies in the ingredients and preparation. Relish typically contains a higher ratio of sugar and vinegar, giving it a sweet-and-sour profile similar to a chutney. Salsa usually relies on tomatoes and lime juice for acidity and is often savory rather than sweet-hot. Relish is also cooked longer to achieve a jam-like consistency.
Can I use frozen peppers for this recipe?
Fresh peppers are superior for relish because they maintain better texture. Freezing breaks down the cell walls of the vegetable, which can lead to a mushy final product. However, if you have a glut of frozen peppers, you can use them, but be aware the relish will be softer and may require a slightly longer simmer to evaporate excess moisture.
How long does this relish last in the refrigerator?
When stored in an airtight container, homemade hot pepper relish stays fresh for up to two weeks in the refrigerator. The vinegar and sugar act as preservatives. If you see any mold or smell an off odor, discard the batch immediately. For long-term storage, you must use a water-bath canning method.
Is it possible to make a sugar-free version?
You can substitute the sugar with a heat-stable sweetener like erythritol or stevia for a low-carb version. However, sugar plays a structural role in thickening the relish. Without it, the consistency will be looser and more watery. You may need to add a thickener like xanthan gum to replicate the texture.
Why did my relish turn out too runny?
A runny relish usually results from not simmering the mixture long enough. Peppers release a significant amount of water as they cook. You must allow this water to evaporate. If your relish is cold and still runny, you can put it back on the stove and simmer it for another 5-10 minutes to reach the desired thickness.
See also: hot pepper relish


