

Ultimate Sourdough Bread: 7-Step Classic Recipe
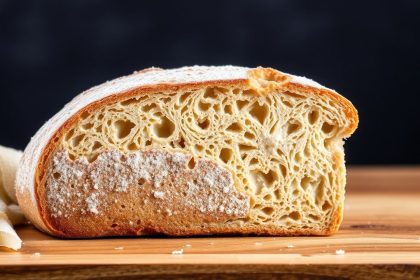
Sourdough combines starter management, controlled fermentation and precise handling to make a blistered crust and open, chewy crumb. This shop-tested workflow gives step-by-step cues so home ovens produce repeatable loaves.
- Key takeaway 1: Peak starter activity sets fermentation power and the acid balance that affects tang and oven spring.
- Key takeaway 2: Target dough temperature (TDT), hydration and gentle handling determine crumb openness and crust texture.
- Key takeaway 3: Bench rest, tight shaping and a hot, steamy first bake produce a defined ear and blistering.
- Key takeaway 4: Track small changes—scale precision, TDT control and hydration tweaks—to move from variable to consistent results.
Sourdough Bread: Introduction & History
Sourdough uses a maintained starter of wild yeast and lactobacilli to leaven bread and create its characteristic tang. The technique traces to ancient practice and regional variation, and modern bakers rely on measured variables to control flavor.
The fermentation biochemistry transforms starches and proteins and alters digestibility and flavor. For technical context, read the core concepts on sourdough and the metabolic pathways summarized at fermentation.
Sourdough Bread Ingredients
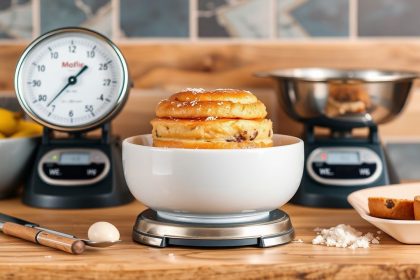
Use a digital scale and consistent water temperature to hit target hydration and dough temperature. Weight-based measurement eliminates the variability that kills repeatability.
Filtered water helps avoid chlorine stress on starter microbes, and flour protein content sets gluten potential. For how gluten builds structure, consult gluten.
Ingredients List
Yield: one 900–1,000 g loaf (baked weight). Target dough temperature (TDT): ~24°C (75°F) unless noted. Adjust hydration by 1–2% for your flour.
- Levain/Starter: 50 g active mature starter (100% hydration)
- Flour: 450 g bread flour + 50 g whole wheat
- Water: 350 g at 24–26°C
- Salt: 10 g
- Optional: 5–10 g diastatic malt powder for improved crust color
Sourdough Bread Preparation Method
Sequence the bake: refresh starter to peak → autolyse (flour + most water) → add levain and salt → bulk ferment with folds → pre-shape and bench rest → final shape and cold proof → score and bake with steam. Each step uses observable signals so timing adapts to dough behavior.
TDT controls fermentation rate and acid profile. A warmer TDT (26–28°C) accelerates activity and favors milder lactic acidity; a cooler TDT (20–22°C) slows fermentation and increases acetic character.
Starter Management
Use the starter at peak activity for consistent leavening and predictable flavor. Peak shows a domed, bubbly surface and a clear volume rise without sharp alcoholic notes.
For a 50 g levain in this formula, a 1:3:3 feed (starter:water:flour) at 24°C will typically peak in 4–8 hours; adjust for your ambient conditions. Keep a simple log of feed ratios and times to correlate with oven results.
Autolyse and Mixing
Combine all flour and 80–90% of the water; mix until no dry pockets and rest 30–60 minutes. Autolyse hydrates starches and proteins and improves extensibility, reducing the need for long mechanical mixing.
Add levain and salt after autolyse and incorporate gently. Mix until the dough is cohesive and gluten begins to develop; avoid overmixing, which can damage gas retention.
Bulk Fermentation & Stretch-and-Fold
Bulk ferment at your TDT until the dough increases 30–40% for a balanced tang and structure. Watch for a change in texture and slight doming rather than relying only on clock time.
Perform 3–4 sets of stretch-and-folds during the first 1.5–2 hours, spacing sets 20–30 minutes apart. Each set strengthens gluten while preserving gas, which supports oven spring and an open crumb.
Shaping, Proofing & Scoring
Pre-shape to develop surface tension, rest 20–30 minutes, then shape into a tight boule or batard. Tight final shaping preserves gas and encourages oven spring and a clean ear.
Cold proof 8–16 hours for deeper flavor and easier scoring. Short, room-temperature proofing (2–4 hours) produces a milder loaf and faster bake cadence when time is limited.
Baking Technique
Preheat a dutch oven or cloche to 250°C (480–485°F) for at least 45 minutes. Bake covered 15–22 minutes to trap steam, then uncover and reduce to 230°C to finish color and blistering.
If you bake without a cover, generate steam with a preheated tray and 150–250 ml boiling water or mist the oven immediately after loading. Remove steam after 12–18 minutes to encourage caramelization and blistering.
Sourdough Bread Nutritional Info
Nutrition varies by flour type and additions. The figures below approximate one slice from a 900 g loaf divided into 12 slices (~75 g per slice).
Long fermentation reduces some FODMAPs and partially breaks down starches and proteins, which can improve tolerance for some people depending on sensitivity. Adjust ingredients if you follow strict dietary needs.
- Serving size: 1 slice (~75 g)
- Calories: 200 kcal
- Carbohydrates: 40 g
- Protein: 6 g
- Fat: 1.2 g
- Fiber: 2 g
- Sodium: 210 mg
Sourdough Bread Expert Pro-Tips
Track TDT and use objective checks—poke test, windowpane and percentage rise—instead of fixed clock times. A small probe thermometer and a 0.1 g-resolution scale are the highest-value tools for repeatability.
Maintain starter hygiene: avoid long contact with reactive metals, keep containers loose-lidded for CO2 escape and match feeding cadence to baking frequency. A concise bake log speeds troubleshooting.
[COMMENT]Below is an expert insight box. It uses the required
[TIP]Expert Insight: Track TDT with a probe thermometer, log starter feed ratios and peak times, and change only one variable per bake cycle. That lets you measure impact reliably and improve consistency.
For pronounced blistering, use high initial steam and avoid brushing the crust right after baking. Let the crust cool and set before any optional finishing touches to preserve blisters and optimum texture.
If the dough feels slack and cannot hold shape, bulk fermentation exceeded its effective window and the next bake will likely underperform. Adjust timings and consider reducing starter percentage or proof temperature to compensate.
Sourdough Bread Conclusion
Control starter activity, hydration, dough temperature and handling to produce a consistent, tangy sourdough with open crumb and a blistered crust. Small, repeatable adjustments deliver the biggest consistency gains.
Keep a concise bake log (date, starter ratio/time since feed, TDT, hydration, number of folds, proof times and bake vessel). That discipline converts variability into reliable technique.
FAQ about Sourdough Bread
How do I know if my sourdough starter is ready?
Reliable signs include a clear doubling in a marked jar, a domed bubbly surface and balanced acidity without sharp alcoholic aromas. A gentle collapse after peak signals the ideal mixing window.
The float test can be informative for light levains but is not definitive for all starters. Rely on marked rise and sensory cues rather than a single test for best results.
Can I bake with whole wheat or rye flours?
Yes. Whole-grain flours increase enzymatic activity and water absorption and they cut gluten strands with bran, so many bakers increase hydration slightly. Rye lacks wheat’s gluten strength and works best in blends (10–30%) or with shortened bulk fermentation.
Adjust hydration in 2–3% increments and document results in your bake log. Small, methodical changes reveal how your flour and environment respond.
What hydration produces an open crumb?
For bread-flour-based formulas, 70–80% hydration encourages larger alveoli and openness. Higher hydration demands gentle handling, strong gluten development and confident shaping.
Raise hydration slowly and keep notes. Incremental increases let you adapt technique without losing control of the dough.
How should I store sourdough to keep it fresh?
Store at room temperature in a paper bag or bread box for 2–3 days to preserve crust texture. For longer storage, slice and freeze; reheat or toast from frozen when needed.
Avoid refrigeration for storage, since cool temperatures accelerate starch retrogradation and can stale the crumb faster than room temperature storage. Use refrigeration only as a last-resort short-term hold.
Can I bake sourdough without a dutch oven?
Yes. Use a preheated baking stone or steel and generate steam with a boiling-water tray or by misting immediately after loading. A cloche, inverted bowl or covered skillet can recreate a humid microenvironment.
Preheat longer without a cover and manage steam carefully to protect early oven spring and to achieve a blistered crust. For related reading on general bread structure, see bread.
Related internal resources: Explore more on CookHarvest sourdough tag and this detailed bake page: Sourdough: step-by-step.
Recommended Reading:
- 7 Pro Tips for Classic Sourdough Bread
- Crafting Magic: 7-Step Mastery of Sourdough Starter
- 7 Fluffy Sourdough Pancakes — Ultimate Butter & Jam Recipe


