
Unlock Nature’s Secrets: Plant identification by Leaf, Stem & Bloom
Plant identification starts with three reliable structural clues: leaves, stems, and blooms. Train systematic observation and use a few simple tools to narrow species quickly on a walk or while tending a yard.
- Key takeaway: Leaf shape, stem form, and flower traits provide complementary identification signals.
- Field practice: Photograph and record habitat to reduce misidentification.
- Tools matter: A hand lens and a compact field guide or app increase accuracy fast.
- Seasonal skills: Learn stems and leaves for off-bloom months.
Plant identification: Prep and Field Time
Preparation Time: Spend 10 minutes collecting basic tools and reviewing local species lists before you head out. A short checklist keeps observations consistent and reduces the chance of missing critical traits.
Active Learning Time: Expect 20–30 minutes per plant when you start; you will speed up with practice. Repeated sessions build pattern recognition and move you from guesswork to reliable identification.
Plant identification: Yield
Outcome: After a few focused sessions you will reliably identify several common plants in your area. Targets of 5–7 species per season are realistic and encourage steady improvement.
Logging progress in a field journal helps you evaluate which traits you read well and which need work. Over time, checklist-driven practice replaces guesswork with consistent results.
Plant identification: Difficulty Level
Level: Medium. The method asks for careful observation and some botanical terms, but the steps are repeatable. Anyone with curiosity and routine practice can reach dependable accuracy.
Technical vocabulary becomes intuitive when you compare leaves, stems, and flowers side by side. A regional guide or key compresses the learning curve for local genera and families.
Plant identification: Gear and Materials
Pack a lean kit: a 10x hand lens, a smartphone camera, a notebook, and a pencil. These items let you capture detail and context without removing plants from the ground.
Supplement with a compact field guide or trusted app for cross-checking features. Carry gloves for spiny or irritant species and a lightweight sampling bag only where collecting is permitted.
- Hand lens (10x): Reveals venation, hairs, and tiny glands.
- Camera/smartphone: Capture multiple angles and habitat context.
- Notebook & pencil: Quick sketches and notes cement memory.
- Regional guide: Narrows candidate species rapidly.
Plant identification: A Step-by-Step Workflow
Use a consistent workflow: leaf first, stem second, bloom third. This order gives reliable discriminators early and refines the guess as you gather more detail.
Always note habitat and growth habit; ecology often rules out look-alikes. Use habitat data to eliminate species that cannot occupy the site you observe.
Leaf: Form, Margin, and Venation
Start with overall leaf shape—ovate, lanceolate, palmate, or pinnate—and record margin type: entire, serrate, or lobed. Leaf arrangement (opposite, alternate, or whorled) is diagnostic for many families and often narrows candidates fast.
Examine venation and surface texture with your hand lens; look for hairs, glandular dots, and waxy bloom. For a quick reference on structure, consult leaf anatomy.
Stem: Cross-Section, Nodes, and Surface
Note stem type—woody or herbaceous—and cross-section shape: round, square, or angled. Square stems often indicate specific families, while woody texture points to shrubs and trees rather than herbaceous plants.
Observe nodes, ridges, and hairs; crushing a fresh stem can release scents that narrow genera. For technical context, see stem (botany).
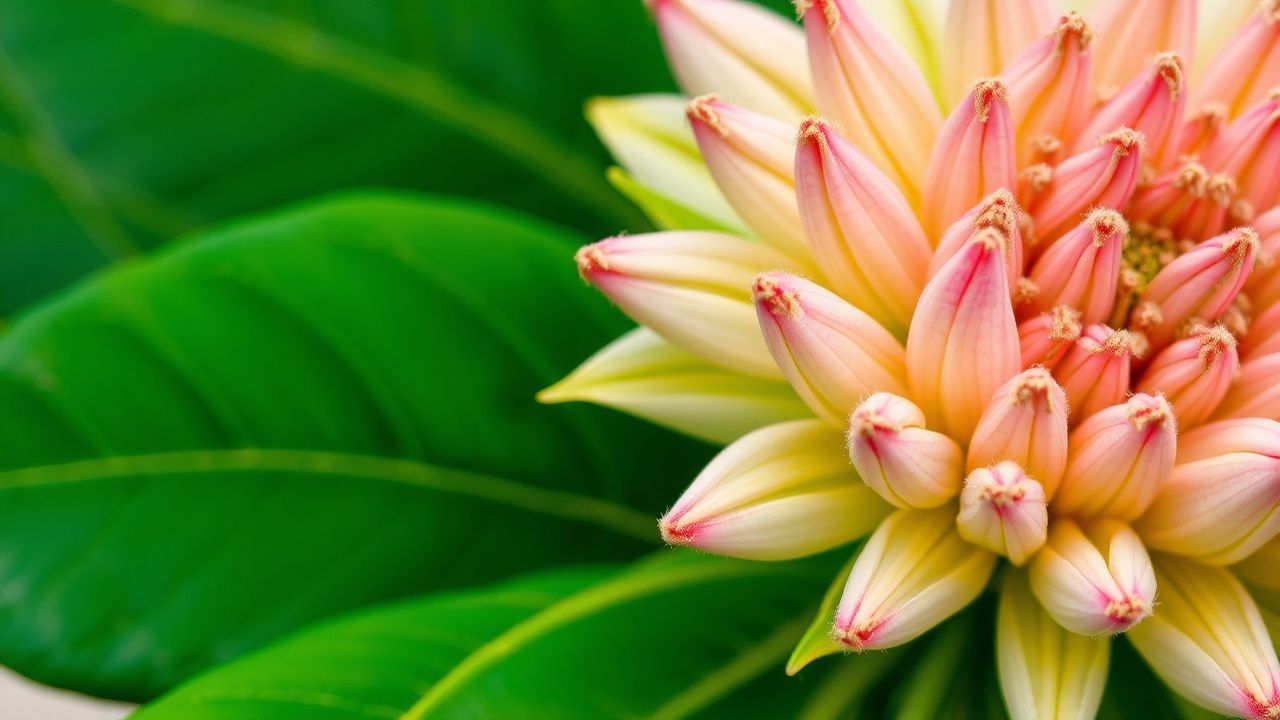
Bloom: Symmetry, Petal Count, and Arrangement
Assess flower symmetry (radial or bilateral), petal count, and whether blooms are solitary or grouped in inflorescences. Petal number and arrangement often point to genus or species quickly when blooms are available.
Record color, size, and any nectar guides or bracts; these details often match pollinator syndromes and offer identification clues. See flower anatomy for a concise primer.
Integrate Observations
Combine leaf, stem, and bloom traits into a short checklist and run candidates through a regional key. Eliminate mismatches—if leaves are opposite but a candidate family has alternate leaves, discard it and move on.
Use dichotomous keys or app filters to input primary traits first; targeted filtering reduces false positives and speeds correct IDs. Keep ecology in the loop: habitat narrows plausible species rapidly.
Record and Confirm
Confirm identifications by comparing multiple individuals and checking range maps or local floras. Verify with high-quality herbarium images or authoritative local references when available.
Log each confirmed ID with date, location, and photos; a local reference library speeds future IDs across seasons. Share findings with local plant groups for peer feedback and refinement via internal resources like the Plant identification guide.
[ TIP ]Expert Insight: Concentrate on recording leaf arrangement and flower symmetry first; those two traits filter most candidates quickly. Photograph several species that share a trait to sharpen pattern recognition.[/ TIP ]
Practice across habitats—forest understories, meadows, and wetlands—to encounter different trait sets. Variation between habitats often highlights diagnostic features you might not see in a single location.
If you want to learn edible species, defer to certified courses and local experts. Never assume edibility from appearance alone; many benign-looking plants have toxic look-alikes.
Plant identification: Chef’s Notes & Tips for Success
Variation: Expect within-species variation; plants change with age, light, and moisture. Compare multiple specimens before finalizing an ID to account for plasticity.
Seasonal strategy: Practice stems and leaves in fall and winter when blooms are absent. These skills transfer well to the growing season and prevent over-reliance on flowers.
- Use multiple angles: Photograph both adaxial and abaxial leaf surfaces.
- Note microhabitat: Soil moisture and light often co-vary with species presence.
- Carry a sketch: Quick drawings often capture relationships photos miss.
Plant identification: Quick Reference Table
The table below summarizes the highest-value traits to check in the field. Use it as a portable checklist during walks and recording sessions.
| Feature | Key Traits | Identification Clue |
|---|---|---|
| Leaf Shape | Ovate, lobed, serrated | Helps define genus and narrows species pool |
| Stem Structure | Woody, herbaceous, hairy, square | Distinguishes families and growth form |
| Bloom Pattern | Solitary, cluster, color, petal count | Often species-specific signature |
| Habitat | Wetland, forest, grassland | Context supports correct ecological identification |
Plant identification: Serving Suggestions
Explore varied environments to build a broad reference set. Forest floors, meadows, and wetlands present contrasting species and sharpen diagnostic skills faster than repeating the same patch.
Curate a visual journal with photos, pressed specimens where permitted, and short notes. Share findings with local groups and consult internal resources like field notes to speed feedback loops.
For ecological background on habitats and species distributions, review habitat (ecology). Habitat knowledge often explains why certain species appear together and helps you eliminate unlikely matches.
FAQ
Q: Why start with leaves when flowers are often diagnostic?
Leaves are nearly always present and give quick clues like arrangement and margin type. Flowers confirm IDs, but leaves let you form an immediate shortlist and stay productive outside bloom season.
Practicing leaf-based IDs keeps you moving through sites efficiently and reduces time spent chasing a single trait that might not be available.
Q: How can I avoid misidentifying look-alikes?
Use multiple independent traits before confirming an ID: combine leaf arrangement, stem texture, bloom form, and habitat. Cross-check with range maps or herbarium images when in doubt.
Careful recording of small features—hair distribution, venation patterns, and scent—often separates close species that appear identical at a glance.
Q: Which tools deliver the fastest accuracy improvement?
A 10x hand lens and a regional field guide deliver the strongest early gains. The lens reveals hairs, glands, and venation that casual photos may miss.
Pair magnified detail with contextual photos and notes; that combination accelerates learning and produces reliable verification later when you revisit IDs.
Q: Can apps replace field guides and keys?
Apps speed candidate lists but can err with low-quality photos or unusual variants. Use apps as a verification layer, not the final arbiter for confident IDs.
Combine tools: let the app suggest candidates, then confirm with a regional key or authoritative reference. For general methodology, consult plant identification.
Q: How do I practice safely when I want to learn edible species?
Never assume edibility from appearance alone. Learn from certified foraging instructors and local experts, and always cross-verify with multiple authoritative references before tasting any wild plant.
Start with well-known, easily distinguished edibles and keep careful records while you build competence. When in doubt, do not taste—safety should guide practice.
Final note: Systematic observation, consistent recording, and repeat field practice turn curiosity into reliable plant identification skill. Use this workflow on every walk to build a dependable local reference.
Further reading: Review fundamental anatomy topics for reference: leaf anatomy, stem (botany), and flower anatomy.
See also: Plant identification


