There’s something irresistibly nostalgic about fruit leather-a chewy, sweet, and tangy treat that takes you back to childhood summer days and homemade goodies. But what if you could create this delightful snack right in your own kitchen, without the hassle of special equipment? Welcome to the world of DIY fruit leather: an easy, no-dehydrator recipe that transforms fresh fruit into vibrant, naturally sweet snacks. Whether you’re a busy parent, a health-conscious snacker, or simply an adventurous foodie, this guide will show you how to harness the power of your oven and blender to craft fruity strips that are as fun to make as they are to eat. Get ready to roll up your sleeves and reinvent snacking-one luscious, homemade fruit leather strip at a time.
DIY Fruit Leather offers a delightful and wholesome way to preserve the vibrant flavors of fresh fruit into a chewy, snackable treat that anyone can enjoy. Originating from traditional preservation methods, this no-dehydrator recipe brings the joy of fruit leather right into your home kitchen with minimal equipment. The beauty lies in selecting the perfect fruits and blending them into a luscious puree, unlocking natural sweetness and colorful appeal while ensuring an irresistibly smooth texture. Whether you’re inspired by sun-ripened berries, tropical mangoes, or a zesty citrus mix, this recipe transforms simple fruit into a fun and healthy snack adventure.
Prep and Cook Time
Preparation: 15 minutes | Cooking: 4-6 hours (oven drying)
Yield
Makes approximately 4 fruit leather rolls (about 8 servings)
Difficulty Level
Easy – perfect for beginners and busy home cooks alike
Ingredients
- 4 cups fresh or frozen fruit (e.g., strawberries, peaches, mangoes, or mixed berries)
- 2-3 tablespoons honey, maple syrup, or agave nectar (optional and adjustable to taste)
- 1 tablespoon lemon juice (enhances flavor and preserves color)
- 1/4 teaspoon ground cinnamon or vanilla extract (optional, for added depth)
Instructions
- Prepare your fruit: Wash fresh fruit thoroughly. If using larger fruits like peaches or mangoes, peel and pit as needed. Cut into chunks for easier blending.
- Cook the fruit: Place fruit in a medium saucepan over medium heat. Simmer gently for about 10 minutes until softened, stirring occasionally. This step intensifies flavors and softens the fruit for pureeing.
- Blend to perfection: Transfer the softened fruit to a blender or food processor. Add lemon juice and sweetener if using. Blend until completely smooth. For an ultra-silky texture, strain through a fine sieve to remove seeds or pulp.
- Prep your baking sheet: Line a rimmed baking sheet (approximately 9×13 inches) with parchment paper or a silicone mat. Lightly grease to prevent sticking.
- Spread the puree: Pour the fruit puree onto the lined tray and spread evenly with a spatula to about 1/8-inch thickness, ensuring consistent drying.
- Oven drying: Set your oven to the lowest temperature setting (around 140°F to 170°F / 60°C to 75°C). Place the baking sheet on the middle rack. Keep the oven door slightly ajar (use a wooden spoon to prop it open) to allow moisture to escape and air circulation.
- Drying time: Let the fruit leather dry for 4 to 6 hours, checking occasionally after 3 hours. The fruit leather is done when it is no longer sticky, slightly tacky to the touch, and peels away easily from the parchment.
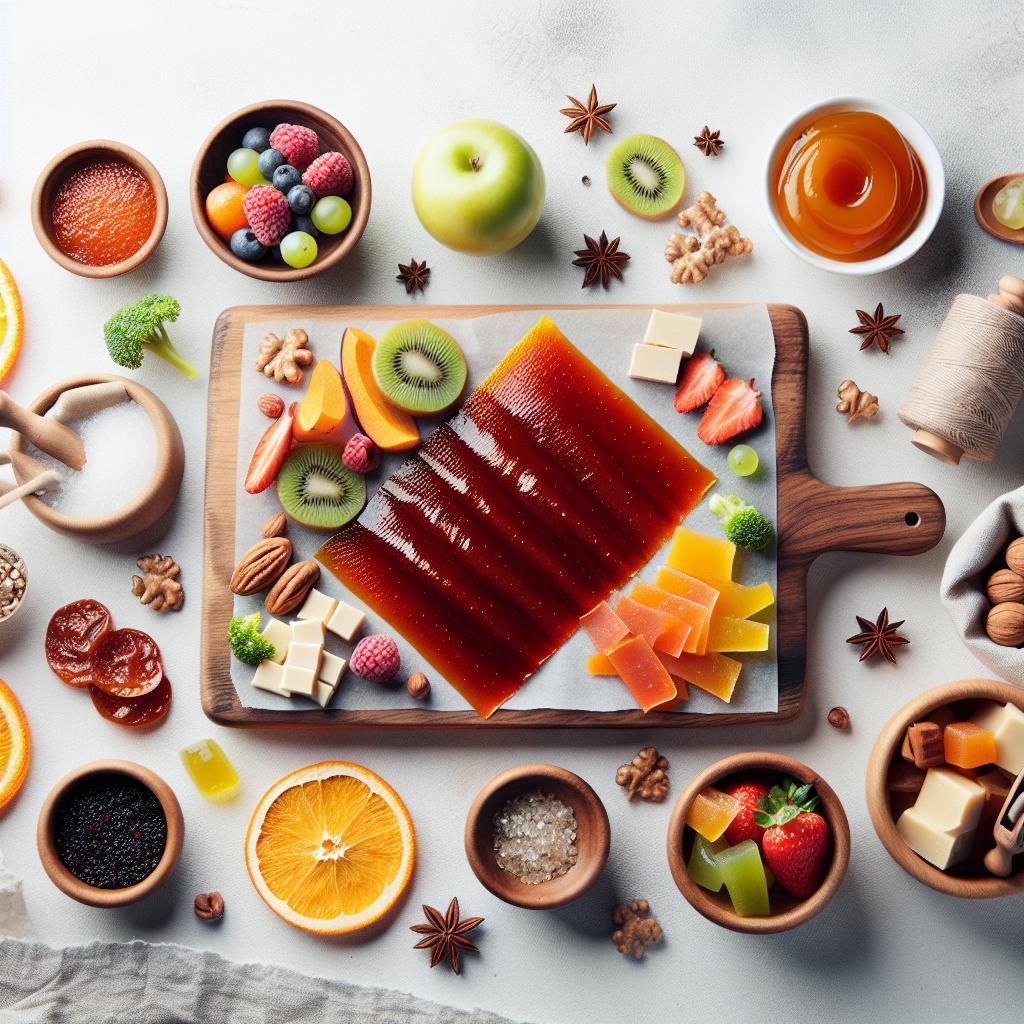
- Cut and roll: Remove from oven and allow to cool. Peel the fruit leather off the parchment. Cut into strips or shapes using kitchen scissors or a sharp knife. Roll each strip around parchment paper for easy storage.
Tips for Success with DIY Fruit Leather
- Choosing fruits: Sweet fruits with low water content like mango, strawberry, or raspberry yield richer flavors and shorter drying times. Adding a tart fruit like lemon or green apple balances sweetness.
- Puree texture: Straining seeds from berries improves smoothness, especially for children or picky eaters.
- Oven temperature: Always keep the temperature low and the door cracked to avoid cooking the fruit leather instead of drying it, which keeps it chewy and flavorful.
- Storage: Store rolls in airtight containers or resealable bags in a cool, dry place. Refrigerate in hot climates to prolong freshness up to a month.
- Experiment with flavors: Try adding spices like ginger, nutmeg, or cardamom for a gourmet twist.
Serving Suggestions
Enjoy your fruit leather as a wholesome midday snack or pack it in lunchboxes for a naturally sweet treat. Pair fruit leather strips with crunchy nuts or a cheese plate to balance textures and flavors. Garnish your serving board with fresh mint leaves or edible flowers for an elegant touch that delights the eyes as much as the palate.
| Nutrient | Per Serving (1 roll) |
|---|---|
| Calories | 90 |
| Protein | 1g |
| Carbohydrates | 22g |
| Fat | 0.2g |

For more creative fruit snack ideas, check out our Healthy Homemade Snacks guide. For comprehensive tips on fruit preservation techniques, visit the Fruits & Veggies More Matters site.
Q&A
Q&A: DIY Fruit Leather – Easy No-Dehydrator Recipe for a Home Snack
Q1: What exactly is fruit leather?
A: Fruit leather is a chewy, naturally sweet snack made by pureeing fruit and drying it into a thin, flexible sheet. Think of it as edible fruit gummy strips without any artificial ingredients or preservatives-just pure fruity goodness!
Q2: Do I really need a dehydrator to make fruit leather at home?
A: Nope! While dehydrators speed up the process, you can easily make fruit leather in your regular oven or even by air-drying on a warm day. This recipe skips the gadget fuss and uses tools you already have in your kitchen.
Q3: What fruits work best for DIY fruit leather?
A: Almost any fruit can shine here! Apples, berries, mangoes, peaches, and pears are wonderful choices. Just make sure they’re ripe and sweet for the best flavor and smooth texture.
Q4: How do I prepare the fruit puree?
A: It’s simple! Wash and peel if needed, then blend your fruit until totally smooth. A touch of lemon juice can brighten the flavor and help preserve color, and a little honey or maple syrup can add sweetness if your fruits are tart.
Q5: How thin should I spread the puree?
A: Aim for about 1/8 inch thick – thin enough to dry evenly but thick enough to stay chewy. Use a silicone baking mat or parchment paper to spread the puree evenly in a thin layer.
Q6: How long does it take to dry fruit leather without a dehydrator?
A: Depending on your oven and fruit moisture, anywhere from 4 to 8 hours at a low temperature (around 140°F or the lowest your oven can go) should do it. Keep the oven door slightly open to let moisture escape.
Q7: How do I know when the fruit leather is done?
A: It should be dry to the touch and no longer sticky, but still pliable. When you lift it, it should peel cleanly from the mat or parchment without tearing.
Q8: How should I store homemade fruit leather?
A: Roll your fruit leather with the parchment paper to prevent sticking and store it in an airtight container at room temperature for up to a month. For longer storage, pop it in the fridge or freezer-it’ll keep fresh for months!
Q9: Can I customize my fruit leather with flavors or add-ins?
A: Absolutely! Sprinkle cinnamon, vanilla, or chili powder for a spicy-sweet twist, or mix in finely chopped nuts, seeds, or shredded coconut before drying. The sky’s the limit-get creative with flavors you love.
Q10: Is homemade fruit leather healthier than store-bought?
A: Definitely! You control every ingredient-no added sugars, artificial colors, or preservatives. Plus, you’re putting real fruit front and center, making it a wholesome, portable snack perfect for kids and adults alike.
Ready to roll up your sleeves and make your own fruity snack? This no-fuss, no-dehydrator fruit leather recipe proves that delicious natural treats are just a blender and an oven away!
To Wrap It Up
Crafting your own fruit leather at home doesn’t require fancy gadgets or complicated steps-just a bit of fresh fruit, natural sweetness, and a little time in the oven or on a sunny windowsill. This no-dehydrator recipe proves that homemade snacks can be simple, healthy, and bursting with flavor. So next time you crave a chewy, tangy treat, skip the store-bought wrappers and embrace the joy of DIY fruit leather. Your taste buds-and your pantry-will thank you!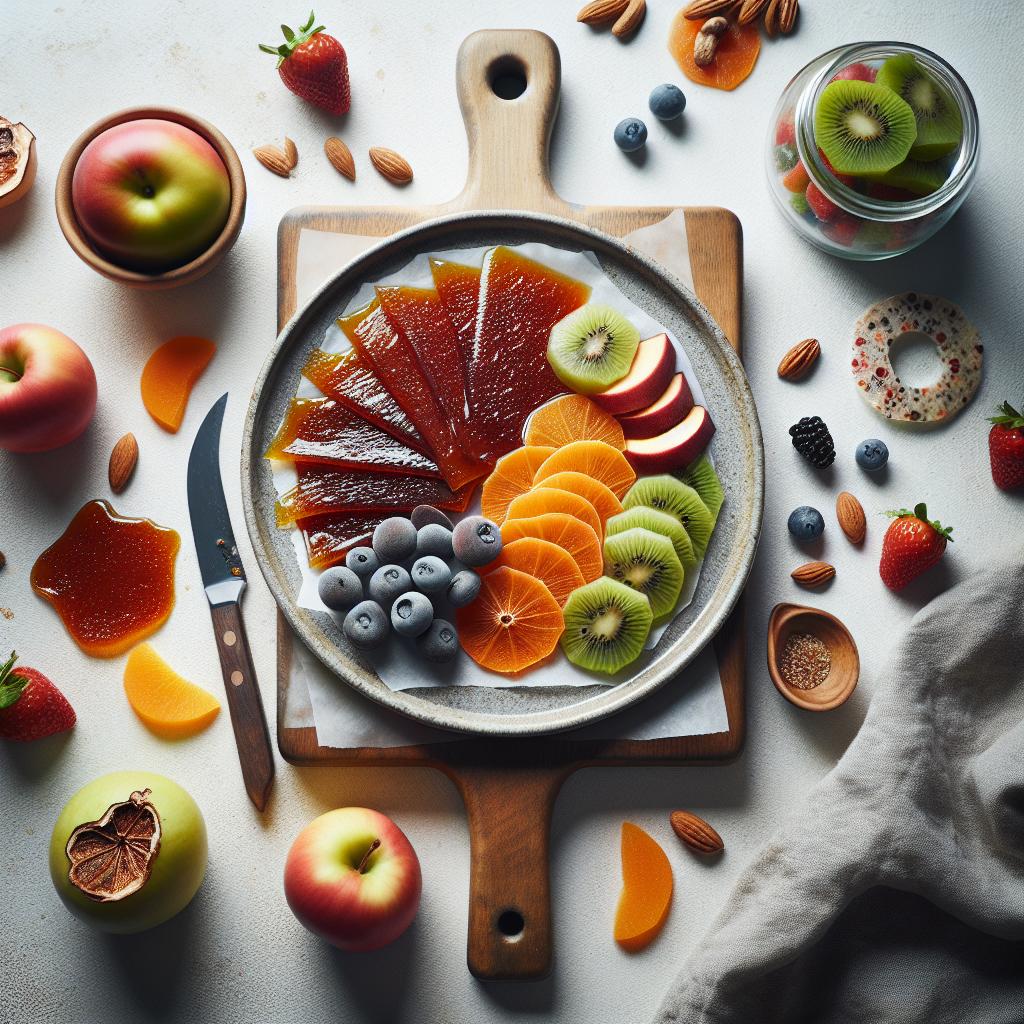


